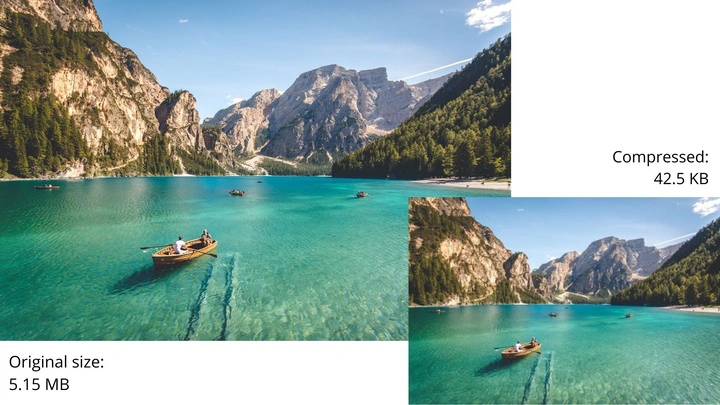
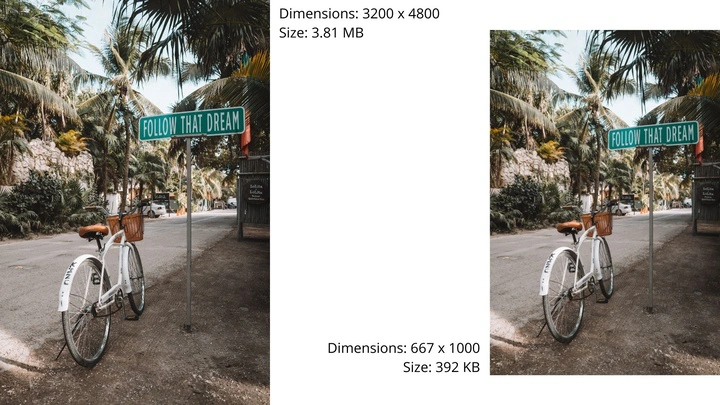
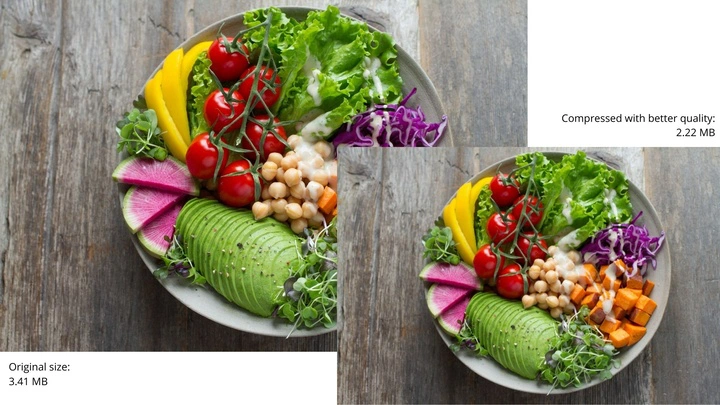
The human brain processes a lot of images 60 thousand times faster than text. It is so arranged that we perceive visual content better. This is confirmed by road signs, which are presented in the form of an image, not text. So, people can understand the information while driving by car. Therefore, it`s very important to think not only about the text content but also about the visual part of it when developing your website on the Internet.
Let’s turn to statistics.
About 80% of users remember what they saw. And according to publishers, traffic grows 12 times faster when using visual content.
This is the confirmation of why you need to think about the visual component of your site.
To make the site more attractive and look professional, you should use infographics, photos, and various thematic images. If you are the owner of a brand, then the best way to talk about your activities is to show it. After all, each of you will confirm that no one wants to buy a “pig in a poke”. Even the most beautiful description is not able to convince you to make a purchase. Only when a person sees what is described looks like, so he makes a decision. And most often it goes in your favor.
But here everything depends on the quality of the visual content. This is what we`ll talk about in the article. How to optimize images for the web.
Why Image Optimization Is Needed
Visual content is an integral part of web design. If you bought a new website or realized that the old one needs updating, be sure to think about how to fill it with images.
Remember that your web resource must have high-quality images of the correct size. Otherwise, they will slow down the download speed. This will lead to the fact that users, without waiting for a response, will begin to leave the site and go to competitors. Your resource will start losing traffic and positions in the search engine ranking.
When downloading high-resolution images, the browser will automatically compress them, so image optimization is needed. This is another important point. As a result, the image quality will deteriorate significantly and all the work that you have invested to create content will be lost. Images may become blurry, poor quality.
If you don`t optimize images for the web, then the content will look not professional – this will negatively affect the perception of your site by users.
What Is Image Optimization?
Image optimization is the process of removing a certain part of the information from a file (image), thereby reducing its size and speeding up the loading of the image itself. As a result of this, when a person gets to the site, all files are quickly opened.
To properly optimize images for the web, you need:
Choose the correct image format.
Reduce the weight and size of the image
Write the file name, alt-attribute (explains what is shown in the picture), title-attribute (descriptive text), caption text (title).
Let’s look at the first two points, the most important in image optimization in more detail.
The Correct Format for Image Optimization
There are large numbers of different image formats that can lead you into a stupor. The most familiar to everyone, who are used on websites: JPEG (JPG), PNG, GIF, SVG. The latter two formats are used extremely rarely, so let’s take a closer look at JPEG and PNG.
How to Optimize Images for Web in JPEG (JPG) Format
Many people know that this is one of the most popular formats. Images in this format are great for image optimization: you can compress it with and without losses, create files of acceptable size. When compressed, the images lose quality slightly, so they remain attractive and professional. At the same time, such content will not affect the page loading speed of your site. If you want to upload visual content to the site, choose image optimization in JPG format.
How to Optimize Images for Web in PNG Format
Unlike JPEG images, pictures in the PNG format have more details. The disadvantage is they weigh more. As a rule, icons, graphs, infographics, pictures with a lot of text are created in this format so that everything looks clear. The absolute advantage for which the PNG format is chosen is a transparent background. Therefore, it`s often chosen to place the logo.
There are 2 types of PNG:
- PNG-8 – supports 256 colors, creates small files, and offers transparency with a certain limitation.
- PNG-24 – supports 16 million colors, has better transparency by setting pixel transparency, and increases the weight of images.
If you decide to make image optimization in PNG format, then choose the second option – 24. In this case, you get a picture of the best quality and with a wide range of shades. But if you need to free up memory and don’t need a lot of colors, then feel free to choose PNG-8.

How to Choose the Right Size for Image Optimization
We all know that high-resolution images have more details and look attractive. Even when approaching, small elements remain high-quality and detailed. The only disadvantage of such images is their large size. We can even safely say – a huge size if the photo was taken with professional equipment.
Remember! The large-size images are the enemies of your site. They increase the page loading speed, especially in the mobile version of the web resource. Therefore, you need to optimize images for the web, if you want to remain in demand and rise in the ranking of search engines.
So, we`ve talked about the importance of image size. Now you need to understand how to determine the correct size for image optimization. Your task is to find a balance between the three components:
- actual file weight;
- image size in pixels;
- image resolution.
Let’s analyze each concept in more detail.
Actual File Weight
By the concept of file weight, we mean how many bytes it occupies in the phone or computer memory. Here it`s important to know the following: files weighing 13 MB are too heavy for site pages. Even a file weighing 7-8 MB is large, especially if you upload several such files to the site at once.
If you want the site pages to load quickly, do image optimization to get the file weight – 200 KB.
Take a look and draw your conclusions:
| Number of images | Actual file weight | Total weight |
| 40 | 8 MB | 320 MB |
| 40 | 200 KB | 8 MB |
As you can see, files weighing 200 KB will take up less space. So, they will not greatly affect the operation of the site.
To reduce the actual weight of files and image optimization, it`s necessary to reduce the size and resolution of images.
Image Sizes
The size of images, which is also important for image optimization, refers to the height and width in pixels. For example, if you take pictures with a Canon camera, you will get images with a size of 6000x4000 pixels – this is a very large size for posting on websites on the Internet. At the same time, these are high-resolution images (what were we talking about), so competent image optimization is required in order not to lose the image quality.

Determine in advance where your image will be placed on the site. For example, it can be placed as a background, as a visual accent in the corner of the screen, or as a banner. This is a very important point because changing the size of the image will depend on the specific purpose:
- To create a background, you will need image optimization up to 2500 pixels wide. The picture will look good in the mobile and computer versions of the site. At the same time, the image weight will be small and will not affect the image loading speed.
- To upload images to the gallery with a portfolio, image optimization is required to the maximum size – 2500 pixels in length. In general, 1500 pixels will be enough.
- Image optimization up to 400-500 pixels is quite suitable for the logo.
How best to optimize images for the web in terms of size best of depends entirely on the goal. The smaller the image should be, the more opportunities there are to reduce the size.
To optimize and resize images for the web, you can use our online tool – Crop Image. The tool works online, allows you to independently determine the size in pixels for your image.
An additional feature of Crop Photo is cropping photos by changing the aspect ratios with fixed proportions. This is convenient if the designer of your site allows you to publish images only of certain shapes. When using such a tool, you will not lose the natural aspect ratio, that is, all the elements of the picture will remain in the correct position.
In addition, Crop Image allows you to immediately take a photo in the format of a circle or square. This way you can immediately optimize images for the web without performing additional actions.
Other Crop Image features for image optimization:
- Adjustment of the horizon line.
- Changing the image format.
- Image processing.
- Adding watermark to photos.
Image Resolution
Finally, we came to the third point, which is very important for image optimization. We are talking about the resolution – the quality of images, which is measured in dots per inch (dpi). What kind of permission is needed for your site? It is important to proceed from the resolution of most devices (computers). It is 72 or 92 dots/inch. For image optimization, it is necessary to adhere to these ranges.
Where to Work with Image Resolution to Optimize Images for Web
You can use editing programs. For example, Photoshop. Here you can select the “save for the Internet” option. It will automatically optimize the image to a lower resolution.
The second option is to compress the image using our Compress Photo tool. You do not need to download it to your computer, install drivers, select activation keys – just open it in your browser and proceed to image optimization.
Our tool offers options for reducing resolution (compression):
- Best quality. In this case, the image quality will be preserved, but the file size will remain higher.
- Smaller size. When you select this option, the images will be compressed as much as possible – the size will decrease, and the quality will deteriorate.
- A certain file size. Here everyone can independently specify the desired file size. The tool will reduce the resolution while maintaining good quality.
Our system does not change the downloaded files on its own. That is, compression occurs only at your request when you choose the appropriate option. You also get the result that you expected.
By reducing the size and resolution, you get the opportunity to optimize images for the web, preserve the quality of images, while ensuring a good loading of the site that users will like.

Let’s Summarize the Results of Image Optimization
So, if you plan to optimize images for the web, remember the following:
- For a banner or background, the image weight should not exceed 1 MB, the permissible width is 2500 pixels.
- Acceptable size and weight of images for a product gallery or portfolio: 500-600 KB and 1500 pixels in length.
- For small graphics, a weight of 300 KB and a size of 500 pixels is enough
If you work in programs, then select “Save for the Internet” when exporting. To save your time, just use our tool, which will allow you to compress images in a few minutes.
Always remember that the modern user appreciates a great user experience. This directly affects the site’s place in search engines. Work on image optimization to improve the site’s performance and increase traffic, and hence the company’s profit.
 Visual Watermark
 by
by 