Self-portrait photography is something that even some professional photographers with years of experience can be intimidated by. It’s okay if the idea of sitting in front of a camera and taking images of yourself stirs up some resistance in you, as well. You might think that this is quite a vain thing to do. That it’s pointless. Or maybe you don’t like the way you look, and this is why the idea of being your own model scares you.
But self-portrait photography isn’t about vanity. It’s about you exploring your own self. It’s about seeing beauty in yourself, yet also allowing yourself to just be you.
The main benefit of taking self-portraits is that it can really help you boost your confidence and improve your self-esteem. It gives you the opportunity to see yourself through your own eyes.
Self-portraits can have a very therapeutic effect on you.
It’s just you and your camera. There’s no one else there to judge you, except for yourself. There’s no one else to tell you what to do, how to pose, what emotions to show. Except yourself. Surely, it can be challenging; especially, if you are your own harshest critic. But if you put self-criticism away and focus on the creative process, it can also be a liberating experience. It can be a safe space for you to explore and be curious about yourself.
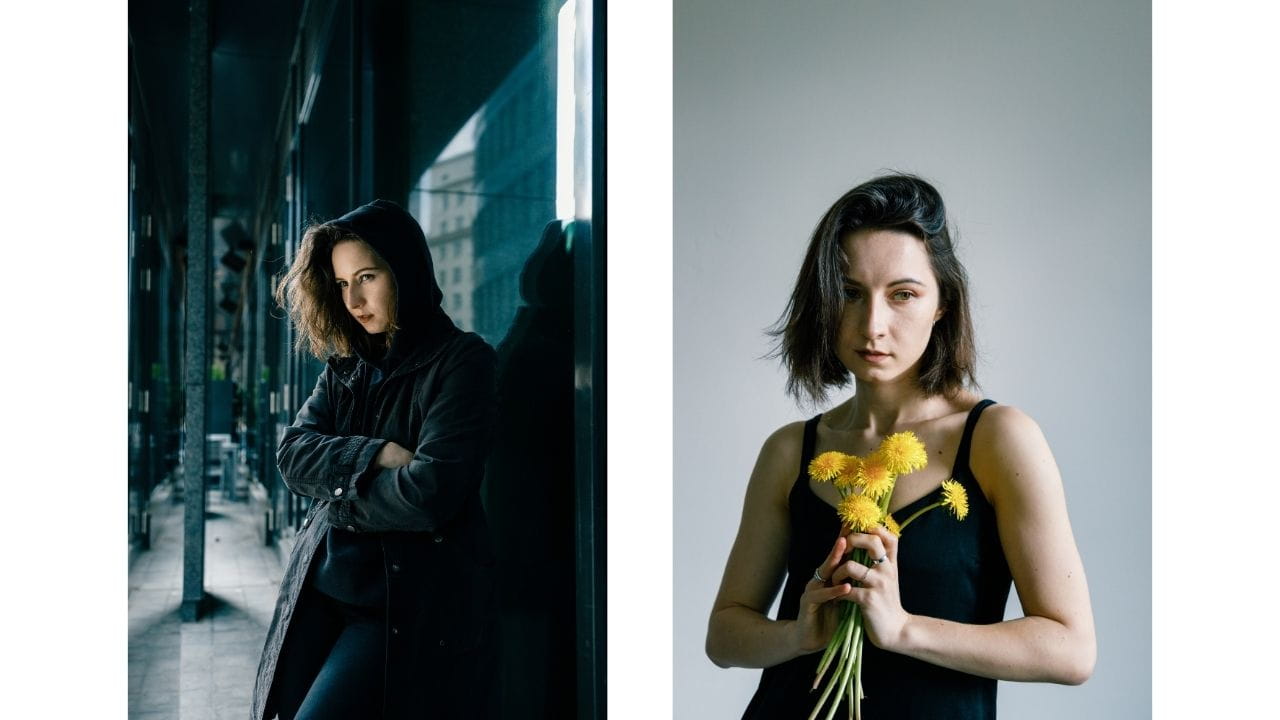
You can try out different expressions, explore your emotions, give idea that others might consider weird. No one has to see the images that you will get in the result. You can do whatever you want. Be whatever you want. You can create just for yourself.
Self-portraits can help you hone your skills of a photographer and a model.
It’s especially important to try this genre out if you’re into portrait photography as it will give you an insight of what people feel when they get in front of your lens.
It wouldn’t be fair to omit the fact that self-portrait shoots take quite a lot of time and effort because you have to wear different hats, so to speak. You need to be a photographer and a model as well as a makeup artist and a stylist if necessary. Plus, since you are working on your own, it’ll take you some to set the camera up. You might need to go from your spot back to your camera to adjust it, then go back.
In other words, it might take you some time to get the position and the angle of your camera right. Self-portrait photography requires some time and effort because you’re doing twice the amount of job you usually do.
But considering all the benefits that taking self-portraits has, it’s totally worth it. So, let’s take a look at how you can do self-portrait photography.
Three Ways to Do Self-Portrait Photography Using Your Camera
1. Set a timer
First, you can use the old-fashioned method of using the timer on your camera. It’s pretty simple. You set your camera, adjust the settings, set a timer – usually it’s 10 seconds – then press the shutter button, rush to your spot and take a pose. The camera takes a shot or a series of shots; this depends on the capabilities of your camera. Then you ran back to it to see the result. You have to repeat that over and over again until you get the shot that you want.
Needless to say, this is the most inconvenient method because:
- you might end up standing in the wrong place or mess up the pose.
- you will get tired from all the going back and worth.
- you will probably need to shot at a higher F stop to make sure that you’ll be in focus.
- it might take you a long while to get something decent.
The benefit of this method is that it’s available on pretty much any camera – old or new, expensive or cheap, film or digital. Smartphone cameras have a timer, too, so you might use your phone to take a self-portrait.
2. Use a wireless remote control
Second, you can purchase a small wireless remote control for your camera. This is much better than the previous option, because once you set the camera up, you can just hold the remote control in your hand and release the shutter button while standing on your spot. If you have a more modern camera, it’ll probably automatically focus on your face, but it might be better to opt for a higher F stop here, too, because there’s still a chance that you will be out of focus.
The drawback is that you still can’t see yourself and after a few shots you’ll probably need to go up to your camera anyway to check the images.
Also, this method is compatible with a wide range of cameras, but you might need to spend some time to look for a suitable remote control if you have an older camera.
3. Connect via Wi-Fi
The third option is probably the best and the most convenient one. Most modern digital cameras have built-in Wi-Fi and a companion mobile app. With them, you will be able to connect your camera to your phone to send your images from one device to another or to shoot remotely.
Basically, with this app, you will turn your phone into a remote control. What’s more, you’ll be able to see yourself on the screen of your phone and adjust the exposure settings, if necessary; which is something that you cannot do with a regular remote control.
You won’t have to go up to your camera to check your images as you will be able to simply check them on your phone.
Another advantage of this app is that you can actually choose where the camera should focus. But what you need to be aware of is that in most apps, once you press the shutter button, your focus will be locked. Keep this in mind if you want your face to be in focus.
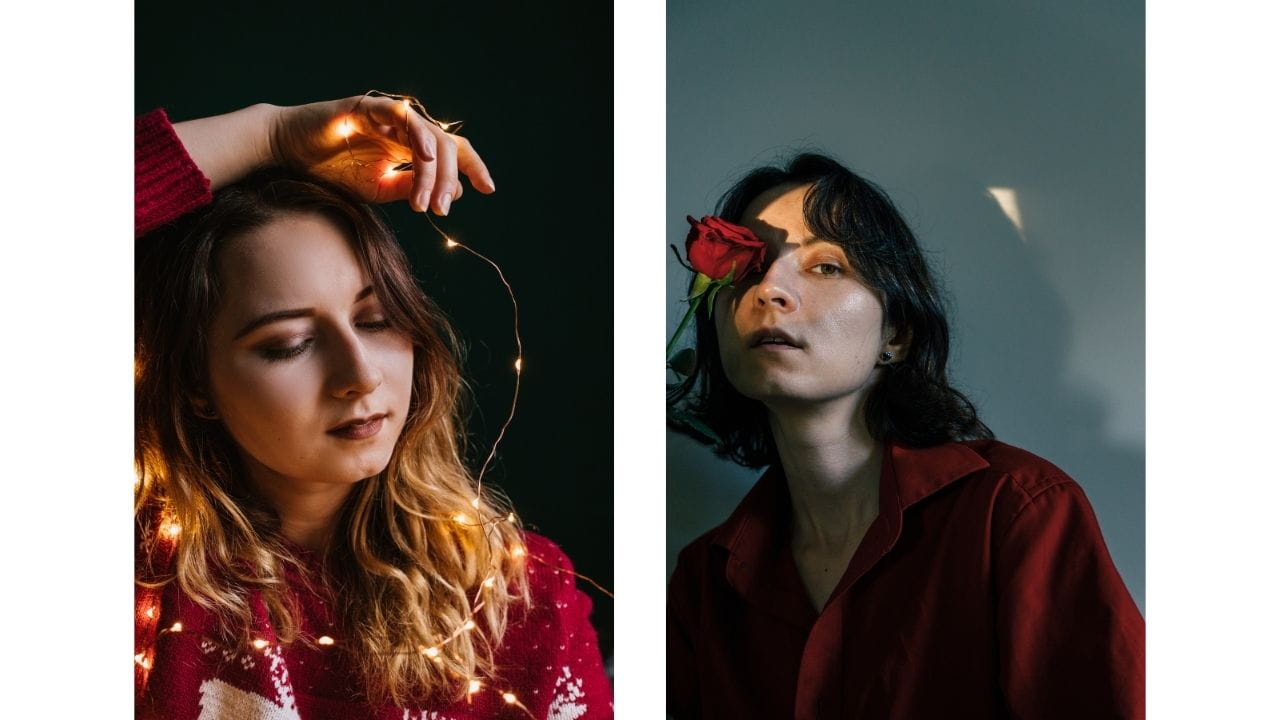
There are a couple of drawback, though.
The connection via Wi-Fi uses up camera’s and phone’s battery pretty quickly, so it’s better if both devices are fully charged at the beginning of your shoot. Also, a smartphone tends to be bigger and somewhat heavier than a wireless remote control, so it will be trickier to hide it. You will need to set a timer on your camera. Once you release the shutter button, the camera will start counting and you will have a little bit of time to hide your phone and get into your pose.
Where can you hide your phone?
There are a ton of options. You can hide it in a pocket or maybe under a waistband behind your back. You can hide it under your arm or behind some kind of a prop that’s near you. Another option is to put a chair or a small table near you and place your phone there, then edit it out. If you do a headshot or really zoom in on your face, there might be no need for you to hide your phone in the first place.
Another thing that you will most likely need is a tripod. If you want to shoot a self-portrait at home and the room that you want to shoot in isn’t big, you might get away with putting a pile of books on your desk then propping your camera on top of these books and maybe putting some small object under your lens to tilt it up a bit. But having a tripod will make things much easier since you will be able to control the angle that your camera is tilted at; not to mention that you will be able to put the tripod pretty much anywhere and you won’t have to worry about your camera falling down.
How to take self-portraits
- Come up with an idea for an entire photoshoot or an idea that you will start with. Pick references, if necessary.
- Choose what you want to wear. Do you makeup, if necessary.
- Set up your lighting equipment or choose a place with the best light, if you are using natural light.
- Set up the scene. Put your props. Hang the backdrop, if you are using it.
- Put your camera on a tripod or whatever your using instead of a tripod.
- Connect your camera to the app or wireless remote control. Set the camera settings.
- Go to your spot and check whether you’re framed correctly. Do some adjustments if necessary - tilt the camera up or down, put it higher or lower, etc.
- Put on your favorite music to get into the mood and take self-portraits.
That’s it! Generally speaking, it’s not as hard as you might think, but it does take some time, effort and patience.
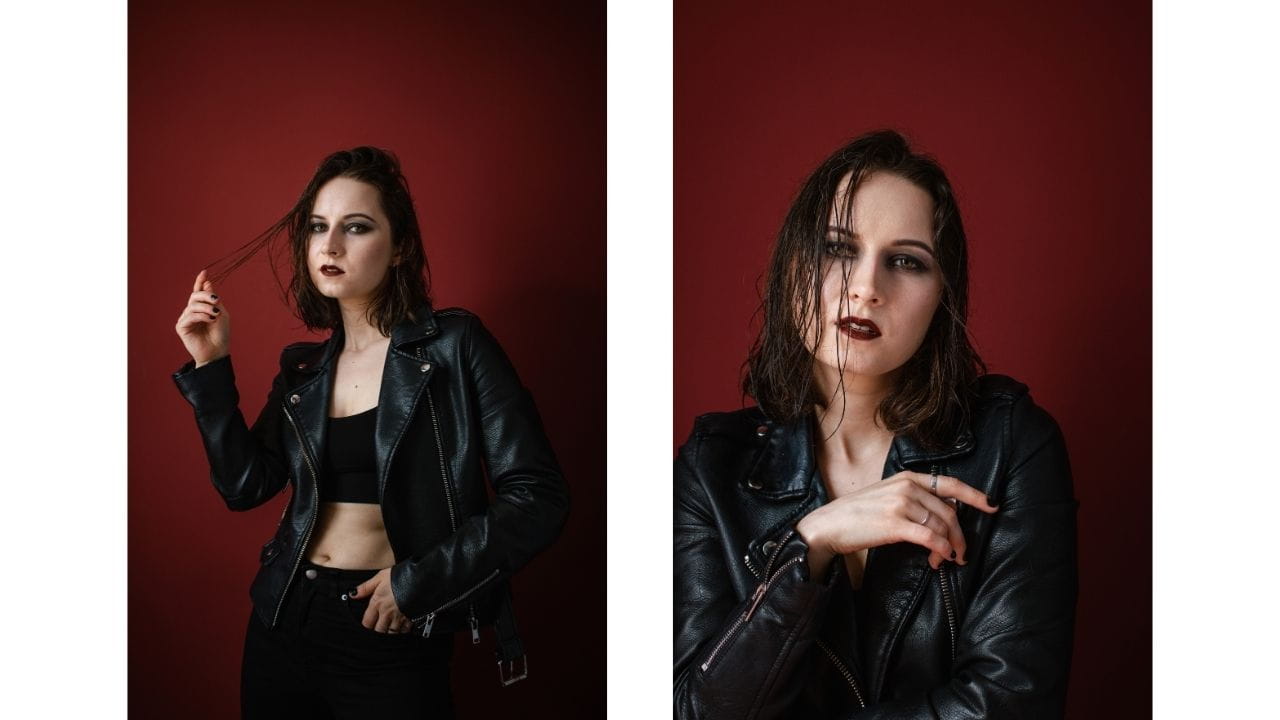
Where can you do self-portrait photography?
Frankly speaking, you can do it pretty much everywhere.
It’s great if you happen to have your own studio – it would be a perfect place to take self-portraits as you don’t have to worry about the light and the background. You have all the necessary equipment and backdrops, plus you will feel comfortable there.
If you don’t have a studio, you can rent one; if it’s not too expensive. Although, renting a studio if you are just starting to get into self-portrait photography might not be the best of ideas because you might feel too much pressure to get great shots and you won’t be open to experimenting. So, maybe save this for the times, when you get a better grasp of self-portraits and feel more comfortable in your own skin.
Probably the best place to do self-portraits is at home, because it’s your space, it’s where you feel the most comfortable. This is crucial for self-portrait photography because you need to feel at ease and relaxed. Self-portrait shoots will require you to get vulnerable. You will need to be able to experiment, too, and be prepared to the idea that you might not get anything good at first. Taking self-portraits might be quite stressful and put a lot of pressure on you, so you need to eliminate any other potential sources of stress.
Another great location would be a relatively deserted place. It might be a forest, a riverbank or a field, if you enjoy being in the nature. Alternatively, it might be a small street, a lane or any other place in your city or town where there are barely any people. If you are worried about your camera, it might be a good idea to take your friend with you and guard your stuff.
Tips for self-portrait photography
Don’t overthink it
If you experience some resistance psychologically-wise, it would be better to set things up and just start taking images. Don’t overthink it. Push through the uncomfortable feelings. Push through your shyness and the tension in your body. It’s possible that on the first try, you won’t be able to relax, and you won’t like any of your portraits. That’s okay. Don’t let that discourage you – try to do another self-portrait shoot and it might go better. It’s also possible that once you start, you will relax and get into the creative flow.
Don’t overcomplicate
Make things simple at first. Choose simple clothes, simple makeup, simple location. Don’t try to do something grand and complex, otherwise you will get stressed out and disappointed with the results. It’s okay if you just sit against a monochrome background and do some headshot portraits. This is especially important if you don’t feel comfortable in front of the camera. It’s also good to make things simple at first because it won’t take you much time or effort to set everything up and you will more likely to give this a try.
Experiment with light
You can use whatever light you want. You can use harsh sunlight or soft light on an overcast day. If you are using window light, it might be a good idea to use a reflector to fill in the shadows a bit. You can also use the artificial light, if you have it. The benefit of the artificial light is that you can use it no matter what and no matter what time of the day it is. You don’t need professional studio equipment, especially if you are at home or in a relatively small space. Getting a couple of small LED panels on AliExpress should be more than enough. You can also make use of some other light sources – for instance, a bike light. It might not be super powerful, but it can work as a fill light. Different kinds of lamp can be great for lighting, too.
Some objects can be used as a prop and to light your scene better. You can use candles or a lighter to provide more light to your face. You can incorporate fairy lights or some other small and cheap light sources that you can find on Amazon, eBay or AliExpress. The options are limitless, really.
Place a mirror behind your camera
This way you will always see if everything is okay with your hair, makeup and clothes. You can also rehearse some poses before actually taking the shot. In addition, looking at yourself in the mirror can help you feel better – it will definitely boost your confidence!
There’s actually another way that you can use a mirror for self-portrait photography – you can bounce light off it. This might work with big and small mirrors. For instance, if the sunlight is streaming through the window directly into room, you can reflect the sunrays onto the wall with the help of a mirror. Moreover, if your mirror is round, you will get a circle of light.
Place something in front of the lens
If possible, you can try placing something in front of the lens. For example, if your camera is on the table or you have something that you can place an object on, you can put a glass or a prism slightly in front of the lens – this will give you a blurry effect on one side. You can put flowers or plants in front of your lens to create a frame around you. You can make a hole in a small plastic bag and tie it around your lens for a blurry vignette effect.
Use a monochrome background
You don’t have to go to a studio to get a great-looking portrait. If you happen to have a monochrome wall in your home, then you are already in luck; especially if it’s a white or grey wall – it makes a great backdrop. If you don’t have that, there are other ways that you can create a monochrome background – large pieces of paper that you can pin or tape to the wall or any other surface. Bedsheets and other kinds of fabrics can serve as a great backdrop, too. Lace fabric or tulle can be especially great as you can shine light through them to get an interesting effect.
Nearly anything can be a prop if you figure out how to use it for your self-portraits.
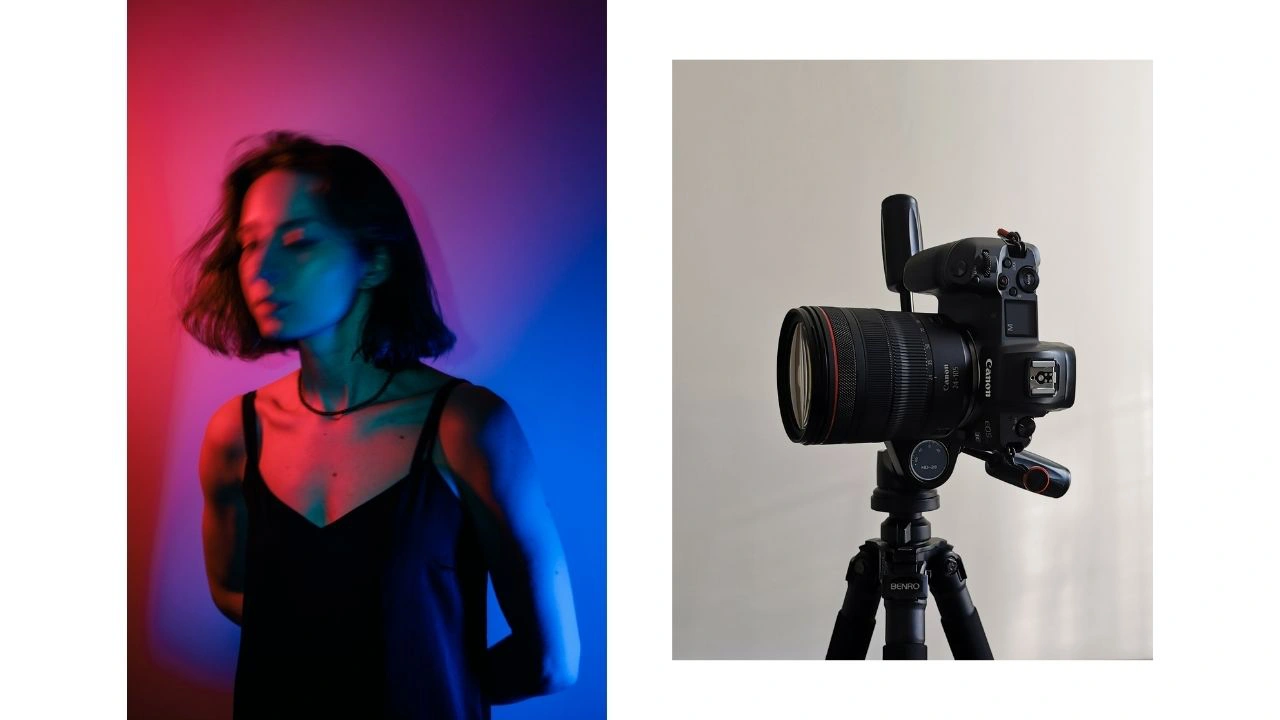
Add motion blur
Another great way to make your self-portraits interesting is to add some motion blur. To do this, you need to lower the shutter speed to around 1/20 or 1/13. When taking the shot, you need to move your body, arms, clothes or your face – depending on what exactly you want to blur. This is a great effect which you should definitely experiment with.
Remember this:
- Don’t get discouraged after a few first failed attempts. If you keep trying, you will succeed eventually.
- Look at the self-portraits of other photographers to get inspired and learn from them.
- Don’t compare yourself to others. If your self-portrait photography doesn’t look like someone else’s, it doesn’t mean that it’s bad.
- Use references to generate ideas for photoshoots, poses, facial expressions, etc.
- Explore various ideas. Don’t shy away from experimenting. Try out different things. Make mistakes.
- It’s okay if you don’t know what you want to get in the result, if you don’t have a clear picture in your head. Just turn on the camera and start shooting – inspiration might come in the process.
- Treat yourself with kindness and empathy. Don’t beat yourself up if something doesn’t work out.
Edit your self-portraits with Visual Watermark
As you might have noticed, self-portrait photography requires a decent amount of time and effort. It won’t come as a surprise if you want to share the fruits of your labor with the world. With Visual Watermark maker, you can easily prepare your self-portraits for posting them on all your social media profiles or even on your website.
First of all, you can add a watermark to your images. This will protect them from getting stolen – you don’t want some dishonest thieves to benefit from your hard work, do you? Watermarks on photos can also serve as free ads for your brand, which is an amazing bonus! Here are the details - How to add watermark to photos.
Secondly, you can crop images online, so that they meet the size requirements of the social media platforms. If you don’t want to change the aspect ratio of your images, you can simply use image resizer to change their pixel dimensions.
Additionally, if you want to publish your self-portraits on your website, you can compress them with online image compressor – this will significantly reduce their file size and they won’t take up a lot of memory space on your server.
Conclusion
Just like any other genre of photography, self-portrait photography poses some challenges and takes some time to master it. In fact, it might be one of the most difficult genres as you need to do twice the amount of work you usually do. It can be stressful and intimidating as well as time- and effort-consuming. But at the same time, it has a lot of benefits that will help you grow as a person and as a photographer. Therefore, you need to try to take self-portraits at least once in your life.
 Visual Watermark
 by
by 