
 by
by Is there someone in a lovely photo that you’d rather not see? Or maybe someone in a group portrait doesn’t want to appear online? Fortunately, you don’t need to delete the photo or avoid publishing that group portrait. What you can do instead is remove the unwanted person from your image. It’s not as complicated as you might think.
In fact, this can be done in several different ways, and you will learn all about them in this complete guide. We will teach you how to crop someone out of a photo as well as how to use AI object removers and Photoshop’s Content-Aware Fill. We will show you all the best tools and methods, so you will be able to remove pretty much anyone; no matter if you are a beginner or an experienced editor.
Reasons to Crop Someone Out of a Photo
Before we move on to the instructions, let’s take a look at the most common reasons to remove a person from a photo:
- Privacy concerns. Sometimes people who didn’t want to be photographed end up in a photo. Or maybe someone in a group portrait just doesn’t want their photos to be published online. So, to respect their privacy, you should publish the photo without showing their face.
- Cleaner background. Did you take a photo in a busy place? And now all the people in the background take the attention away from the main subject? Remove all the distractions to make your image look clean and neat!
- Relationship changes. Do you have a beautiful photo, but your ex is in it? Or maybe a friend who you’ve fallen out with? Instead of deleting the photo, just remove the person!
- Professional use. Maybe you have a beautiful portrait of yourself that would look absolutely perfect on a resume or as a headshot on your website…but there are a couple of people in the background. No worries! It will take you just a couple of seconds to remove them and your portrait will look more polished and professional.
- Better composition. This is probably the least common reasons of all, but sometimes you might need to crop a person from a photo to fix the composition and make it more balanced.
How to Crop Someone Out of a Photo on iPhone or Android
Let’s start with the simplest and most obvious way to remove a person from a photo. You will need to simply crop your entire photo. Fortunately, cropping an image on a smartphone is pretty straightforward and effortless. You won’t even need to download anything.
Follow these steps:
- Go to the Photos app if you are on iOS or to the Gallery app if you are on Android.
- Find and open the necessary photo, then tap on Edit.

- Select the Crop tool.

- Adjust the cropping area so that the person that you want to remove is no longer in the frame.

- Apply the changes. Your smartphone might offer you to replace the original or save the edited image as a new file, so pick the desired option.
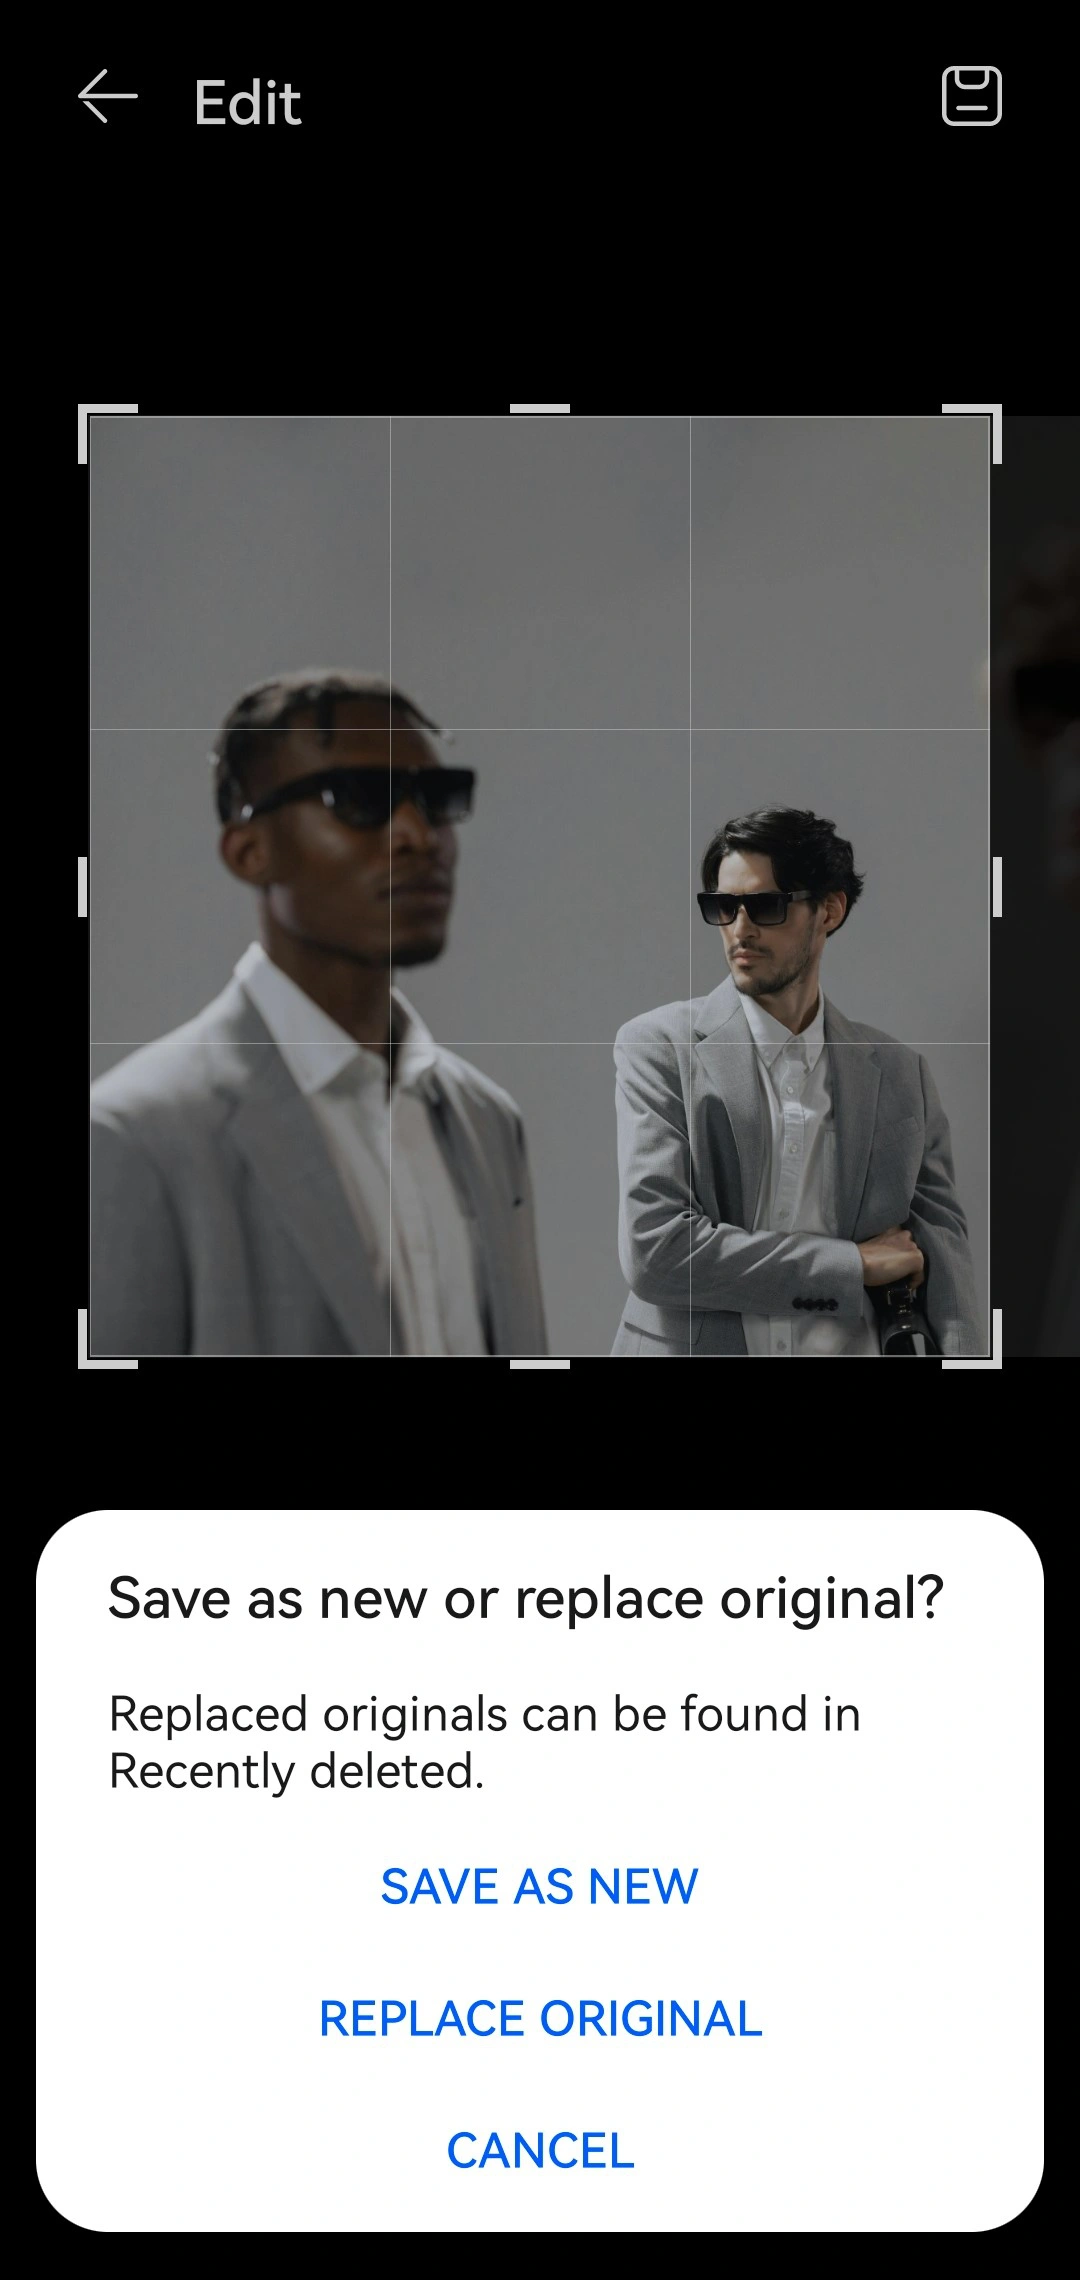
That’s it! Super quick and easy, right?
How to Crop Someone Out of a Photo Using an Online App
There are plenty of apps that are either specifically for cropping or offer the crop tool. For instance, Visual Watermark has an app for cropping that can make this whole process super quick and easy. And since it’s an online app, you can use it on any internet-connected device.
Here’s what you’ll need to do:
- Open Visual Watermark’s Crop tool.
- Import your image.

- Make sure the rectangular shape is selected.
- Click on “No constraints” to open the dropdown menu. Here you can pick a cropping preset for popular social media platforms or with common aspect ratios. Alternatively, you can enter your own pixel dimensions or aspect ratio.
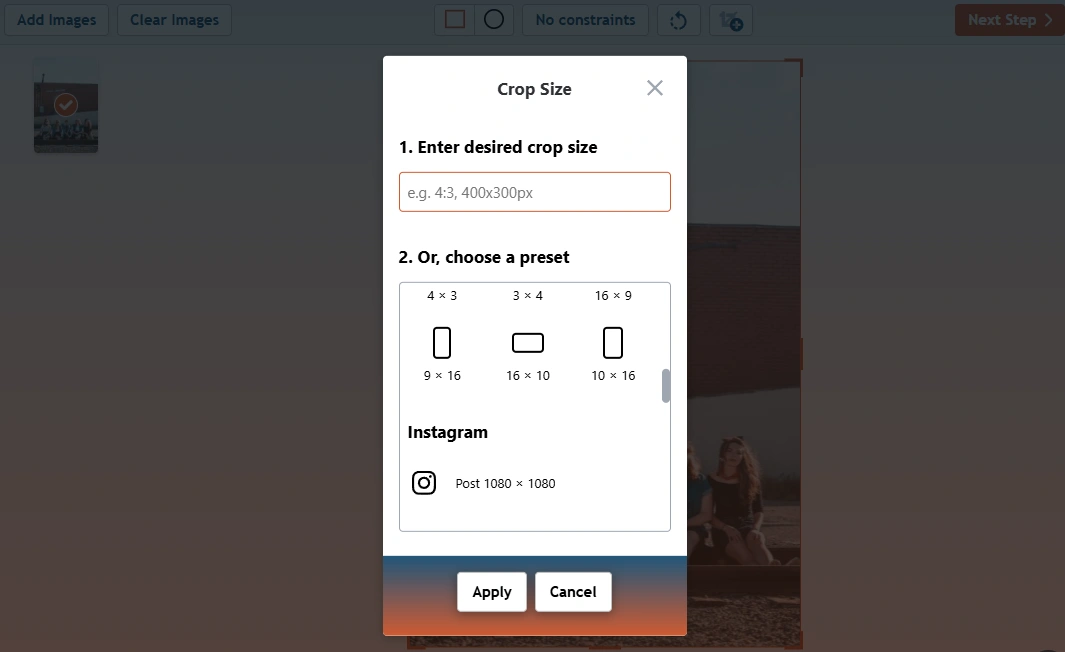
- If you want to do freeform cropping, keep the “No constraints” option.
- Adjust the size and position of the cropping area. Everything outside it will be cropped out, so make sure that the unwanted person is outside the orange borders.
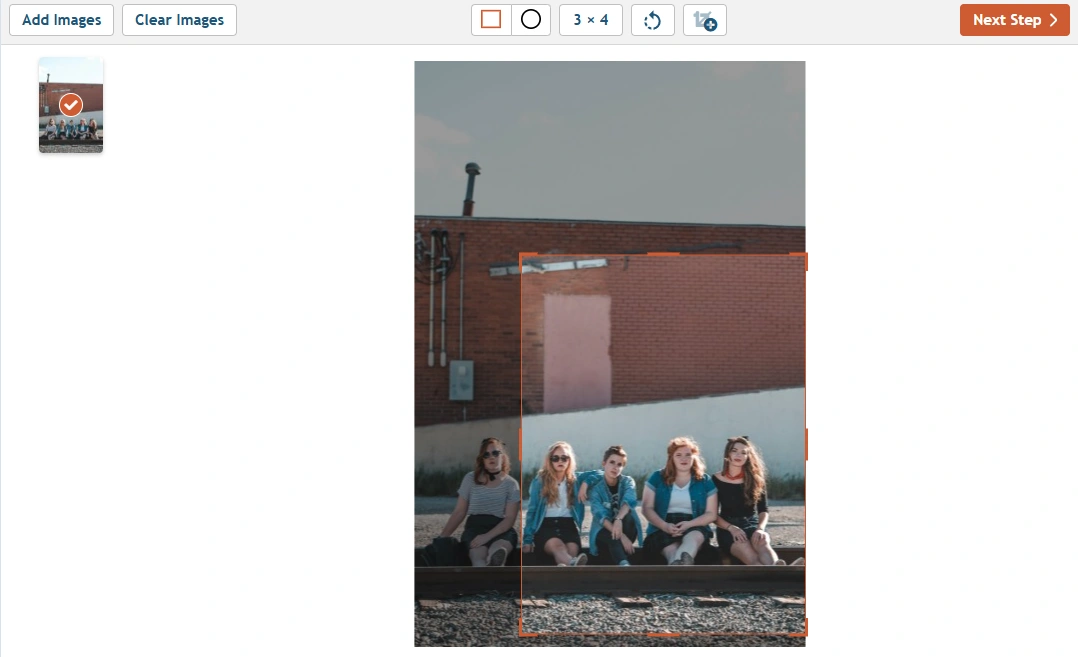
- When you’re ready click on Next Step.
- Specify the export settings if necessary. In the Preview section you can check whether your cropped image looks okay.
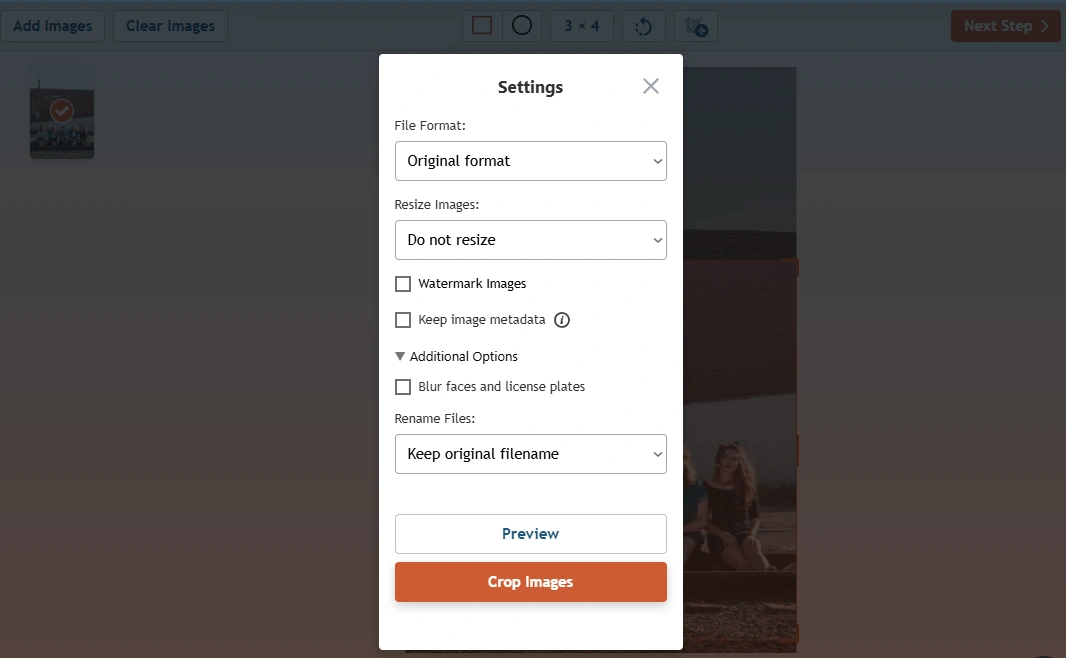
- Click on Crop Images. Wait a bit. Then download your cropped copies.
That’s it!
The main benefit of Visual Watermark’s crop tool is that it offers cropping presets – with their help, you will be able to not only crop out the person but also fix the composition. Also, Visual Watermark’s app supports batch-processing, so you will be able to crop multiple images if necessary. But please note that its free version has a limitation – you will be able to process only up to 10 images per day.
Pros of cropping:
- Perfect if you need to fix the composition.
- Super quick and effortless.
- No editing skills required.
Cons of cropping:
- This method works only if the unwanted person is near the edge of the frame.
- You will inevitably remove not only a person but also a part of an image.
- The balance and the composition of a photo can be affected in a negative way.
How to Remove a Person From a Photo Using AI Object Remover
The number of apps that offer an object removal tool is only growing. They utilize AI algorithms to replace an object with pixels sampled from neighboring areas. You don’t need to be a pro at image editing. It will take mere seconds for a clever removal tool to provide you with amazing results.
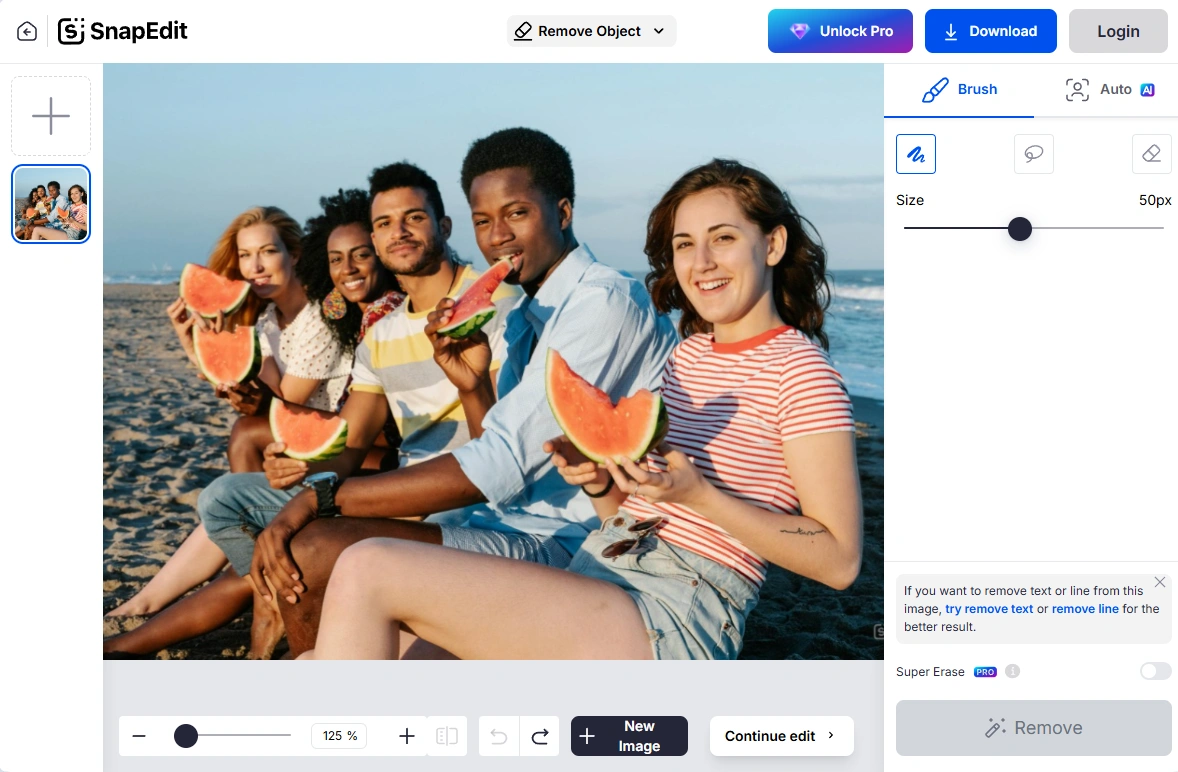
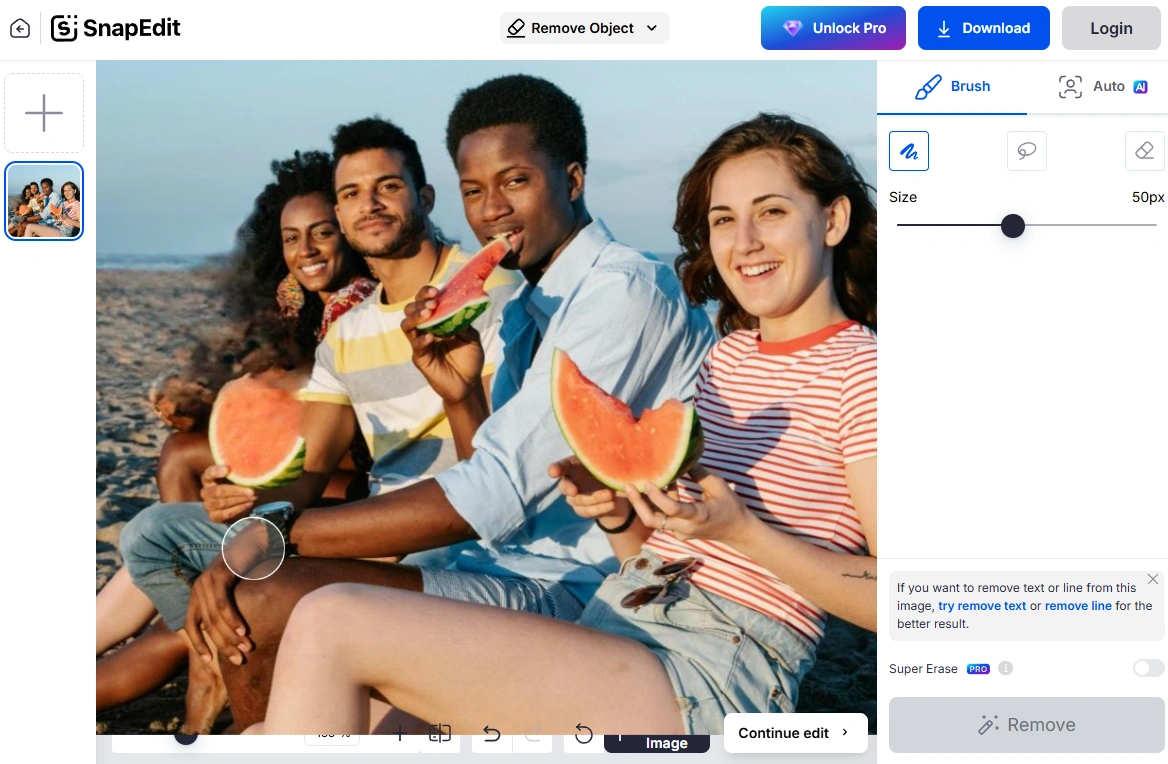
Let’s take a look at how you can remove a person from a photo using MyEdit, which is an online tool with a user-friendly interface. Follow these steps:
- Open MyEdit’s Object Removal tool.
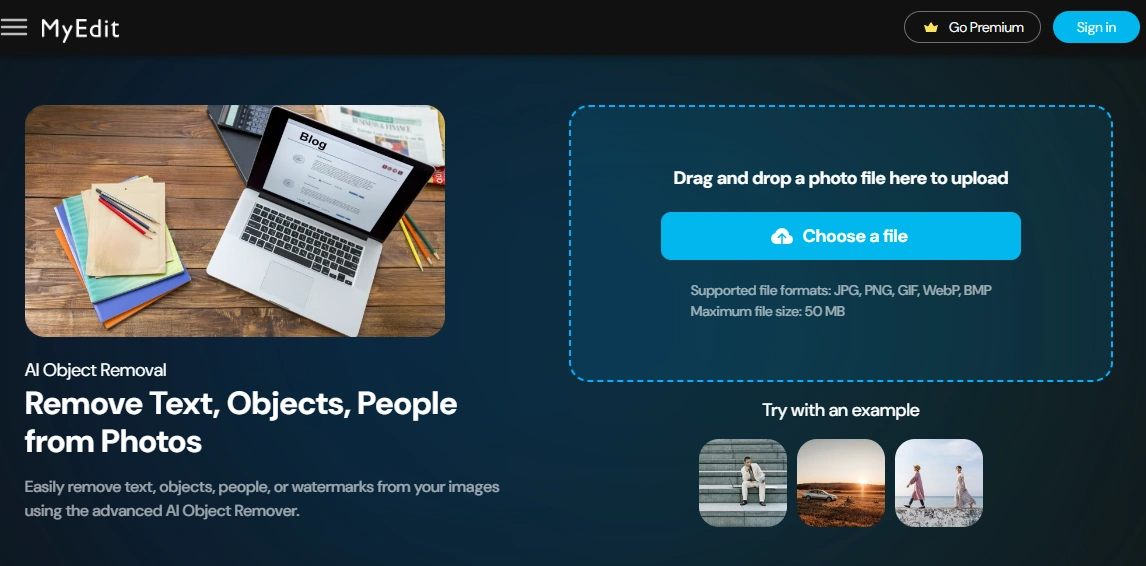
- Import the necessary photo into the app.
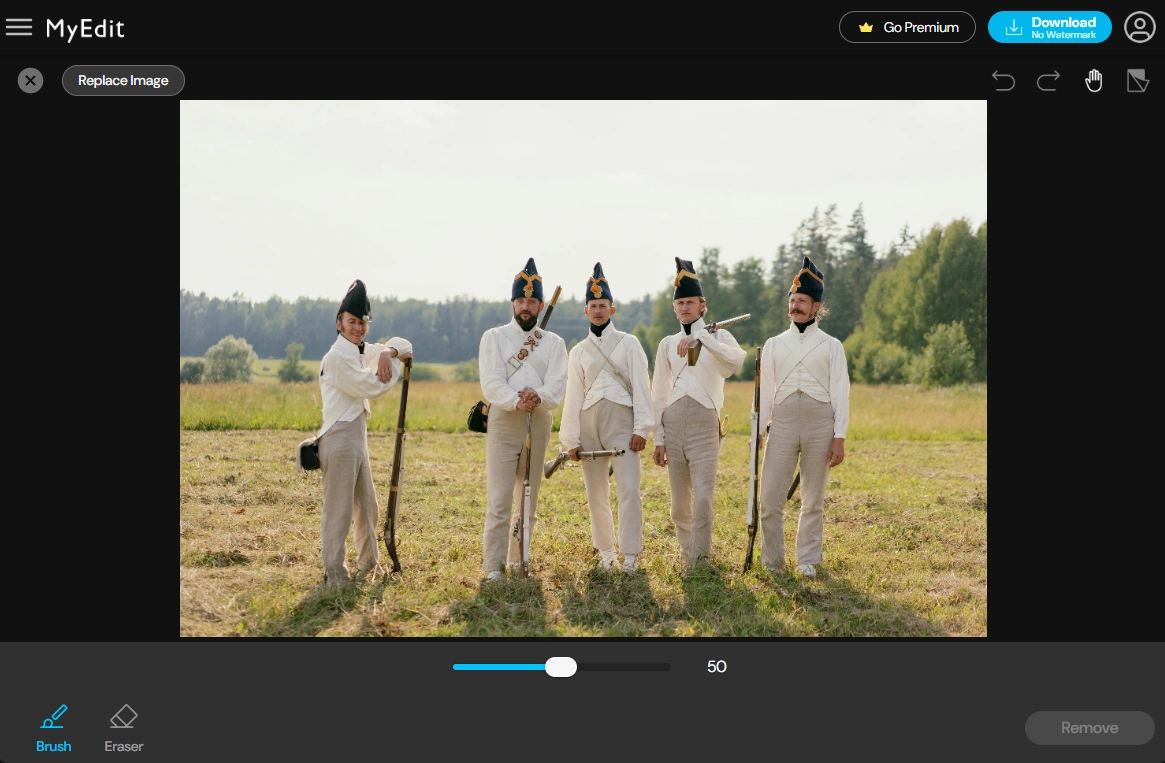
- Paint over the person that you want to remove with a brush. Adjust the brush size with the slider, if necessary.
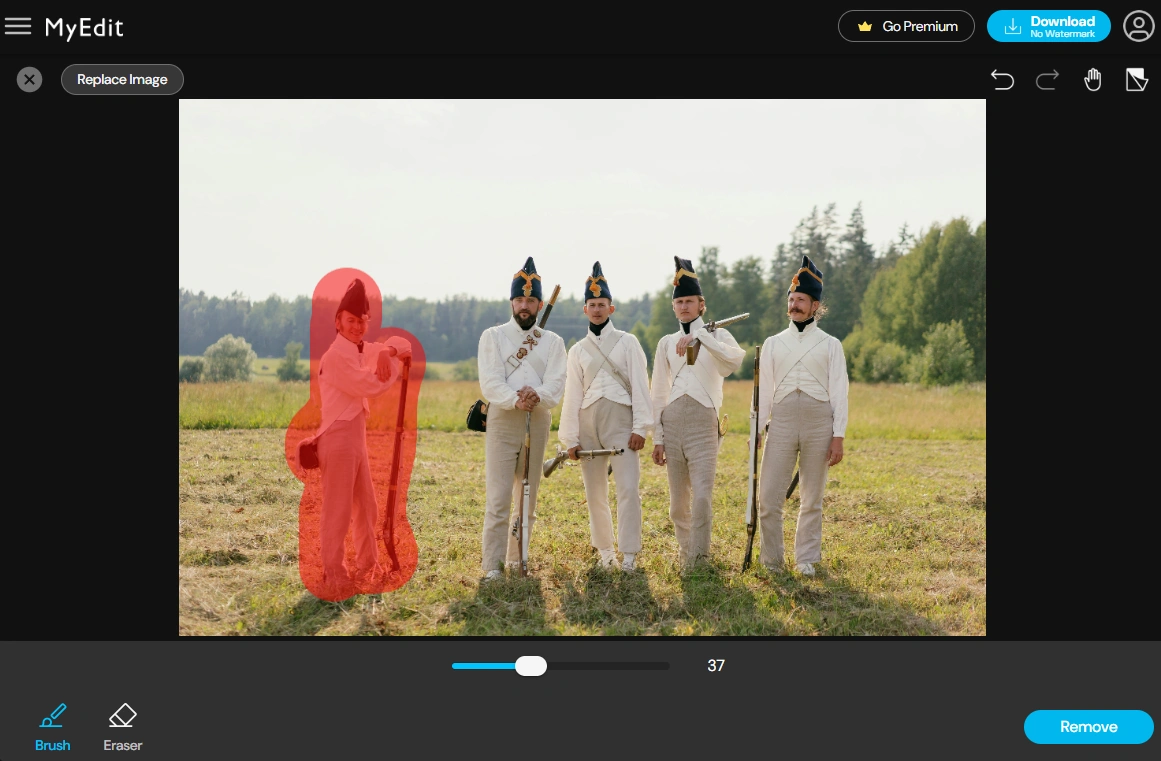
- Click on Remove and wait a bit.
- Сheck the result, then download your edited photo.
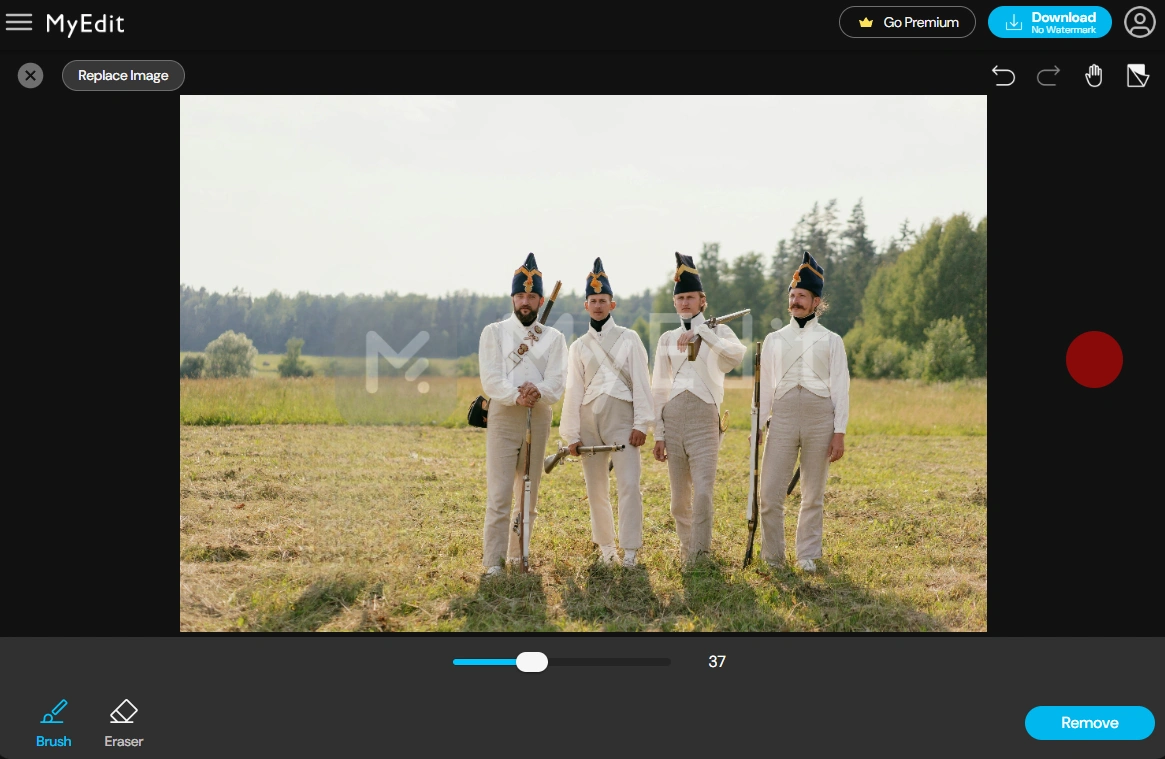
Yep, it’s that easy!
If you don’t like MyEdit, you can give a try to SnapEdit or AIEASE. AI Object Removers work in the same way, which is really convenient.
Pros of using an AI Object Remover:
- This method can be used if a person is close to the center of a photo or to the edge of the frame.
- There’s no learning curve.
- Efficient and hassle-free way to remove someone from a photo.
Cons of using an AI Object Remover:
- You will need to pay to use this tool in most cases. Some apps add a watermark to your processed image in the free version.
- Removing a person in a group portrait where people are positioned close to each other can be very tricky.
- These tools also tend to be inaccurate when working with busy or textured backgrounds.
- Some artifacts and blurry areas may appear.
Here’s a portrait where people sit together tightly. This is the before:
And this is the after:
As you can see, the Object Remover left some blurriness and artifacts. So, this method can be unsuitable for some images.
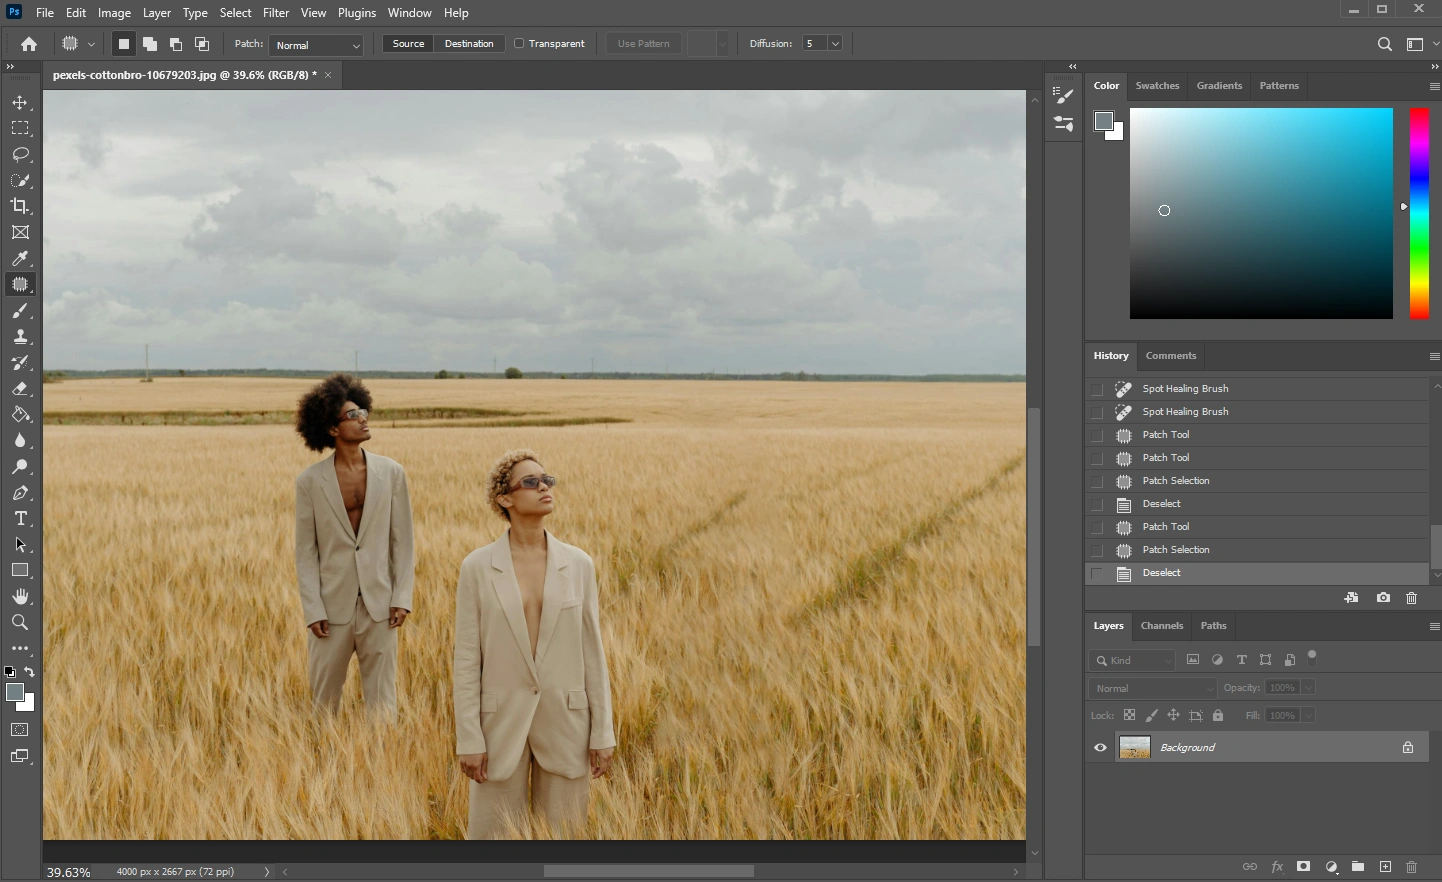
How to Remove a Person from a Photo using Adobe Photoshop
If you do have some image editing skills and some time on your hands, you can try to use more advanced editing software. Adobe Photoshop is extremely powerful, which is why it can provide professional-level results. It’s great for detailed work because it will give you much more control and precision.
Here’s what you’ll need to do:
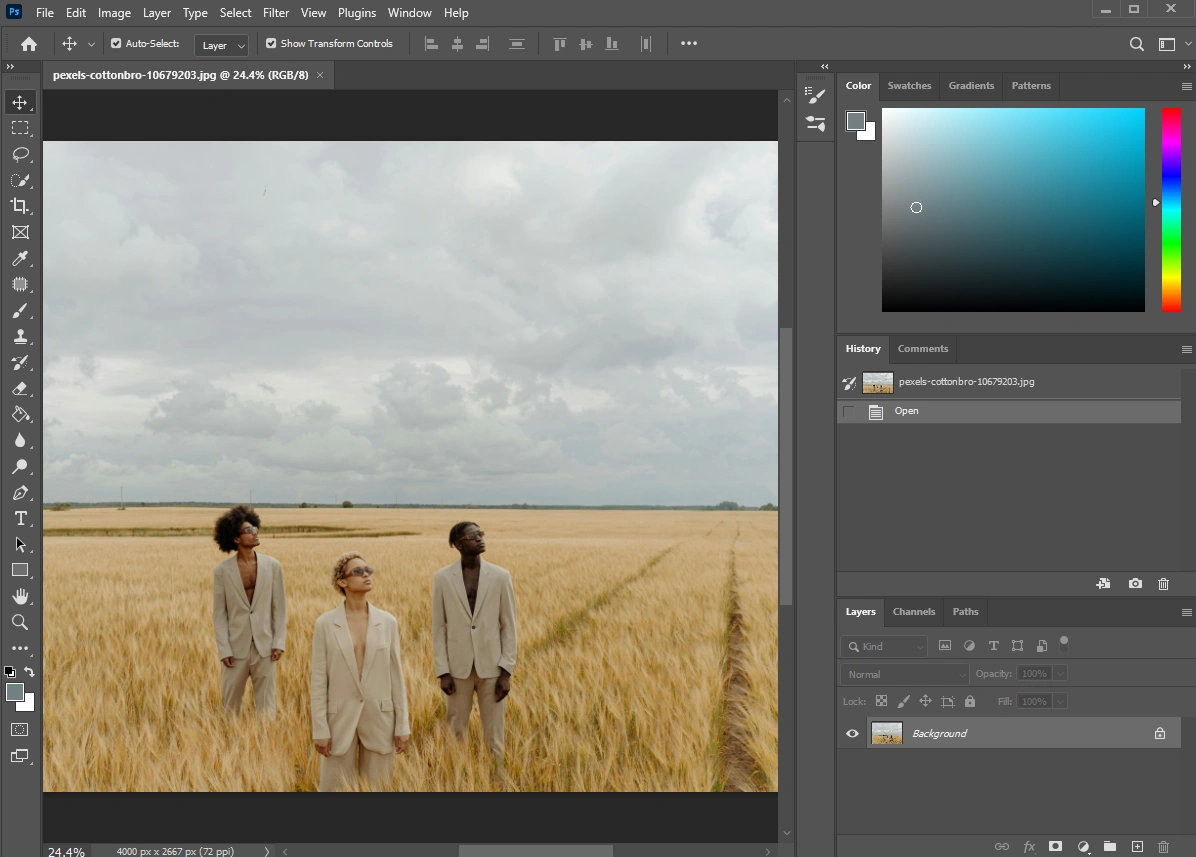
- Open your photo in Adobe Photoshop.
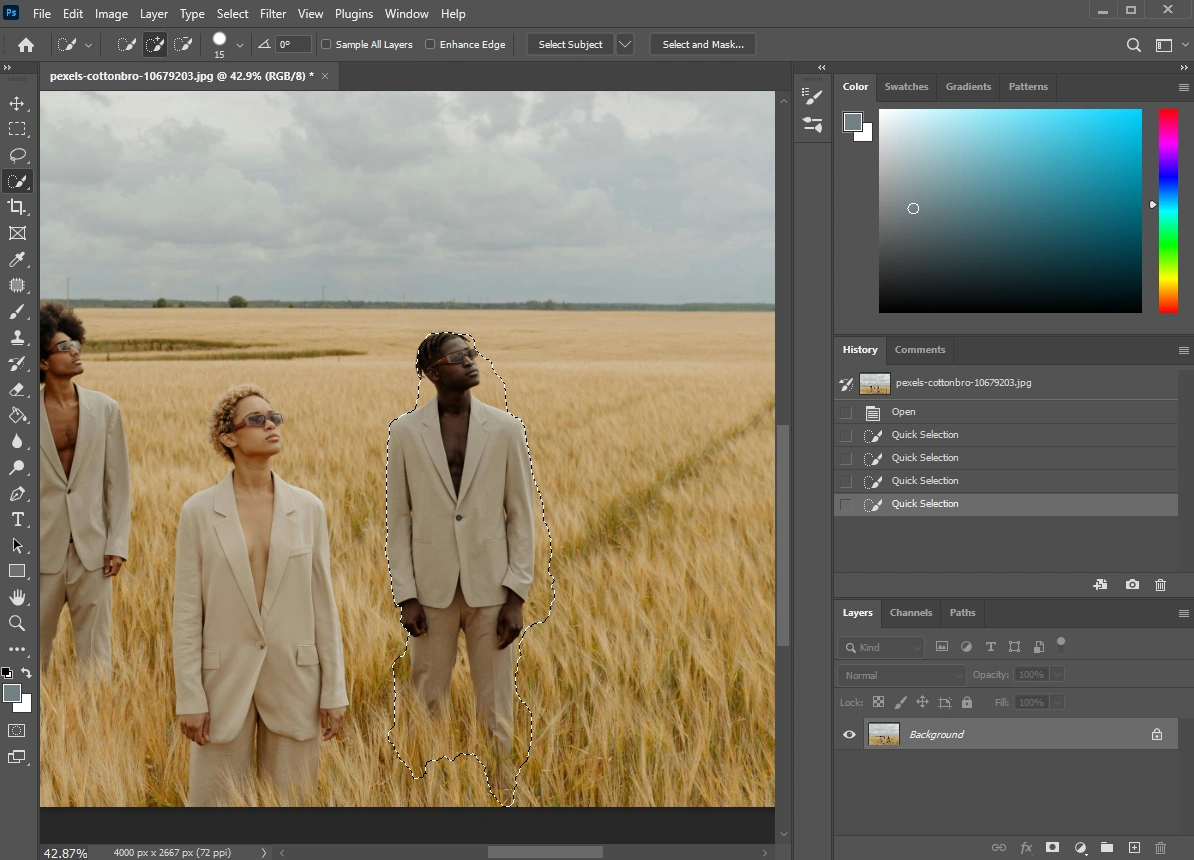
- Use Object Selection or Quick Selection Tool to make a selection of the person that you want to remove. If you are not familiar with creating a selection in Adobe Photoshop, check out our guide on how to cut something out of a photo – it provides detailed instructions.
- Right-click on the selection and choose Content-Aware Fill.
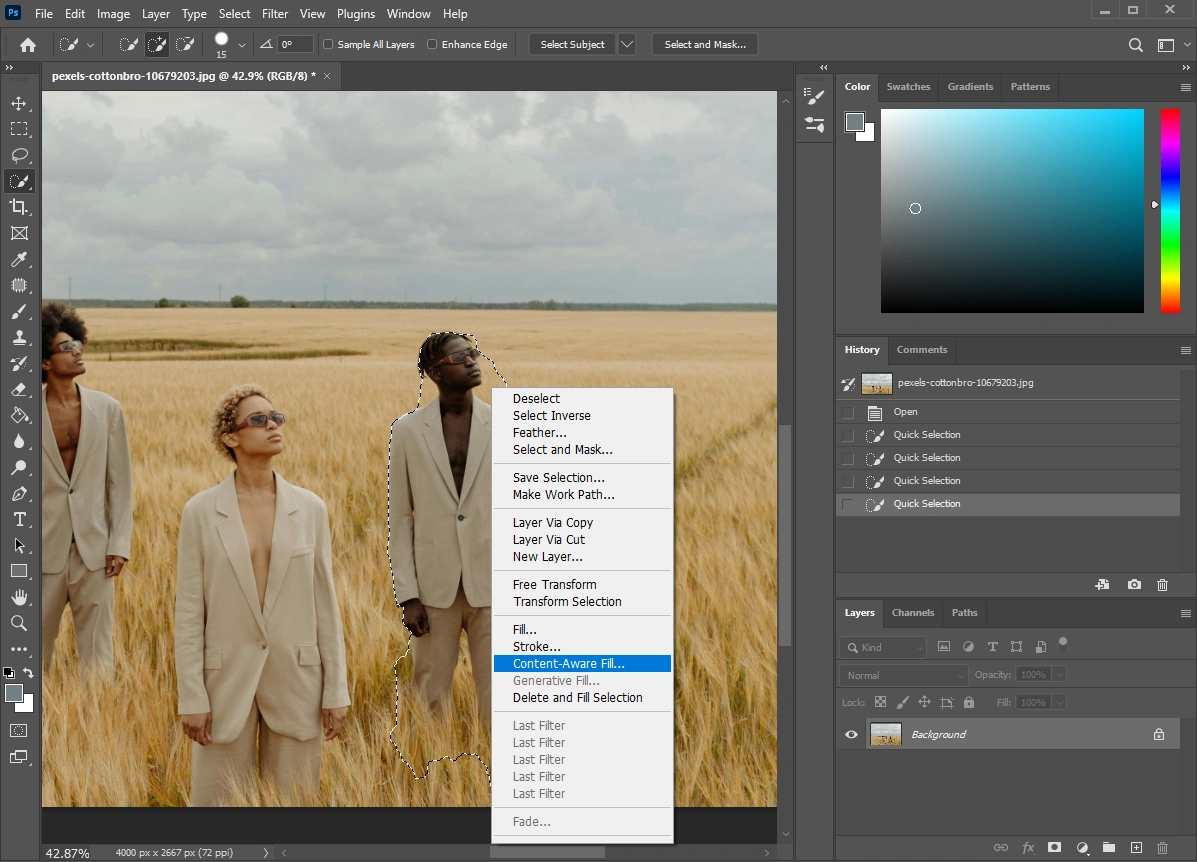
- The Content-Aware window will open. Adjust the settings here. Depending on the complexity of the background, you might need to experiment with different settings.
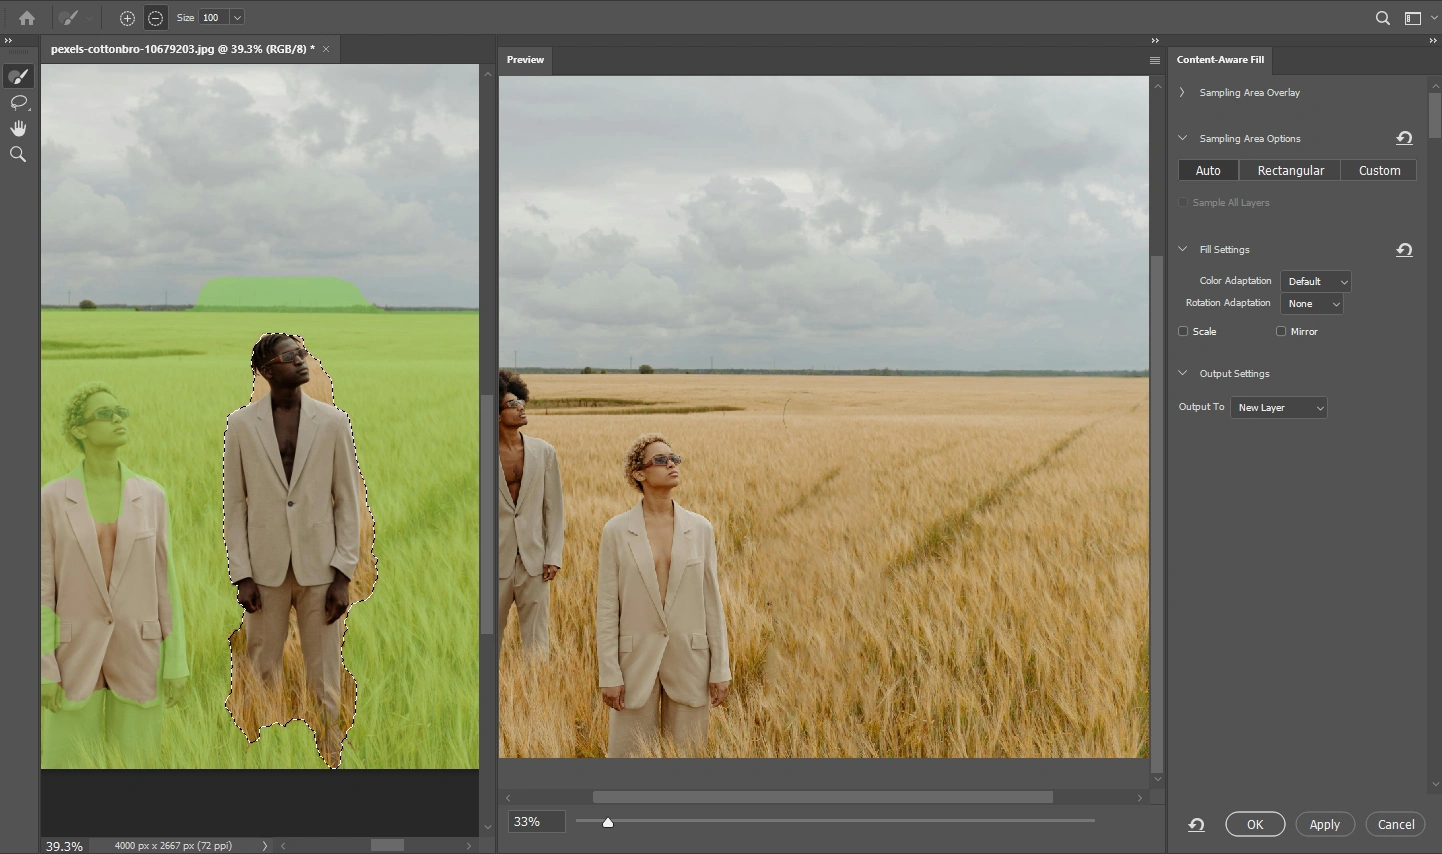
- The green areas are where the pixels are sampled from. Use the Brush to add new areas or subtract the unnecessary ones.
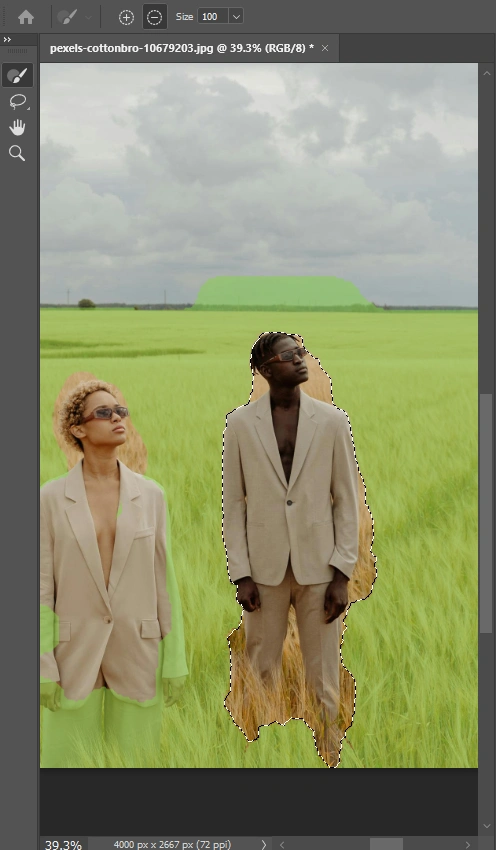
- When you’re ready, click OK.
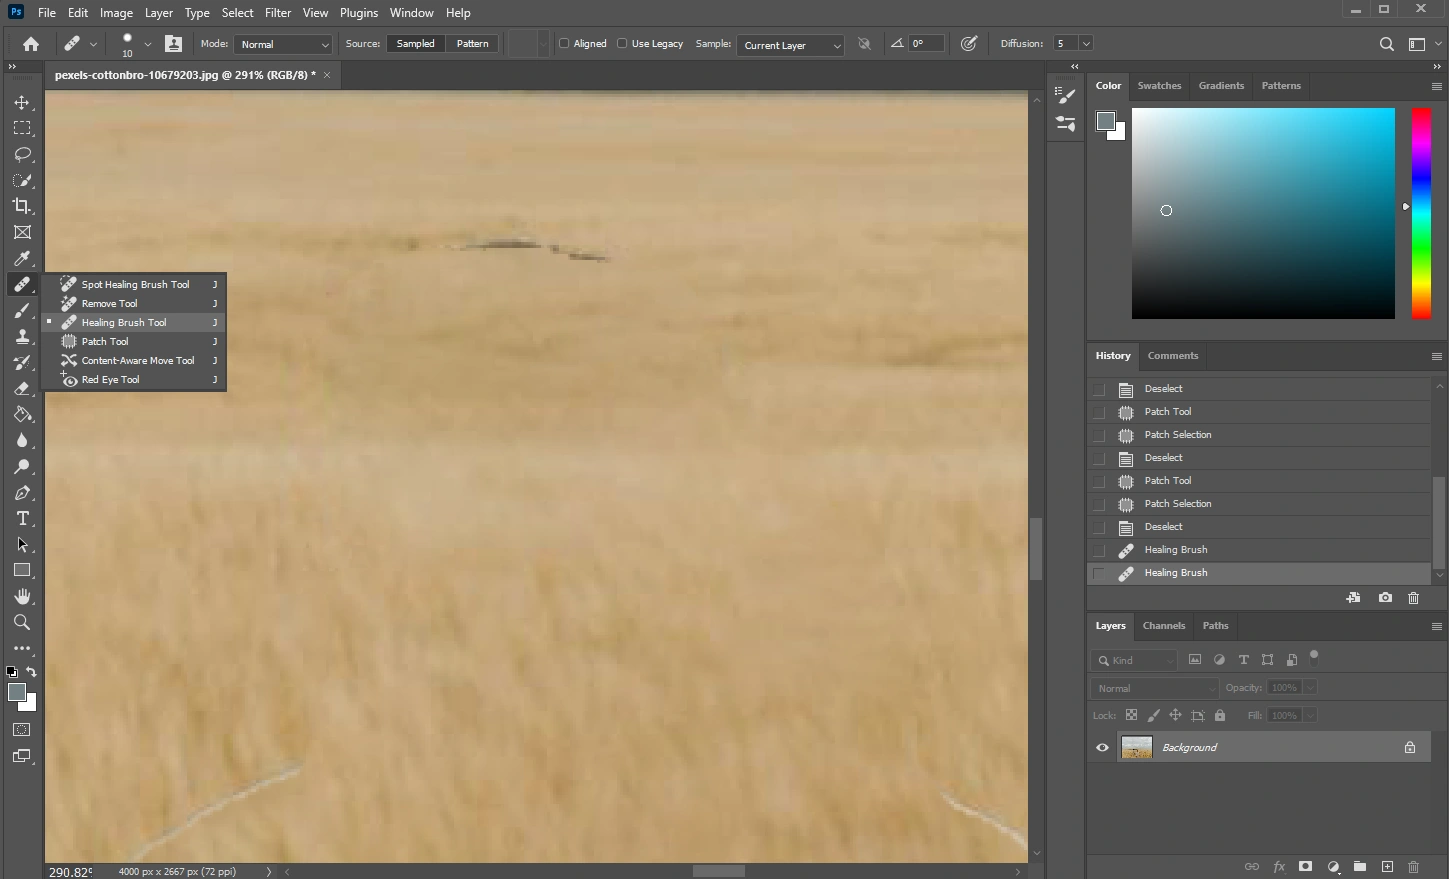
- The Content-Aware Fill can leave some blurry areas and artifacts. But you can use the Clone Stamp, Healing Brush or Patch Tool for fine-tuning. It’s also a good idea to zoom in to be really precise with your editing.
That’s it!
Keep in mind that if your image has a busy and textured background, you will probably need to do lots of fine-tuning and, thus, the whole process will take more time.
Pros of using Adobe Photoshop:
- It’s a mix of automated and manual editing, so you can be as precise as you want.
- Neater and more natural-looking results.
- Perfect if you’re working with high-resolution photos.
Cons of using Adobe Photoshop:
- You need to have some image editing skills or be ready for a steep learning curve.
- Depending on the complexity of your photo, it can be quite tedious and time-consuming.
- Adobe Photoshop isn’t free of charge.
- There can be some artifacts and blurriness.
Blur the Person’s Face Instead of Cropping Them Out
Finally, what if it’s not possible to remove a person from a photo in a seamless way? You can’t crop them out. AI Object Remover leaves too many artifacts and using Adobe Photoshop is just too complicated.
Fortunately, there’s an alternative – you can simply blur the unwanted person’s face. It’s really easy, and your photo will still look nice after wards. Here’s how you can blur someone’s face with Visual Watermark’s blur tool:
- Open Visual Watermark’s website, then go to More Tools > Blur part of an image.
- Import the necessary image into the app by clicking on the Select Images button or by simply dragging and dropping it.
- The app will use AI algorithms to automatically detect and blur all the faces in the image.

- If needed, you can add a new blurred area manually by clicking on the Add Blur button.
- If you want to remove the blur from some of the faces, click on the Objects button. Then unselect the necessary faces.

- Click on Intensity, then adjust the slider if you want to make the blur more or less intense.

- If you want to tweak the blurred area, click on it to select. Then you can resize, reposition and even rotate it.

- Repeat this with each image in the batch, then click on Next Step.
- Set the export settings if necessary.
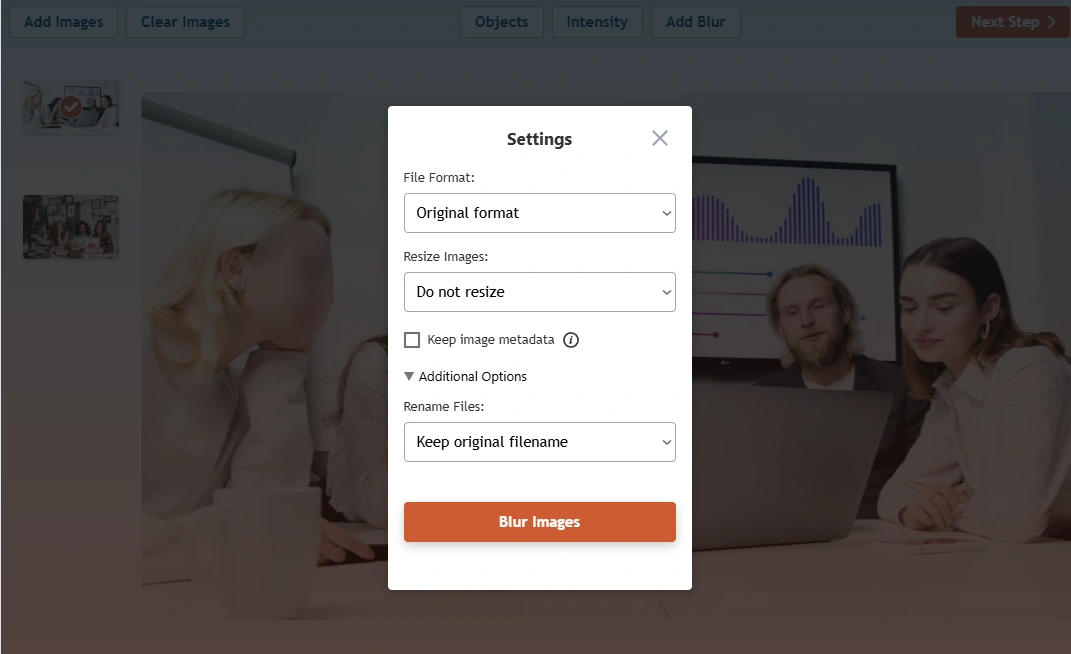
- Click on Blur Images. Wait for the processing to finish. Then download the modified copies.
And you’re done! The identity of a certain person is now hidden while the photo remains intact and without any artifacts. It’s pretty quick and easy, right?
Pros of blurring:
- Perfect if you need to protect someone’s identity
- This method works regardless of where the person is positioned in the frame.
- This quick method can be used by total beginners
Cons of blurring:
- It isn’t suitable if you want to remove a person for aesthetic reasons
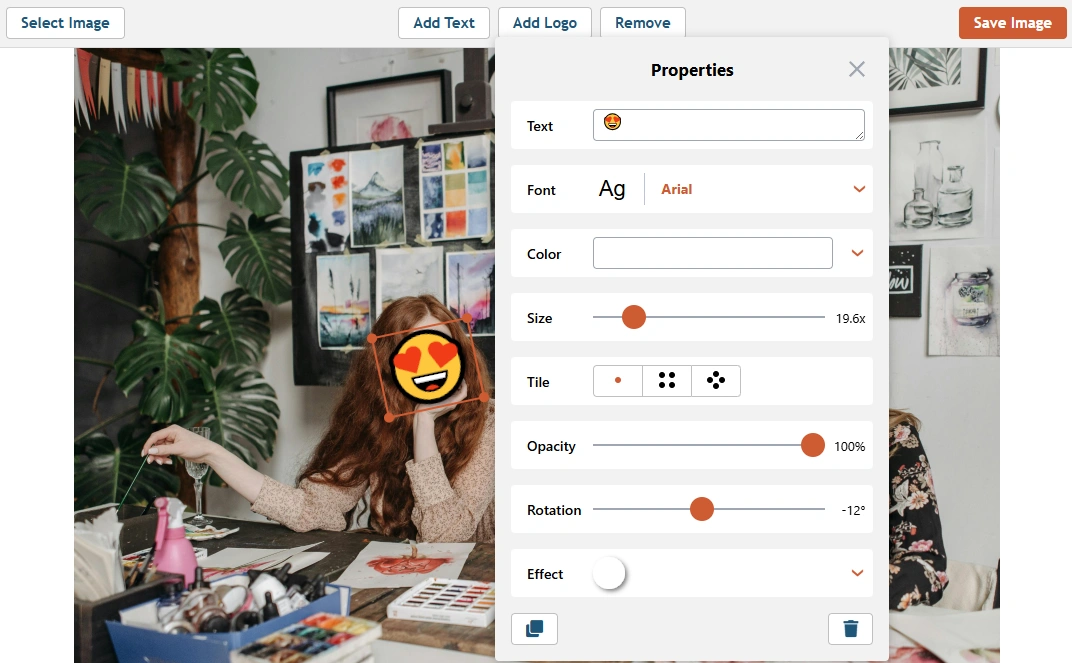
Here’s an idea!
If you don’t want to blur someone’s face, you can cover it with an emoji or a funny image. Just open Visual Watermark’s Add Text to Photo app and import the necessary photo. Then click on Add Logo and import the funny image. If you want to cover the face with an emoji, then click on Add Text and insert the necessary emoji in the Text input area. Make the necessary adjustments, then export your edited image. That’s it!
Final Thoughts
Now you know how to remove someone from a photo. If you need natural-looking results, then you should probably go for Adobe Photoshop. It does require more editing skills, but you’ll have much more precision, control and flexibility there.
But if you’re not a Photoshop pro and don’t want to become one, there are alternatives that require less time and effort. AI Object Removers can provide some amazing results within just a couple of minutes.
You can also simply crop someone out of the photo with the help of an image cropper or blur someone’s face with a blurring app. In this day and age, there’s a method for every skill level!