If you are a photographer, content creator, or someone who actively posts on social media, you likely need to crop images frequently to achieve a more balanced composition or remove visual noise and distractions. Sometimes, cropping is also necessary to meet the requirements of an online platform where you intend to share your images. In this situation, it would be great to have a convenient tool at hand for quick and free cropping, such as Canva.
You have probably already heard of it. Maybe you even use it to create designs for your social media accounts. This incredibly versatile image editor has an astonishing selection of options, tools and features, yet it’s quite easy to use. And of course, you can crop images in Canva, as well. It’s pretty quick and uncomplicated. What’s more, you can do it in several different ways – here you will find step-by-step instructions on how to crop an image in Canva!
How to Crop an Image in Canva Quickly
This method is perfect for those who want to crop an image in Canva quickly and then download it. In other words, this method is for those who don’t necessarily want to use an image in a design.
Here’s what you need to do:
- Go to Canva’s website and create an account for free. Sign into your account if you already have one.
- On Canva’s dashboard you’ll see the “Create a design” button in the top left corner. Click on it.

- Select the Upload option, then import the image you want to crop.
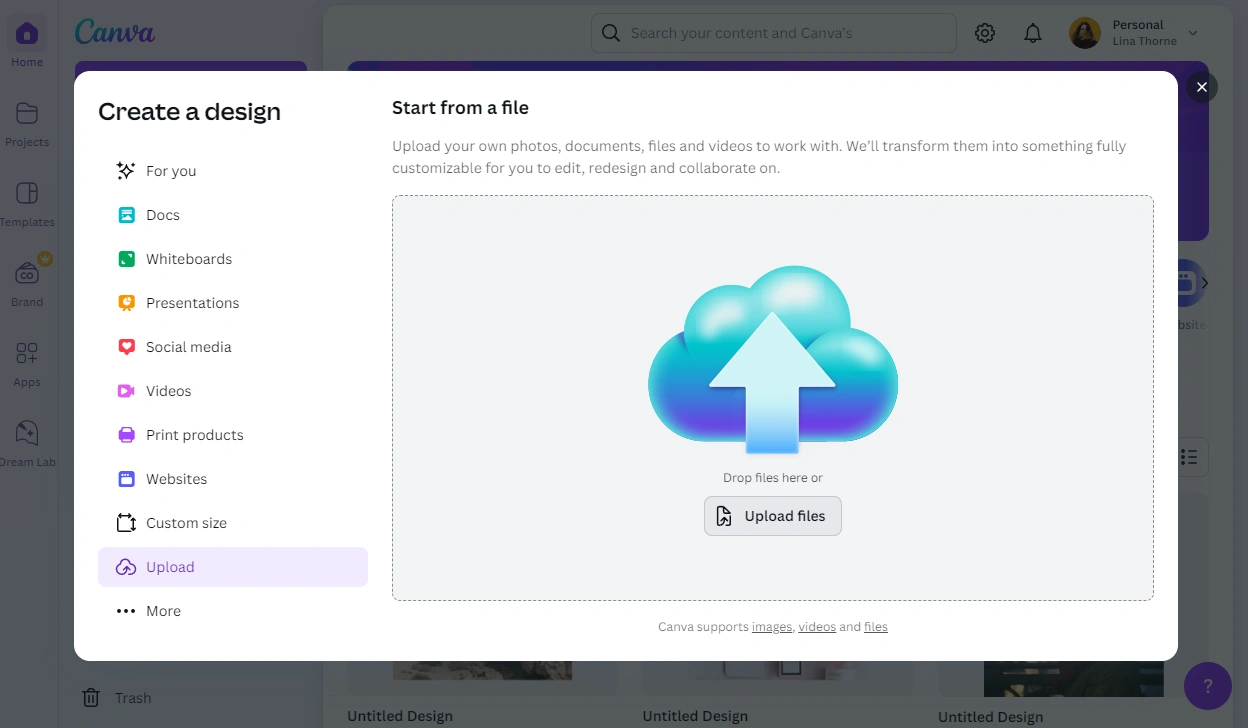
- Once your image is uploaded, click on the Edit image button.

- Go to the Crop section.
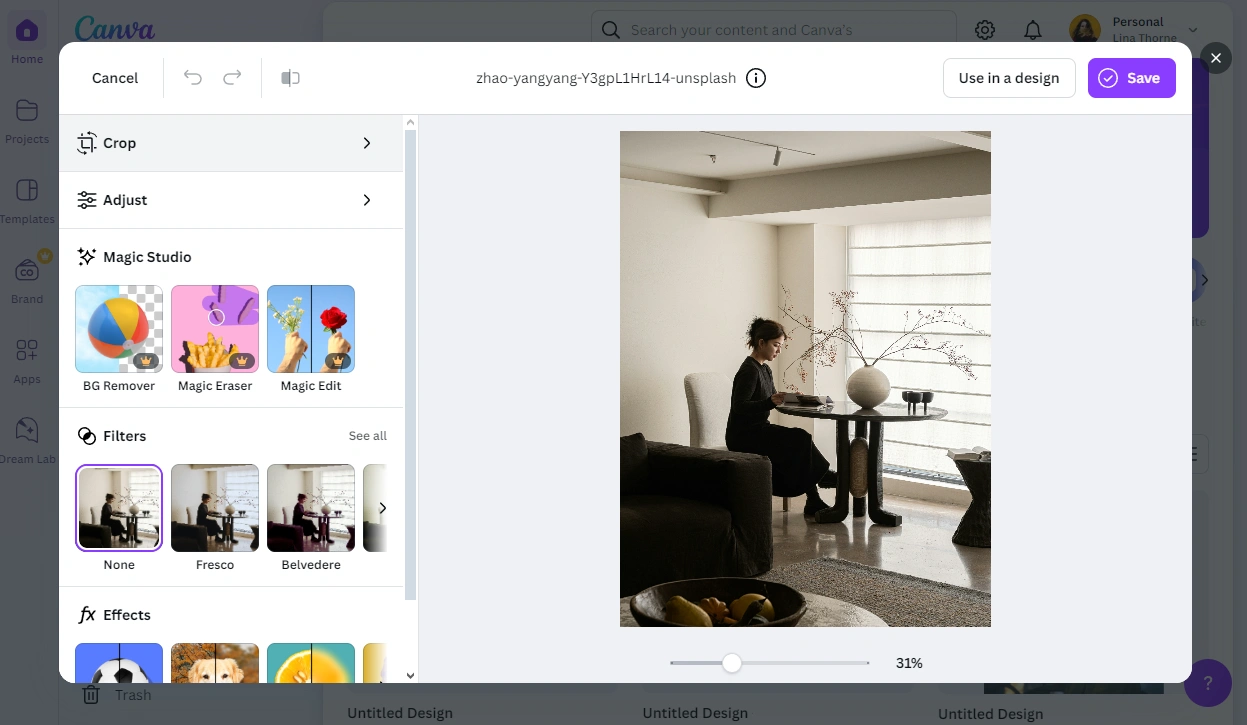
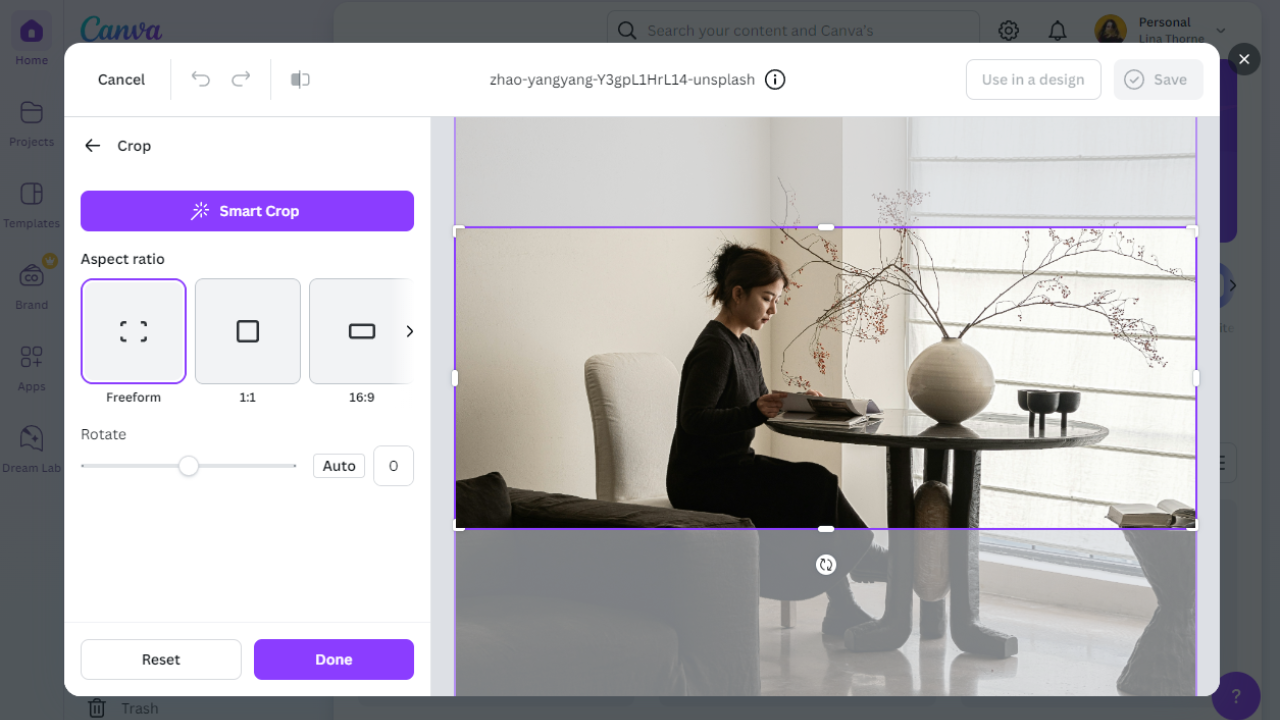
- Select the aspect ratio that you need. Unfortunately, it’s not possible to enter your own aspect ratio here.
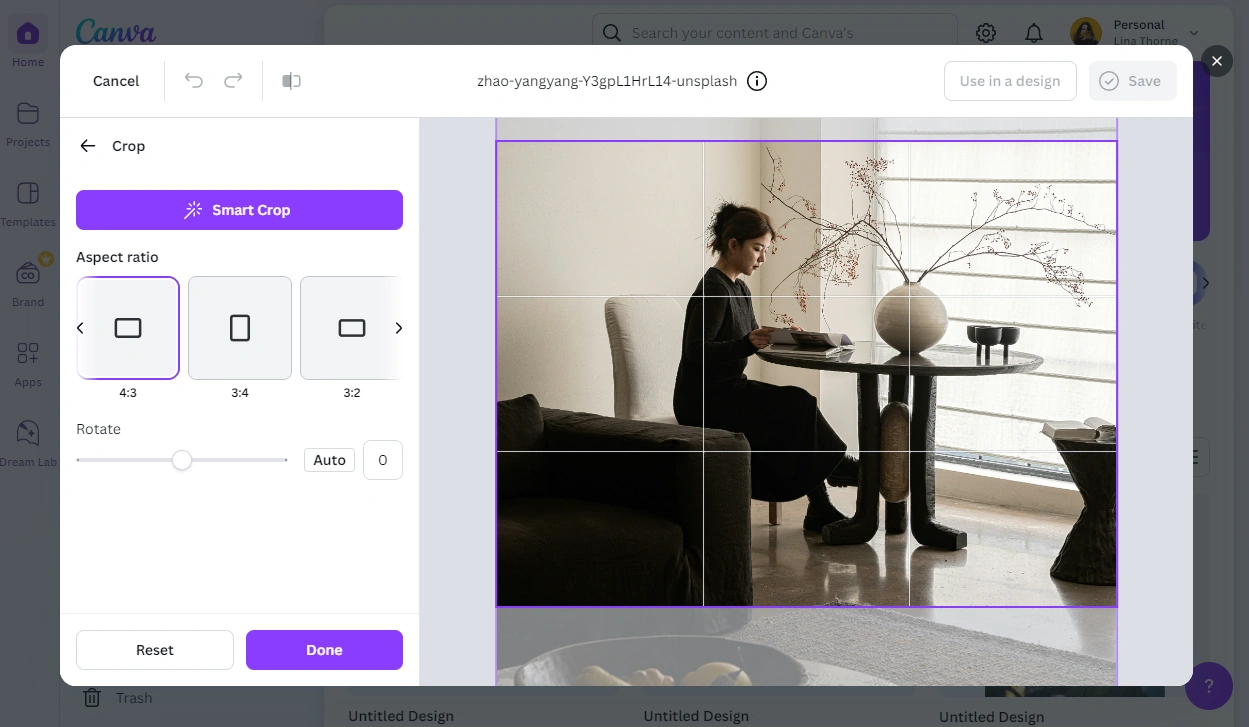
- If you want to crop your image freely – i.e. without the aspect ratio being locked – choose the Freeform option.
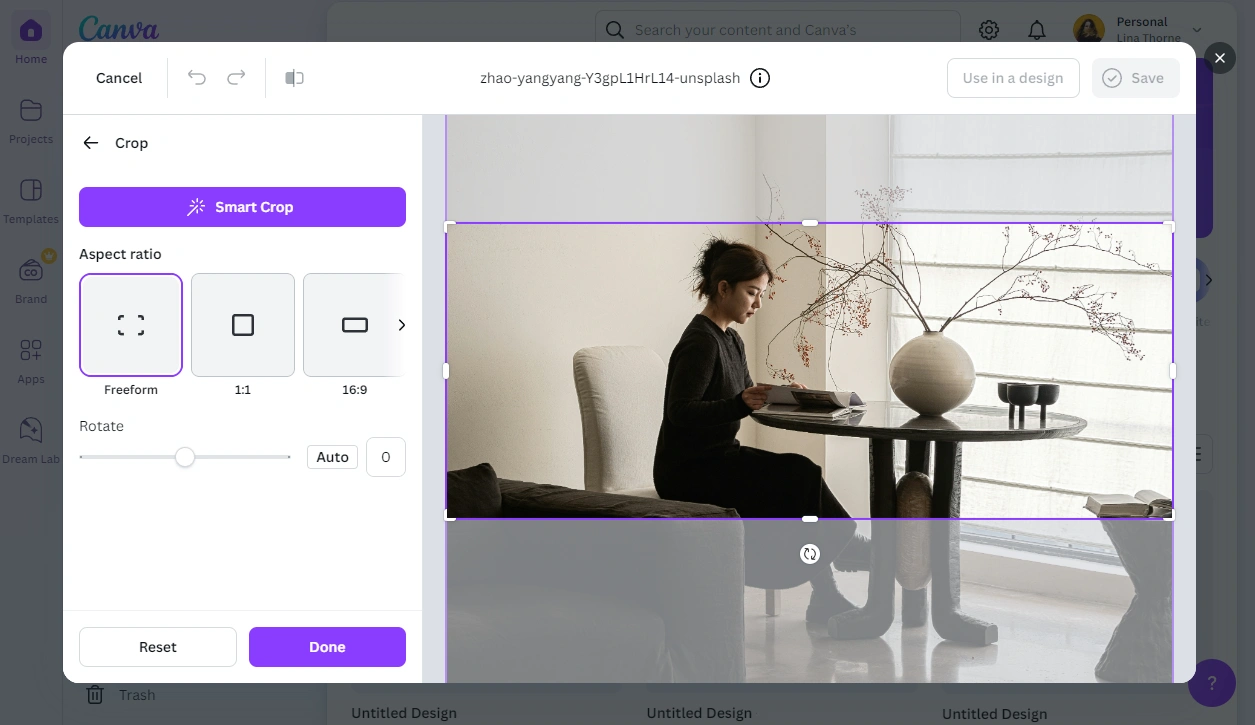
- Use the cursor to resize and reposition the cropping area.
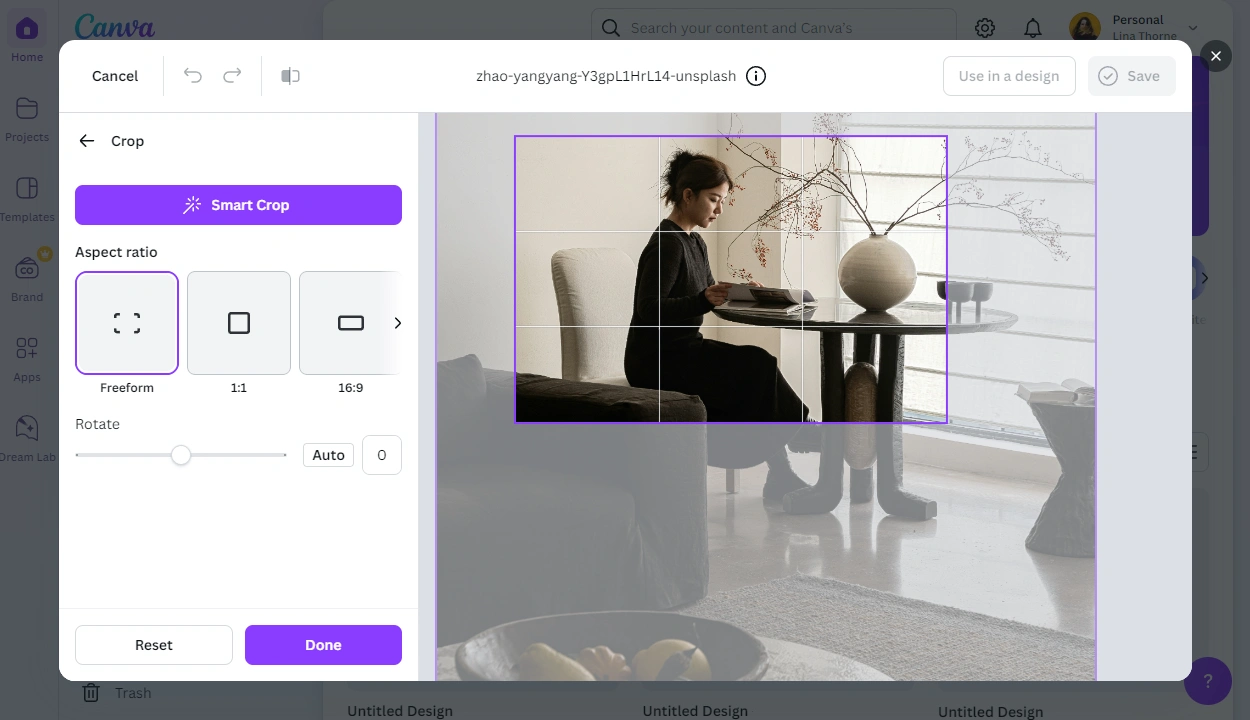
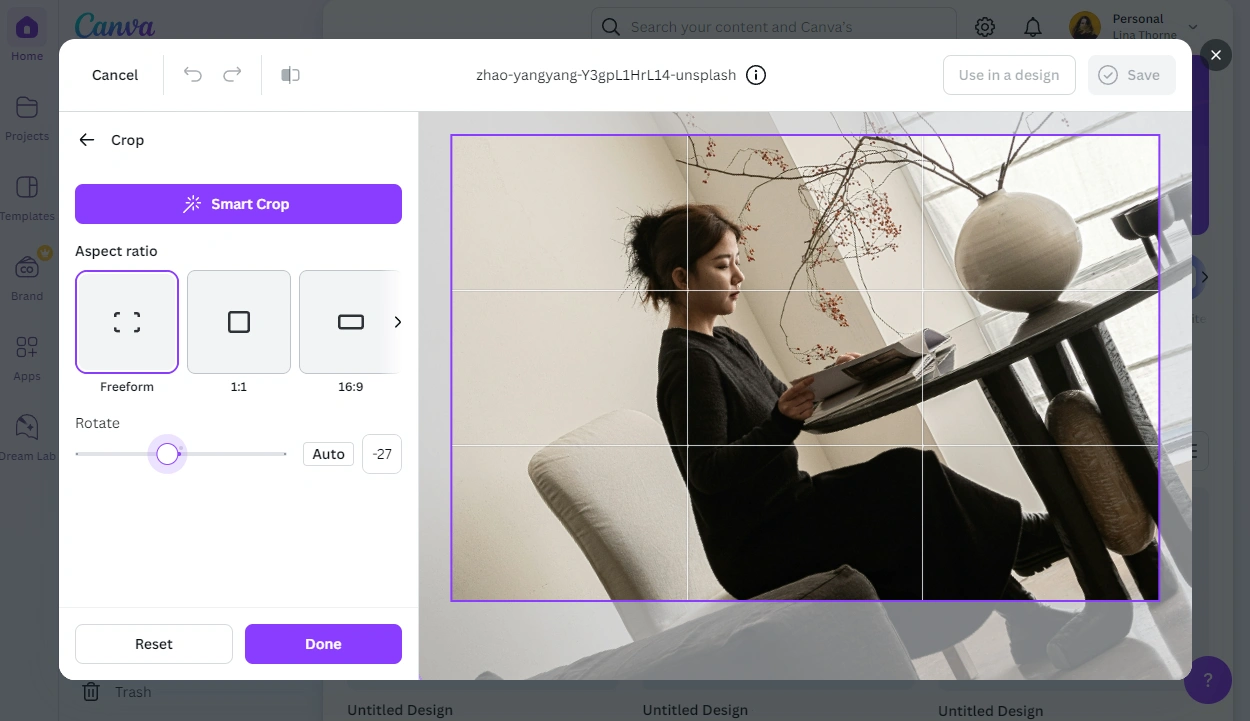
- Toggle the Rotate slider if the angle of rotation needs to be changed.
- When all the adjustments are made, click on the Done button.
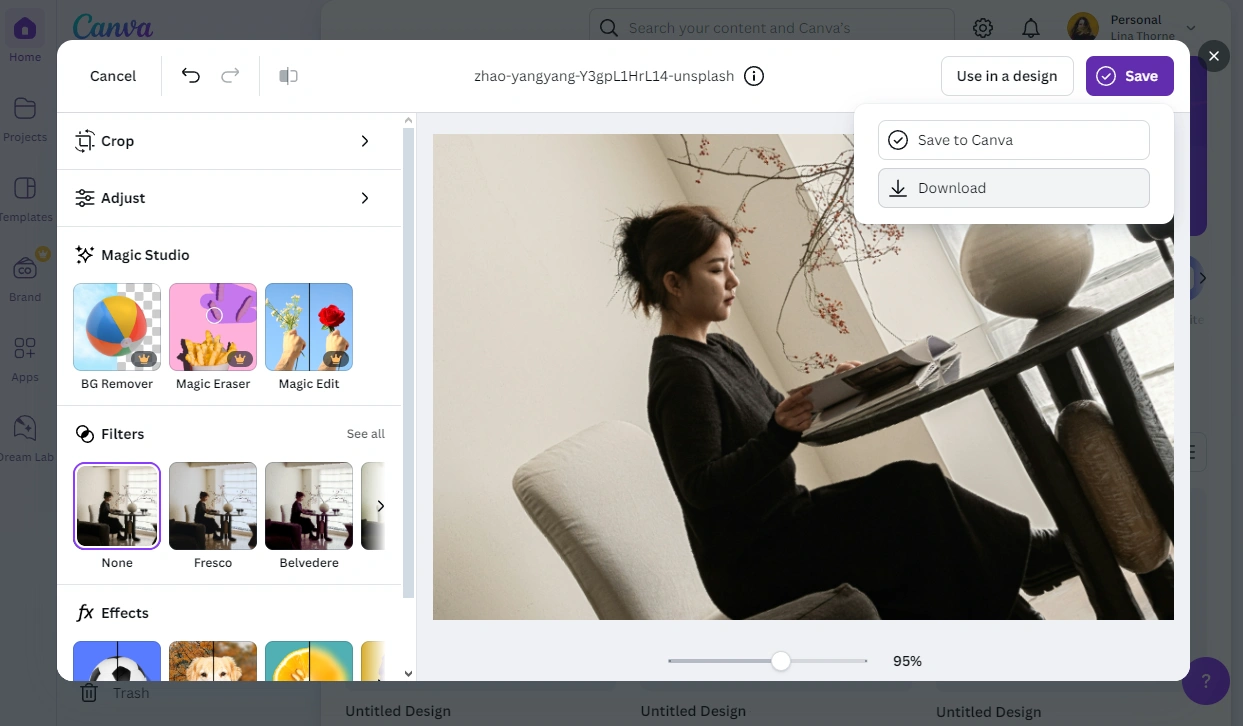
- Go to Save > Download and download your image, then close the editing window.
That’s it! The cropped copy of your image is now on your device. It’s a rather effortless way to crop an image within just a couple of minutes.
Please note, though, that this method cannot be used if your image is too big. After you upload it, there will be no “Edit image” button. Therefore, you will need to use another method from this guide.
How to Crop an Image For Social Media in Canva
What if you need to crop your image for social media? If that’s the case, changing its aspect ratio won’t be enough. You will also need to change its pixel dimensions so that it meets the necessary size requirements. Can this be done in Canva? Of course! This process will take a little longer, but it’s not too complicated or time-consuming.
Let’s take a look:
- Click on the “Create a design” button on Canva’s dashboard. Go to the Social media section and look for a template with pixel dimensions that you need.

- You can use the search bar to speed up the process. For instance, type in Pinterest.
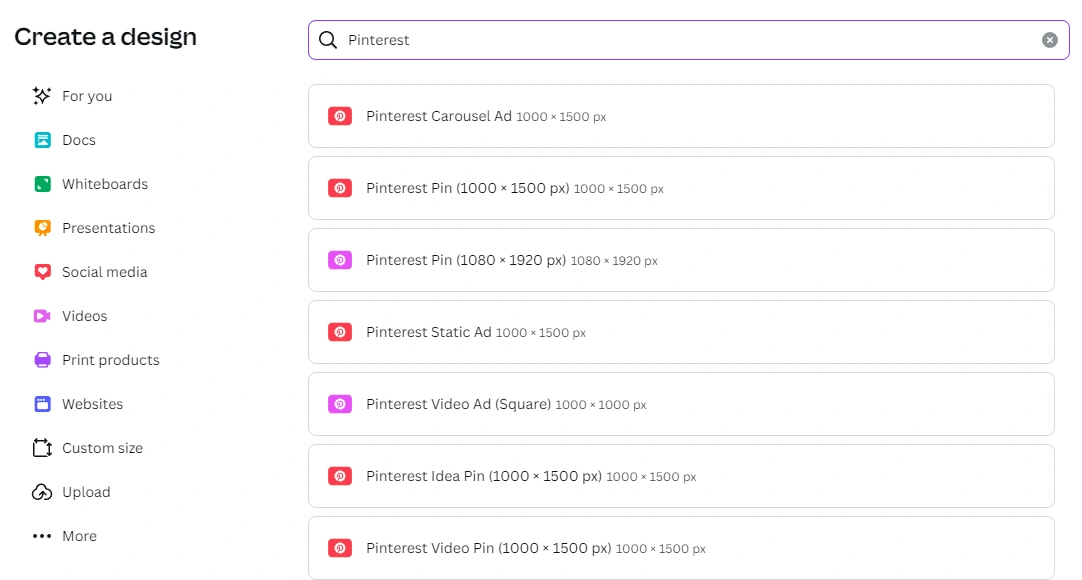
- Click on the required template once you found it.
- You will be taken to Canva’s editor. Your blank template will have the necessary pixel dimensions and aspect ratio.
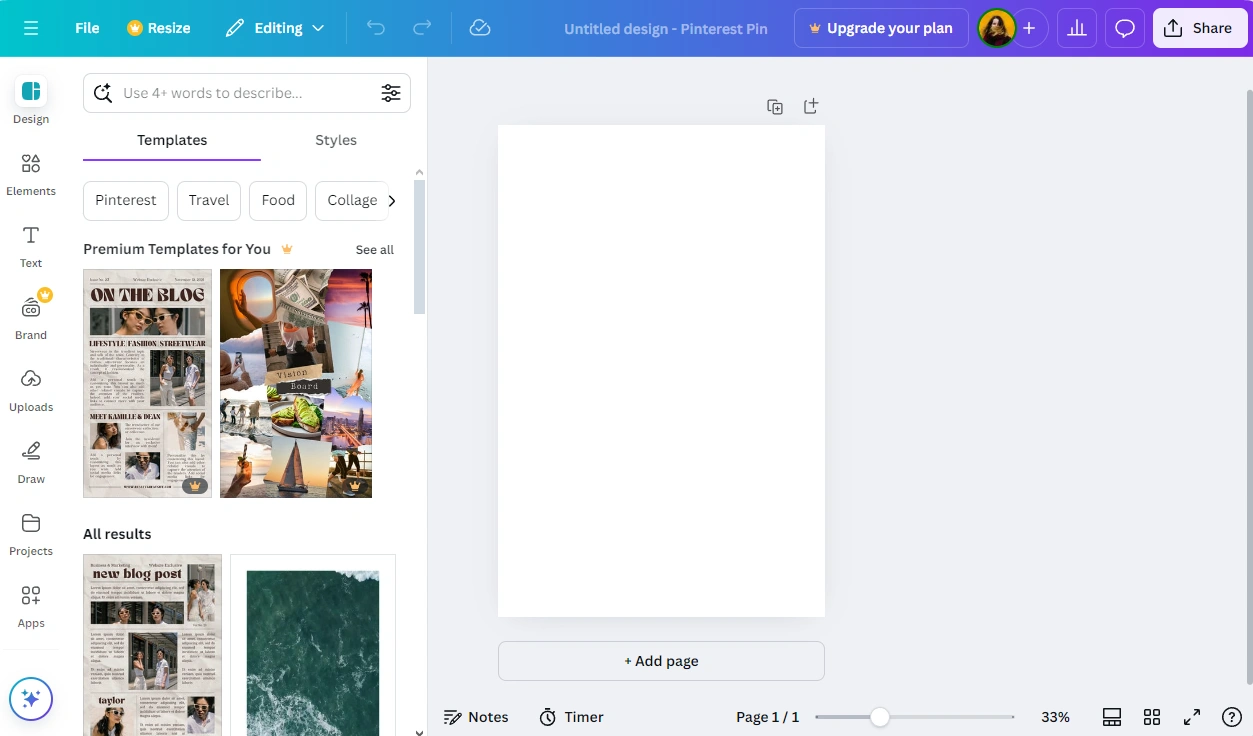
- Navigate to the Uploads section in the bar and import the necessary image.
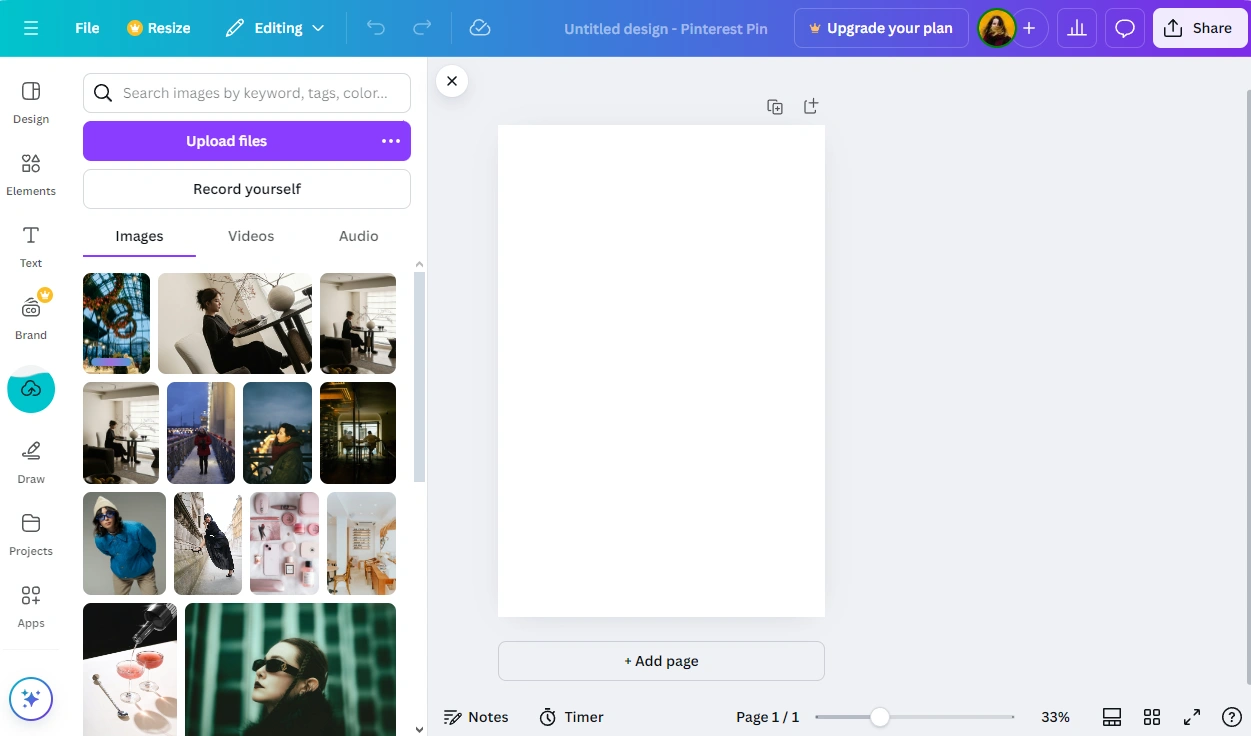
- To add your newly uploaded image to your blank template, click on it.

- Now, you need to make your image bigger, so that it covers the blank template entirely. Use your cursor for this.
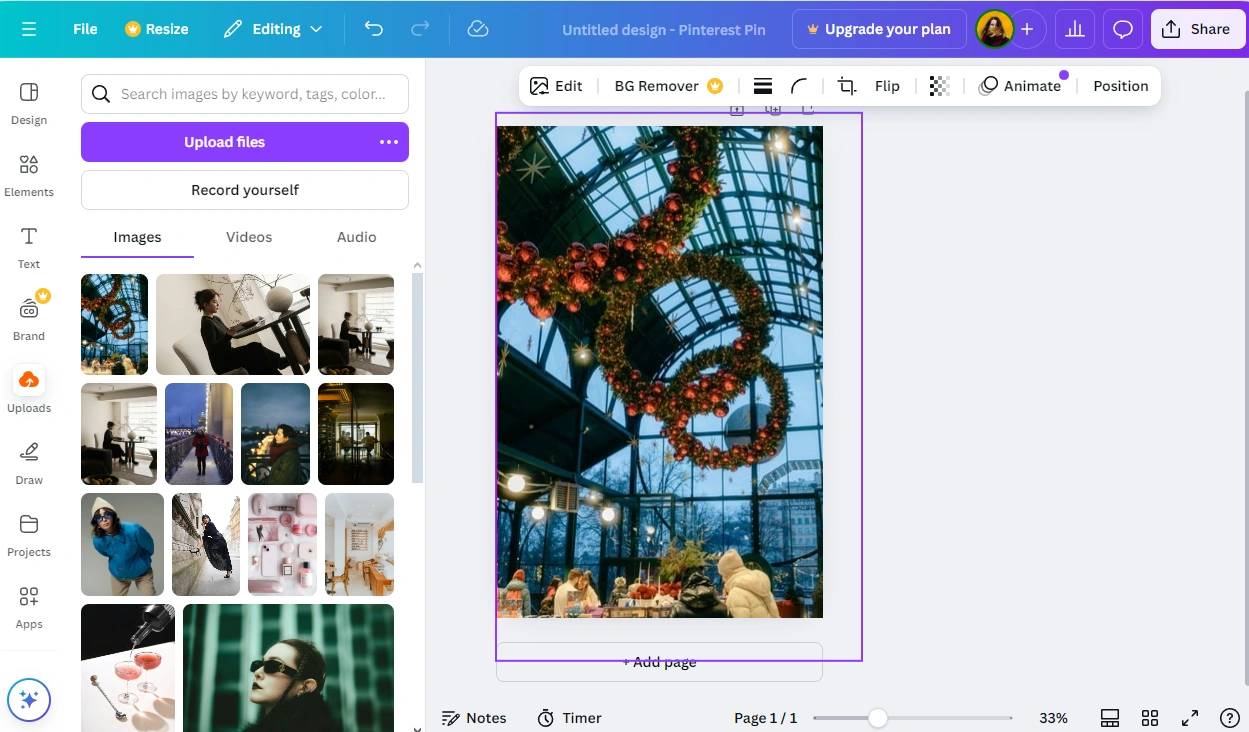
- Use the Rotation handles under the image to tilt it if necessary.
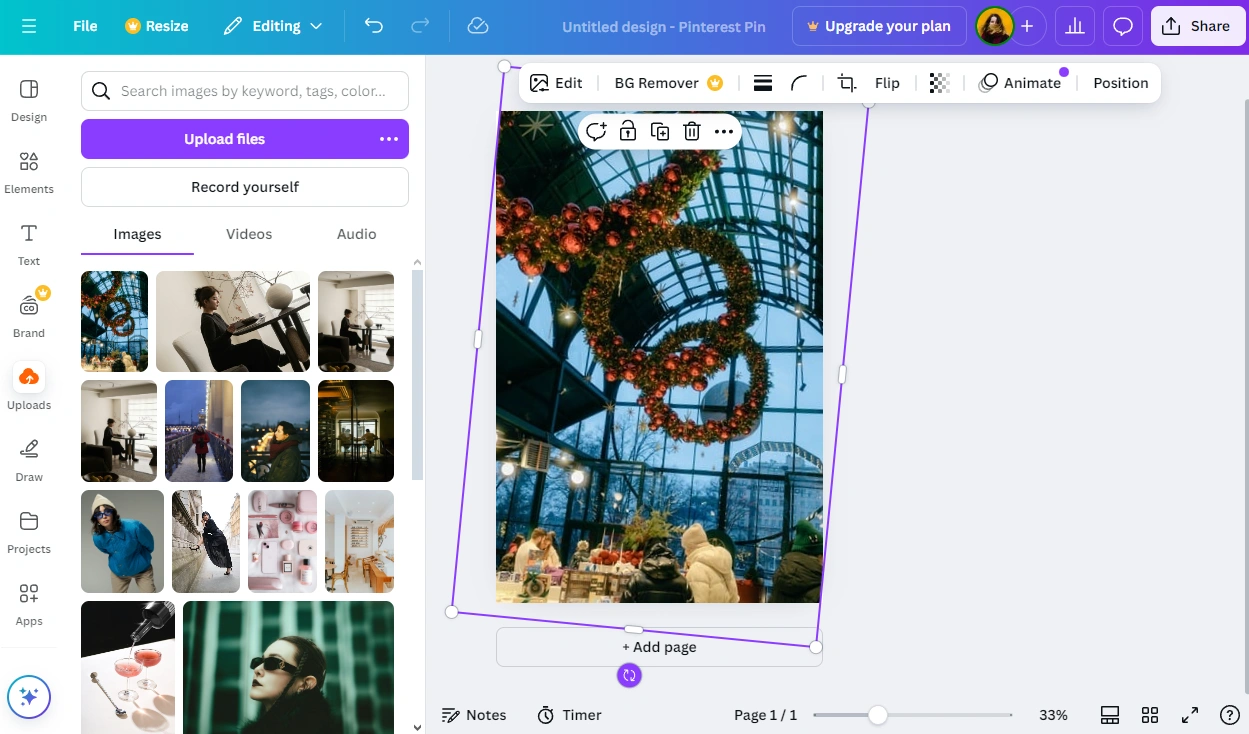
- If you need to make some adjustments to your image, click on Edit > Adjust. For instance, use the Brightness slider to make your image brighter.
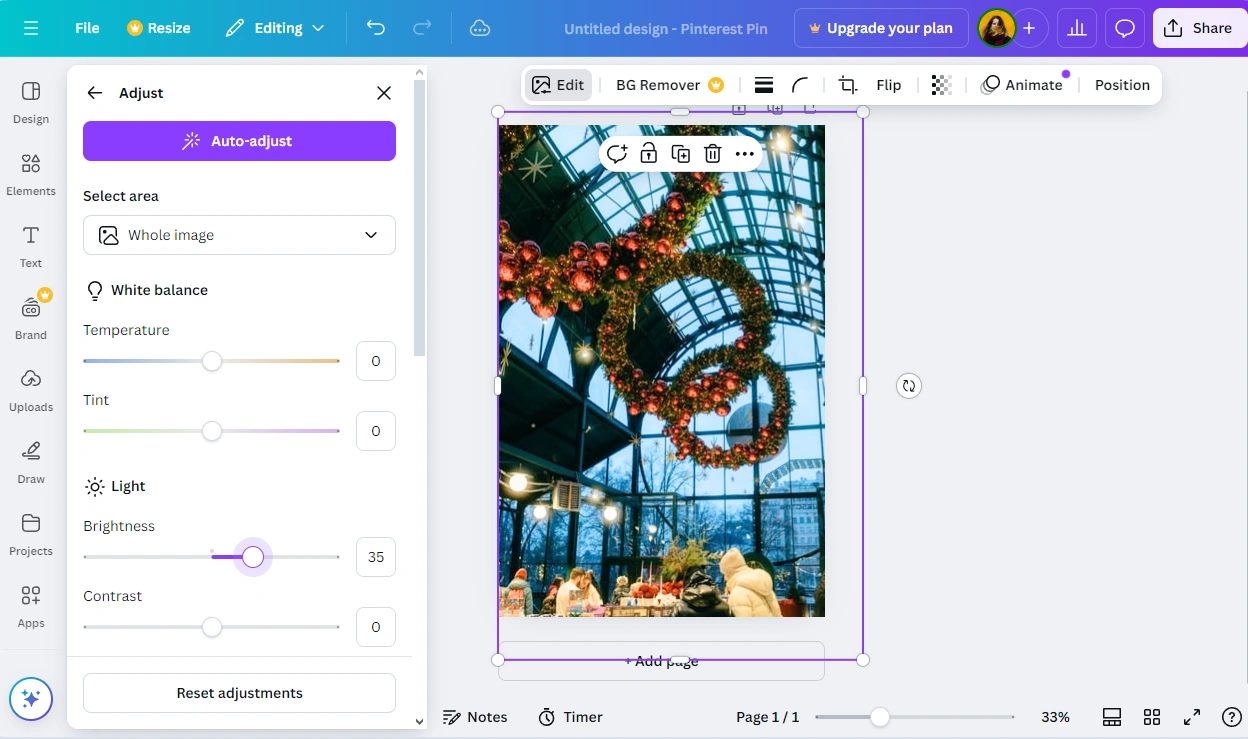
- When you’re ready to apply the changes, press Enter.
- You can actually share your cropped image right to your social media account without downloading it. Click on the See All button to view all the options in the Share menu.

- Then select the necessary option.

- But if you want to download your cropped image first, select the Download option. Make sure that the JPG format is selected as most social media platforms prefer it. Please note that you will be able to set the desired quality only if you have Canva Pro.
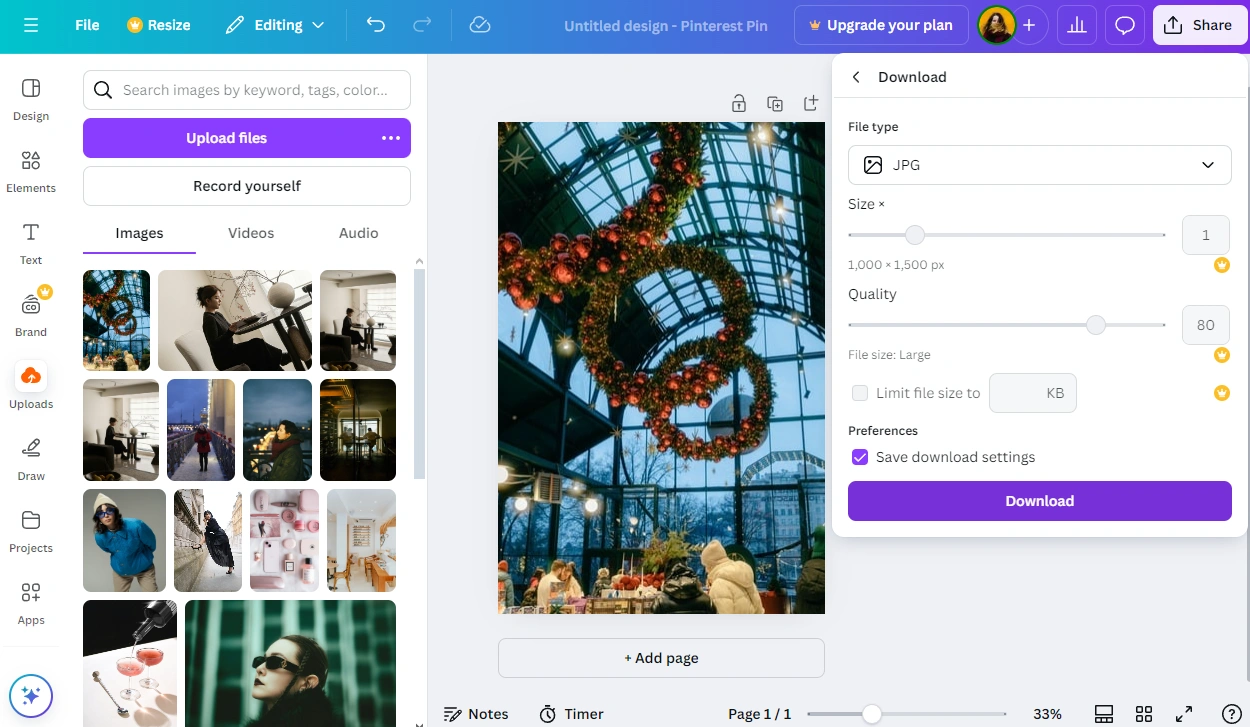
That’s it! Now, you’ve changed not only the aspect ratio, but pixel dimensions, as well.
There’s a downside, though. If you want to crop the same image for a different social media platforms, you will need to repeat the whole process from the beginning – pick a different template on the Canva’s Dashboard, then adjust the size and placement of your image. It’s not particularly time-efficient.
How to Crop an Image in Canva And Use It in a Design
Let’s say that you’ve created a design – for instance, a thumbnail for your next YouTube video – and you want to import an image, then crop it.
Here’s what you’ll need to do:
- In Canva’s editor, open the necessary design.
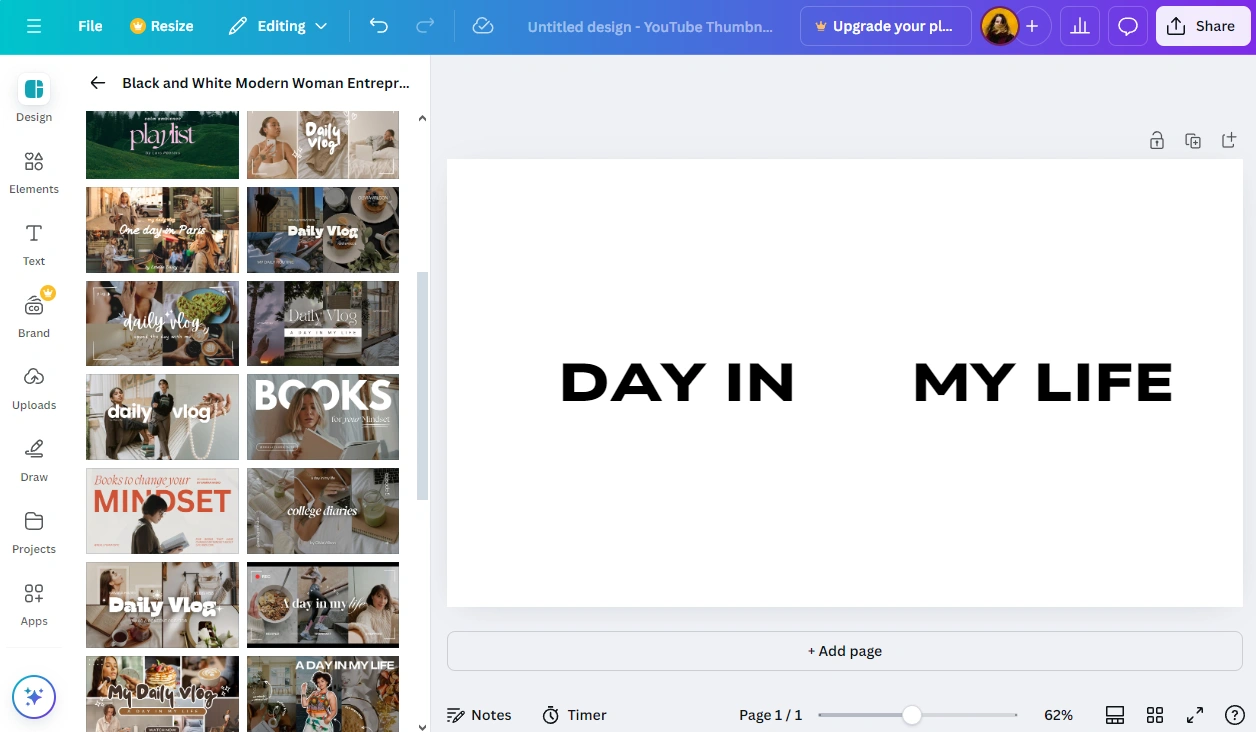
- Go to the Uploads section and import your image, then add it to your design.
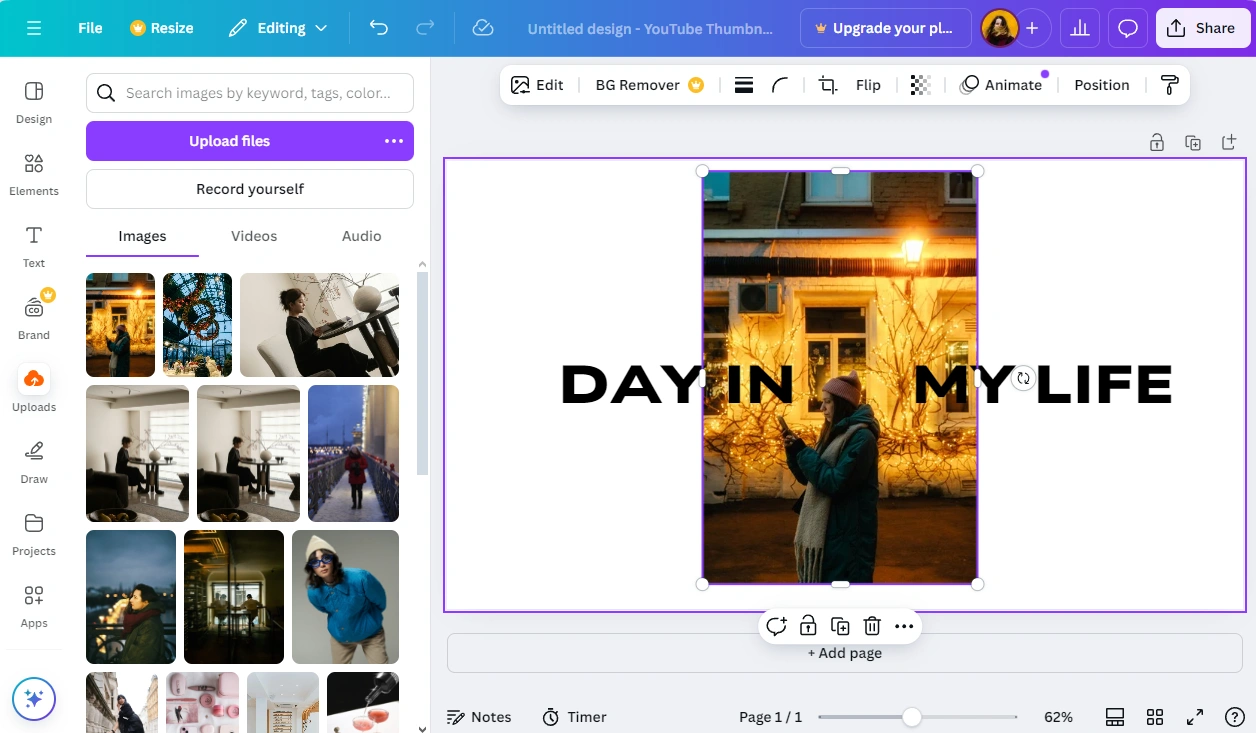
- Next, choose the Crop option in the Canva’s bar at the top. It’s shown only when your image is selected. Alternatively, you can simply double-click on the image – this will also open the Crop section.
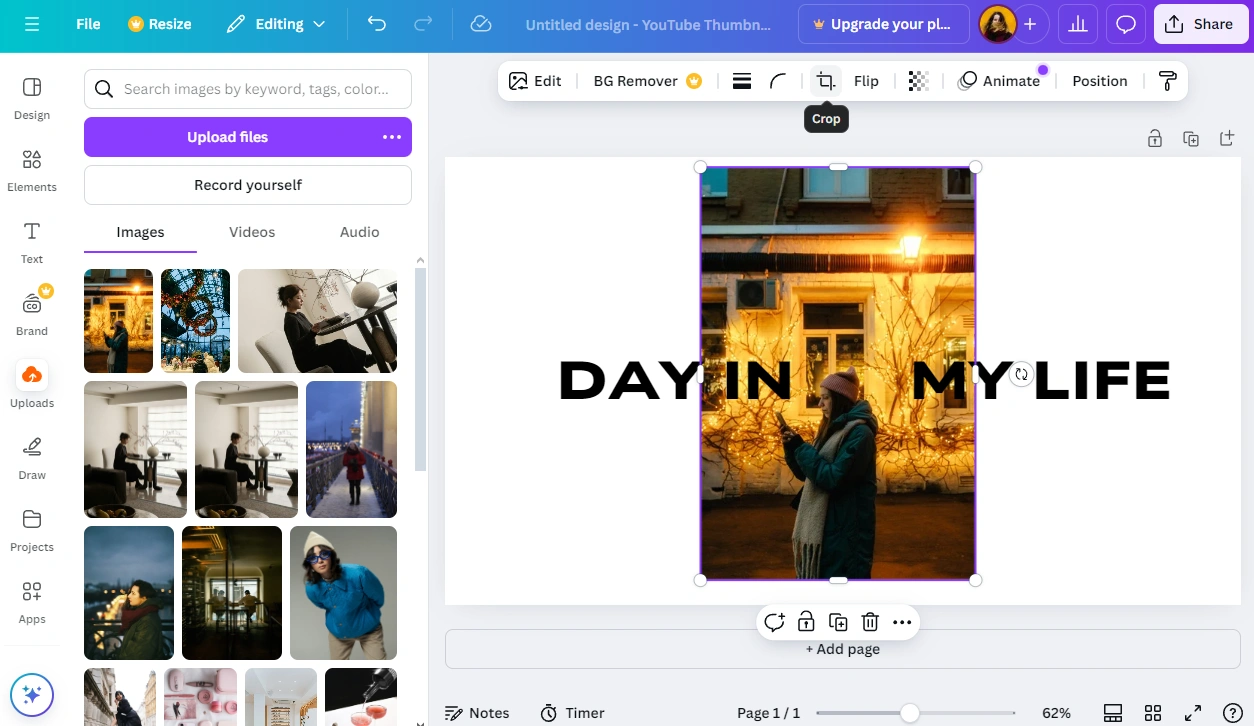
- Adjust the size and placement of your image. You can pick one of the available aspect ratios or crop an image however you want.
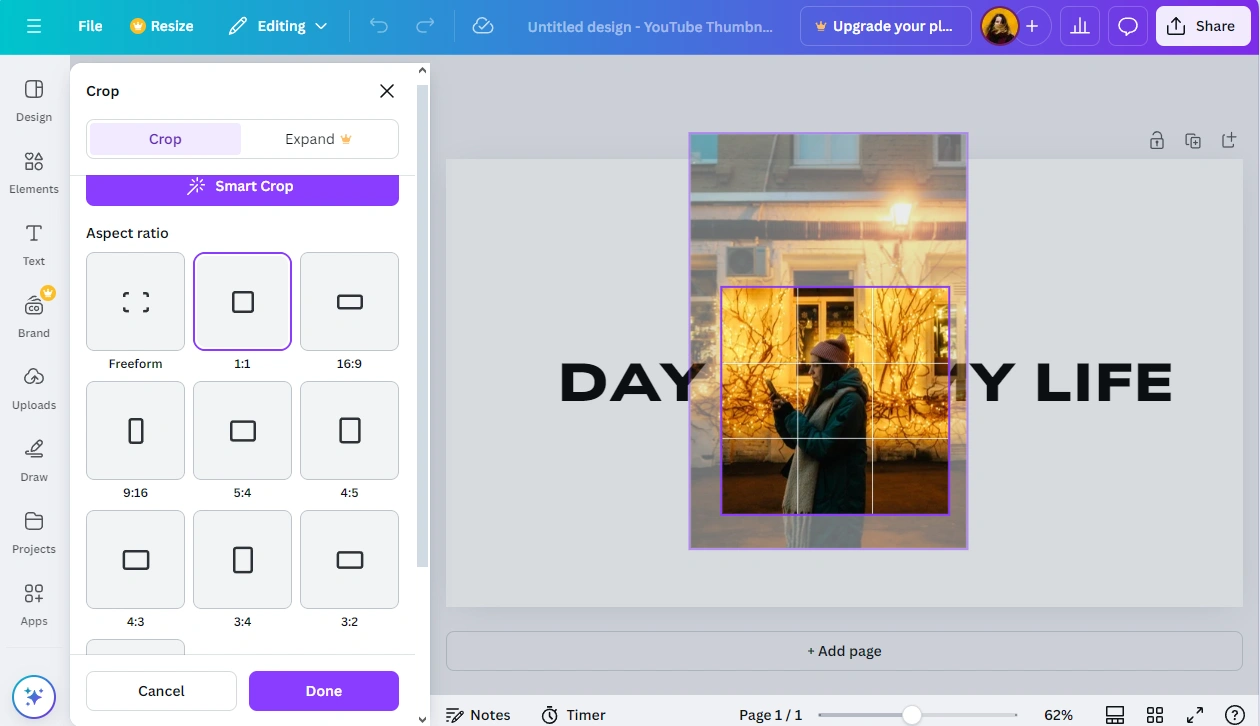
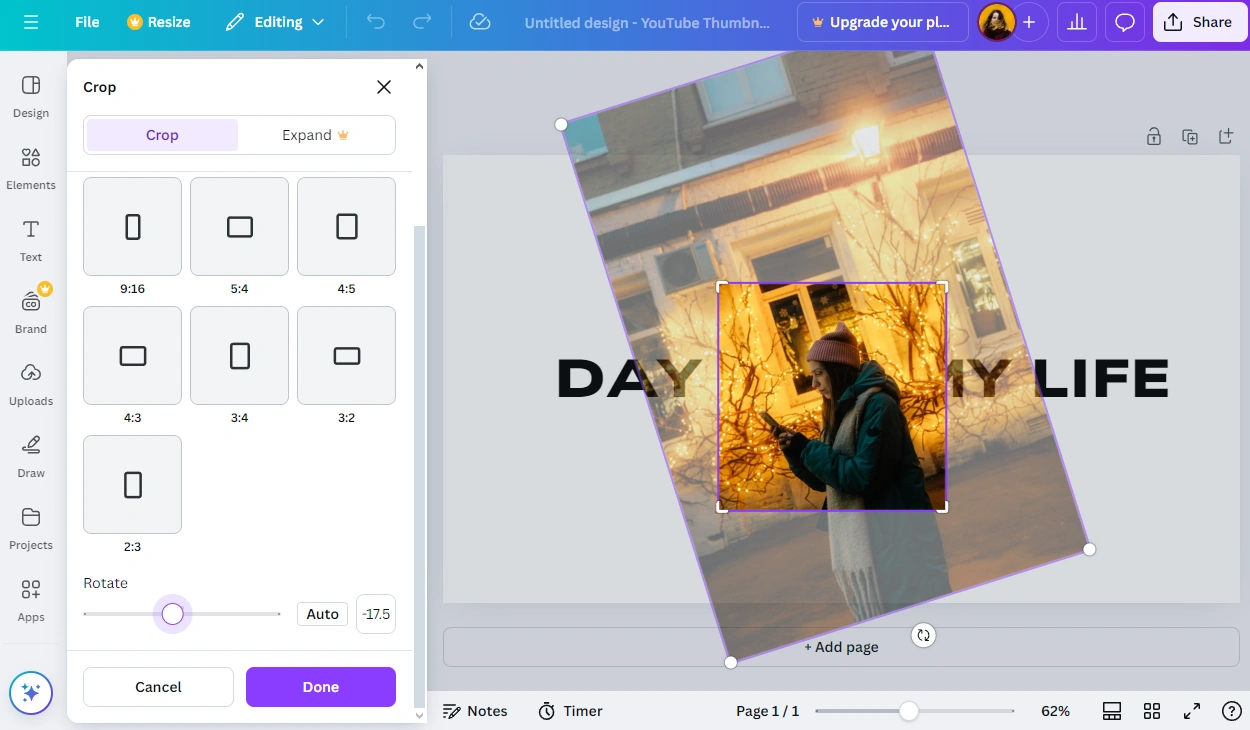
- Make use of the Rotate slider if necessary.
- If you click on the Smart Crop button, Canva will analyze your image and determine what the most visually pleasing composition for it will be. This feature can be convenient, but unfortunately, it doesn’t always provide good results and usually sticks to the original aspect ratio.
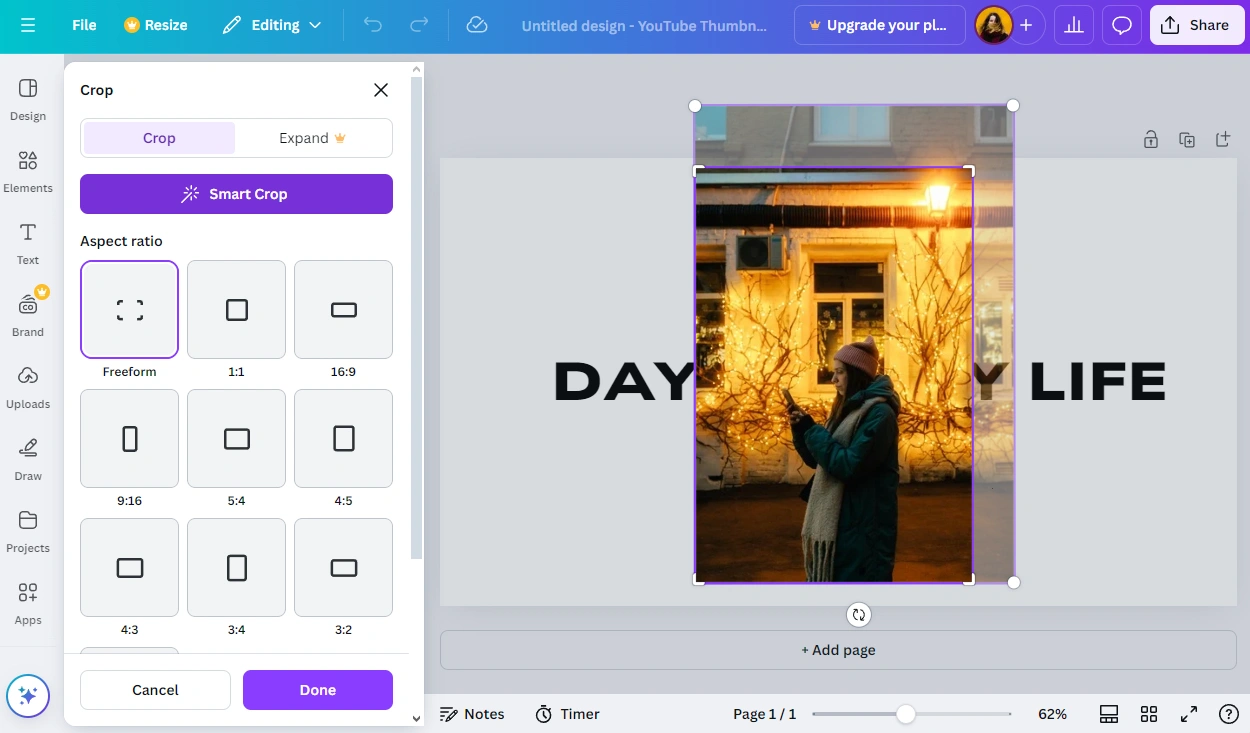
- Press Enter and all the changes will be applied to your image.
All done! You have a cropped image in your Canva’s design!
How to Crop into a Circle or Any Other Shape in Canva
What if you want to crop an image into a circle to use for a profile picture? Or maybe you’re creating a fun presentation for your friends and want to crop some images into various shapes? You can do all that in Canva! In fact, Canva offers a stunning selection of shapes.
Just follow these steps:
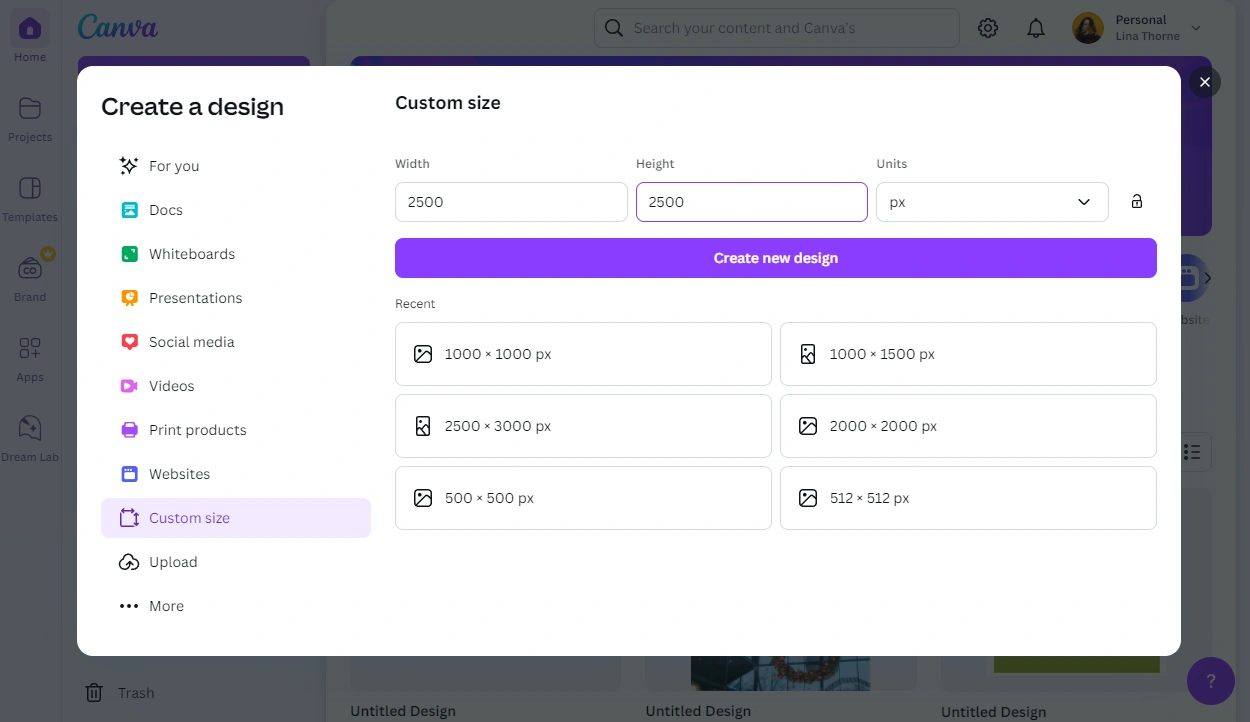
- After you click on Create a design, pick the Custom size option and enter your pixel dimensions. Please note that if you want to crop an image into a circle, it would be better for your template to be a square. So, you will need to enter something like 2500 x 2500px.
- Once the editor is open, upload the necessary image and add it to the blank canvas.

- Switch to the Elements sections, then type in your key word in the search bar and press Enter. For example, it can be “Circle” or “Star”.
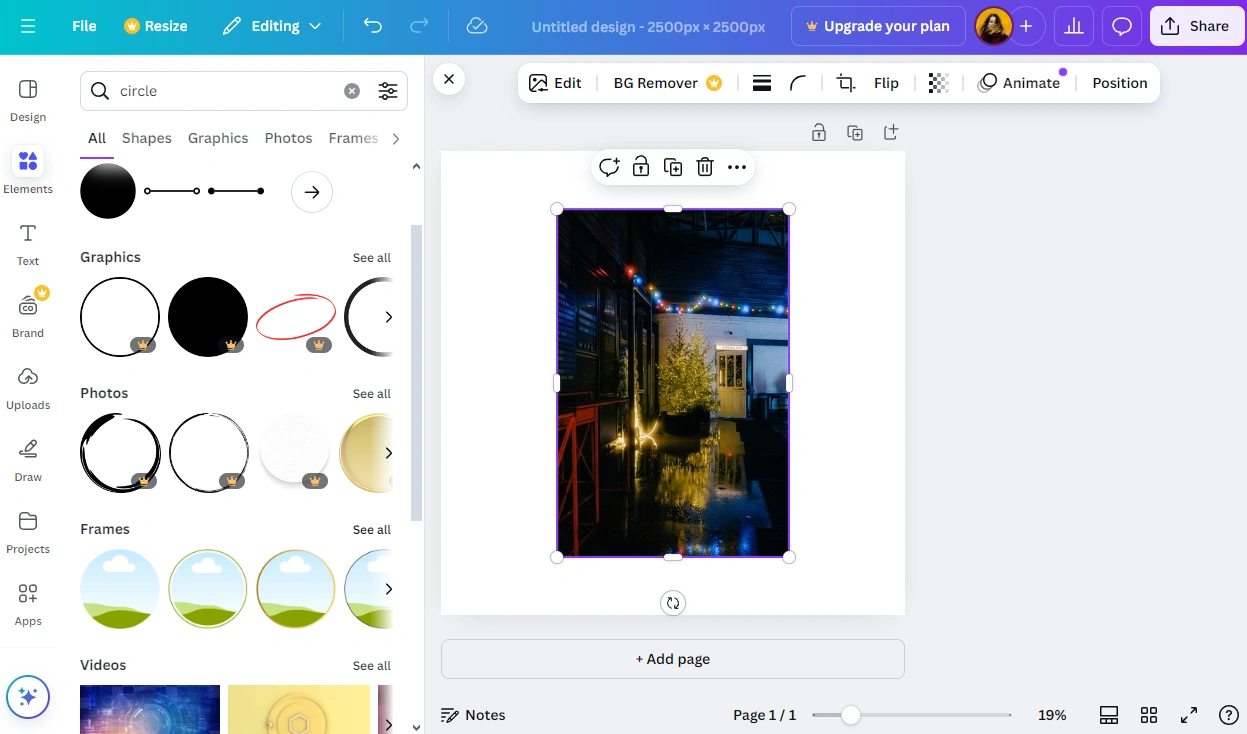
- Go to the Frames section.
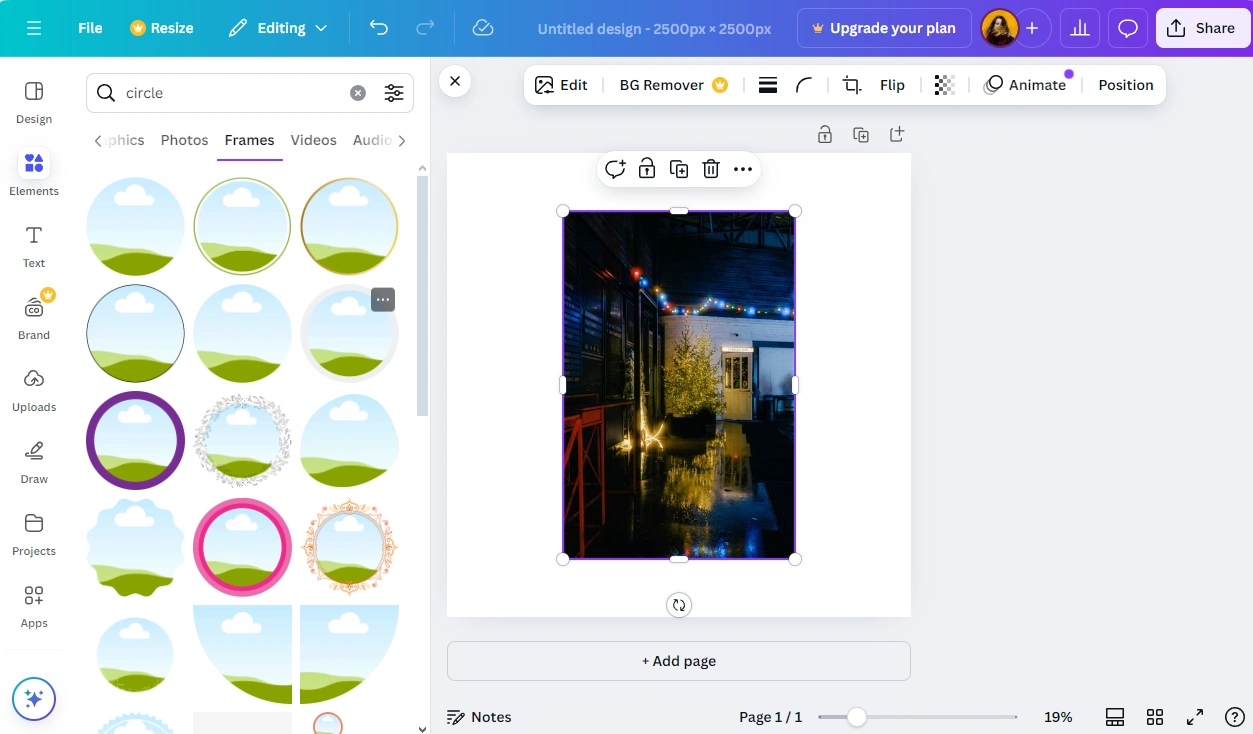
- Pick the necessary frame and add it to the canvas by clicking on it.
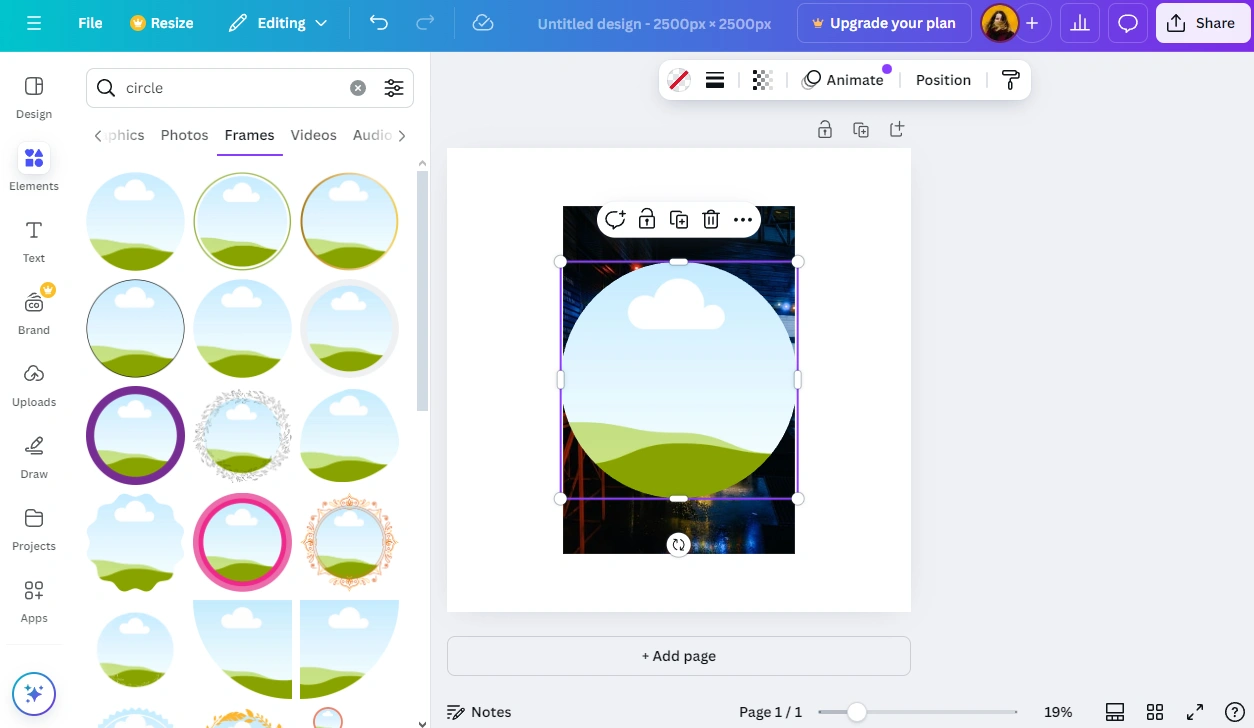
- Select and drag the image into the frame using the cursor. Your image will instantly take the shape of the frame.
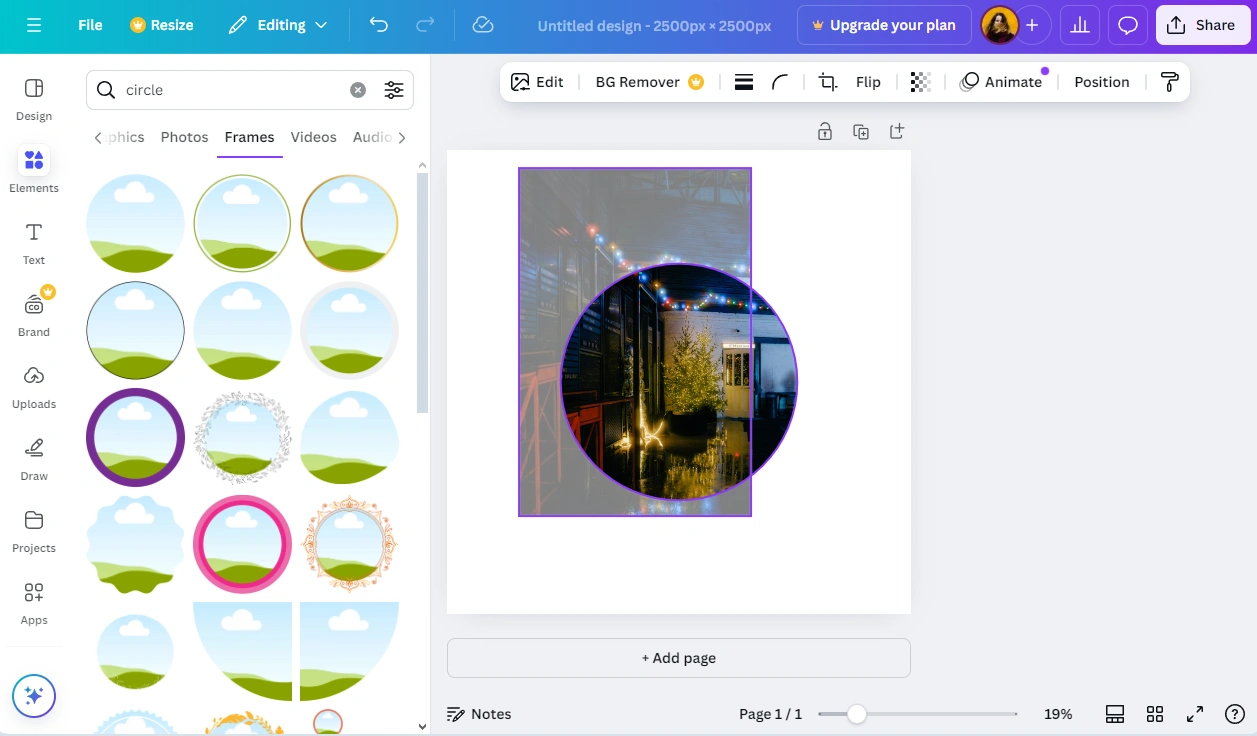
- Do you need to change the size or position of the image inside the frame? Double-click on the image, then make the necessary adjustments.
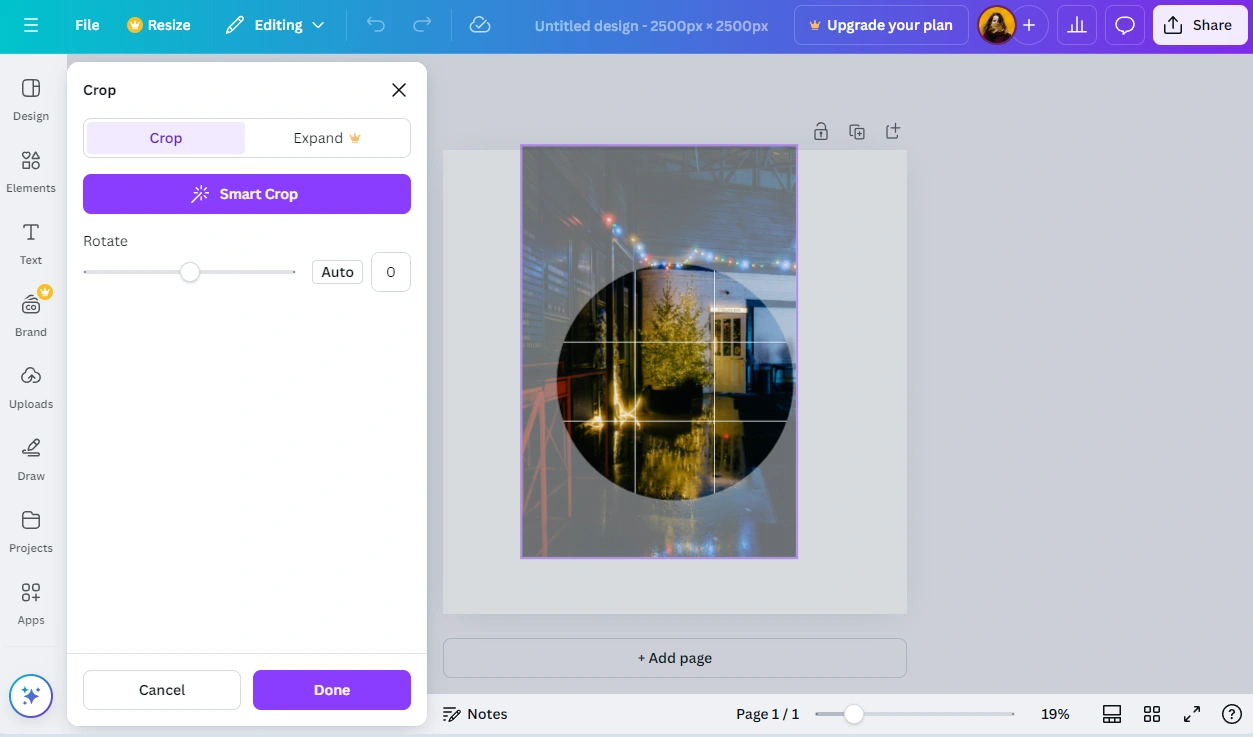
- Click on Done. The changes will be applied.
- Use the cursor to reposition and resize the frame itself.
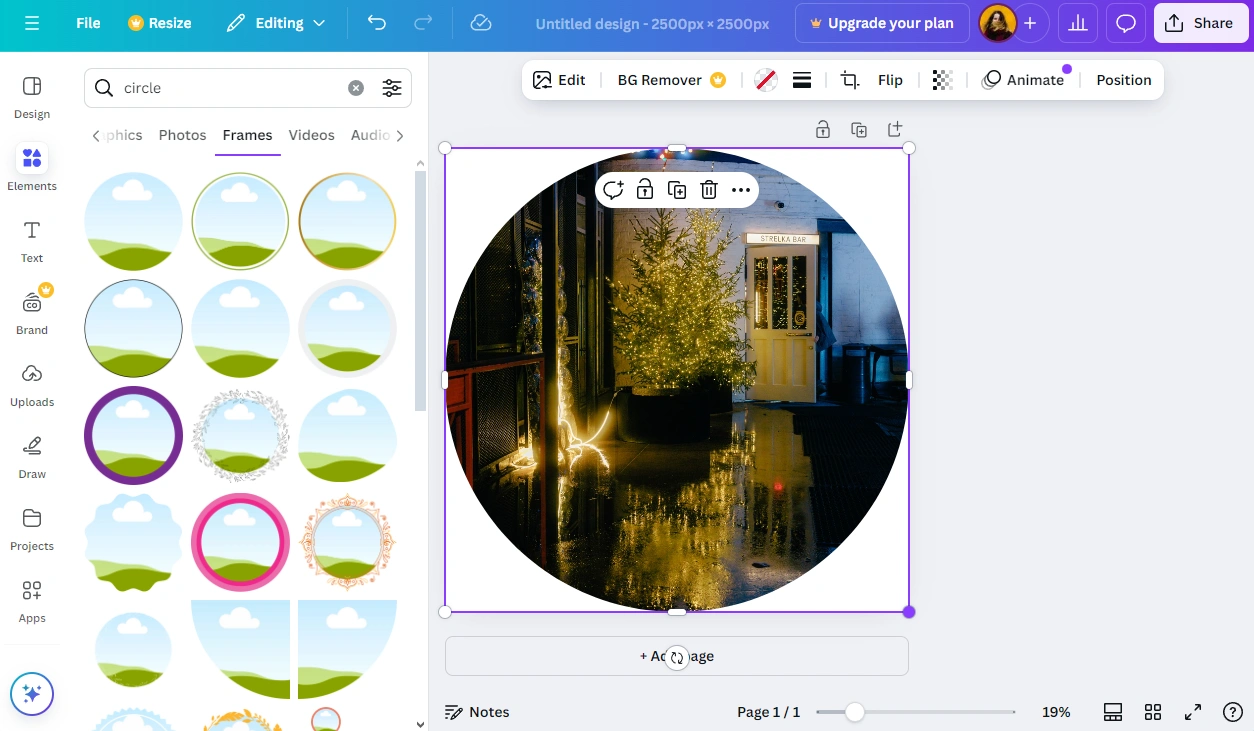
- To export your image, navigate to Share > Download.
And now you know how to crop an image into a shape in Canva!
However, there’s something you need to be aware of. You may not know this, but your image will still be a square or a rectangle even if you crop it into a shape. Your cropped image will simply be on a white background. For the background to be invisible, it should be transparent. The PNG format supports transparency, while JPG does not.
But here’s a catch!
Transparent background is available only in Canva Pro. So, even if you export your cropped image as a PNG, it will still have a visible white background. So, if you want to avoid this, you might need to get the paid version of Canva.
How to Crop Multiple Images in Canva
Finally, let’s see how you can crop several images in Canva. This process is pretty straightforward:
- Click on Create a design, then enter a custom size or select a template.
- Import your images in the Uploads section.
- In the editor click on the Add Page button at the bottom. This will duplicate your blank canvas.
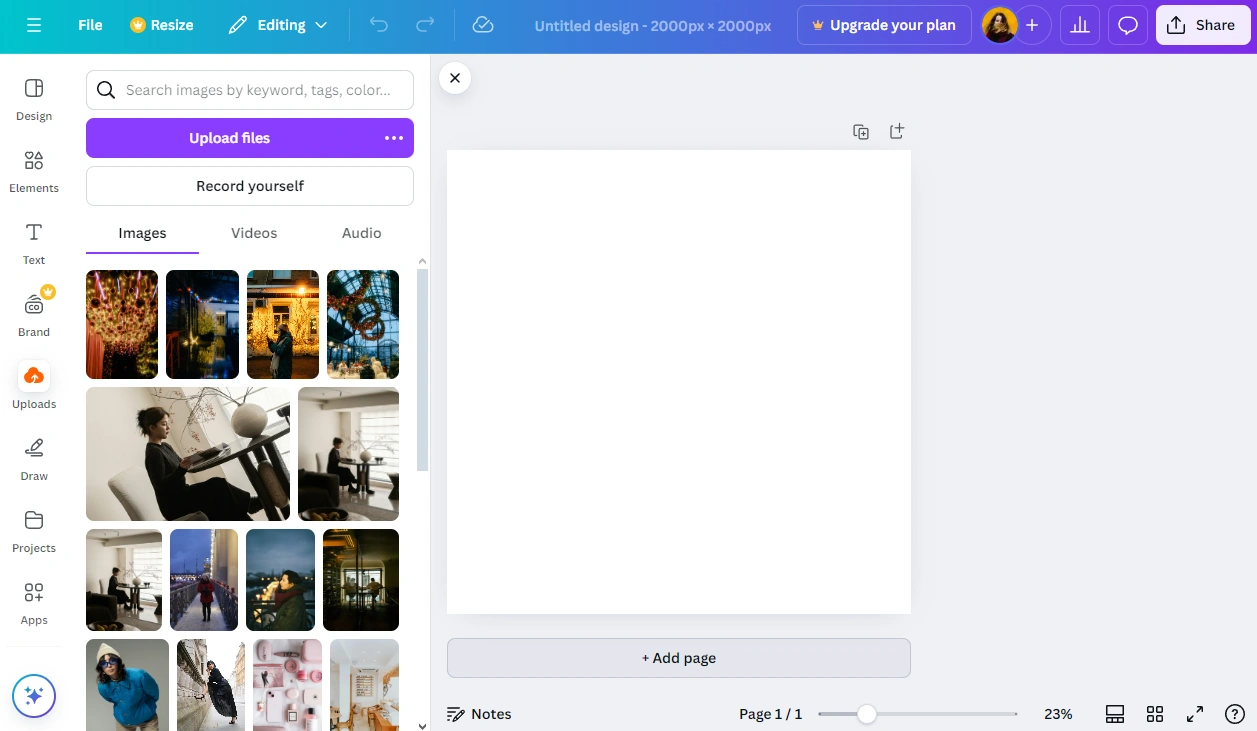
- Make as many copies as necessary.
- Add one of the images to the first canvas, then enlarge the image so that it covers the canvas entirely. Adjust the position of the image.

- Do the same with the rest of the images.

- Click on the Share button in the top right corner, then choose Download. Make sure that the All Pages option is selected.

All that’s left to do is download a zip file with your cropped images!
The downside of this method is that your cropped images will have the same pixel dimensions and aspect ratio. Since you basically create copies of your initial canvas, there’s no way to change the image size or aspect ratio of these copies. Also, if you want to crop a batch of images into a square, you will be able to crop some of them into a circle. But if you choose a different aspect ratio, there will be too much space around the circle cropped image in Canva, which can be an issue.
Visual Watermark vs Canva
Now that we’ve taken a look at all the different ways to crop an image in Canva, you know that this process is pretty quick and straightforward. If you need to crop only a couple of images, that is. But when it comes to cropping a batch of images or cropping into a circle, things get a bit tricky. So, if you are looking for a more effortless way to achieve these results, there’s one – you can use Visual Watermark’s image cropper.
Visual Watermark is a website where you can find different tools for basic image editing:
- watermark photos, watermark videos, watermark PDFs
- add text to photo, add logo to photo, add logo to video
- blur part of an image
- compress photo, and more.
Let’s take a look at the key differences between Canva and Visual Watermark:
Local Processing vs. Cloud-Based Operation
Canva and Visual Watermark work in a browser. Both of them can operate on any device that’s connected to the Internet. However, Canva is a cloud-based platform, therefore your files will be uploaded to their servers. Whereas, when you use Visual Watermark, the whole process takes place right in your browser. Which means, your files will never leave your device. They won’t be uploaded to any servers. In addition to all this, you won’t have to create an account on Visual Watermark’s website, whereas it’s not possible to use Canva without signing up and signing in.
Non-Destructive Editing with Automatic Copy Creation
There are no empty canvases or new pages in Visual Watermark. You simply upload images, edit the cropping area on each image separately, then export your cropped copies. Yep, Visual Watermark never changes the original files – all the settings are applied to copies that are created automatically.
Flexible Batch Cropping with Customizable Presets
Visual Watermark supports batch-processing, therefore, you will be able to crop a batch of images in one go. Moreover, you will be able to crop multiple images differently. For instance, you will be able to crop the first image into a square, crop your second image to 4:5 aspect ratio, then switch to the circle shape and crop the third image into a circle.
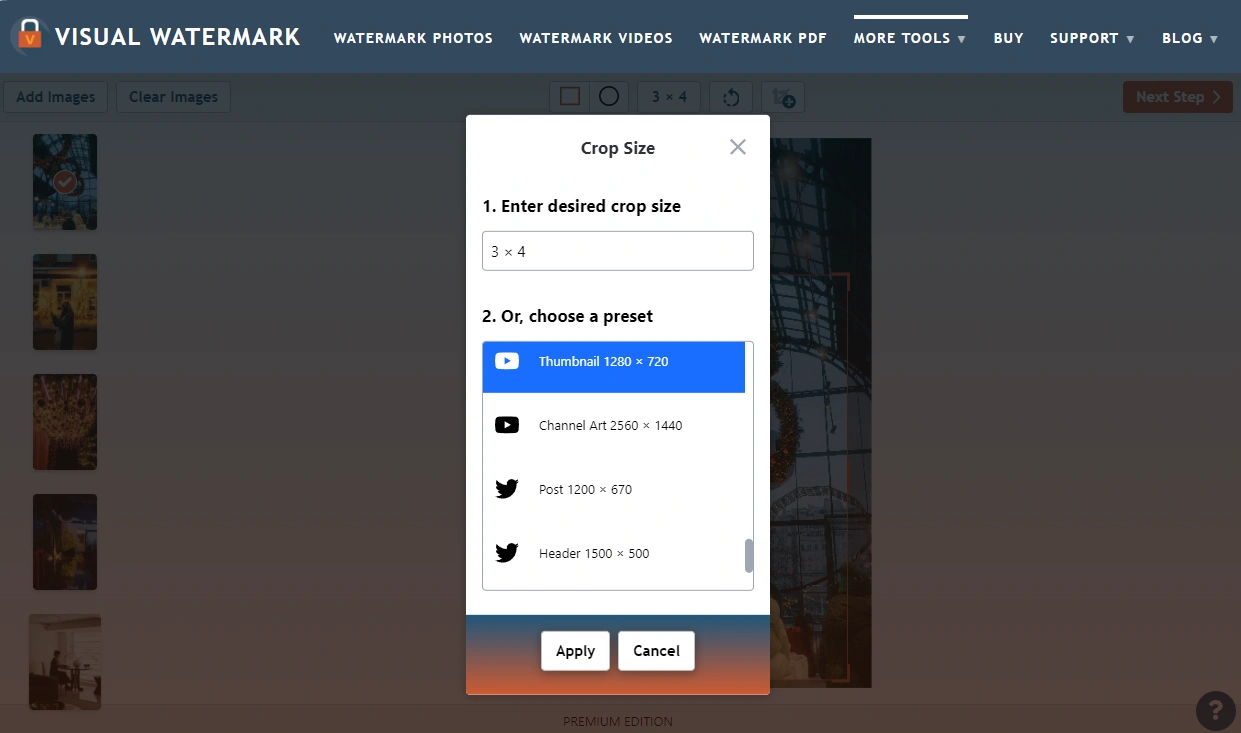
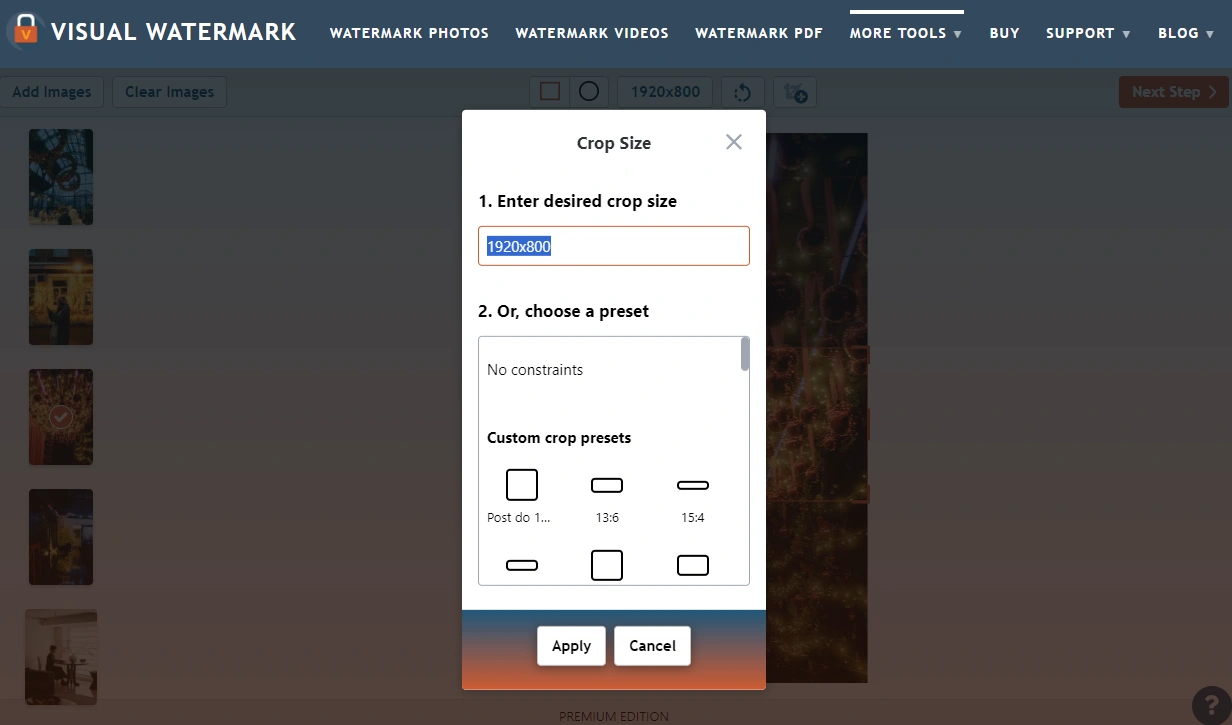
In Visual Watermark you can do freeform cropping or pick one of the ready-made presets for social media or with popular aspect ratios. Here, you can also enter your own aspect ratio or pixel dimensions. You can pick different presets for different images in one batch – you won’t have to start over! The process of cropping multiple images is much more convenient and time-efficient in Visual Watermark.
But Visual Watermark only allows you to crop into a circle, square or rectangle. If you need a broader selection of shapes – say, you want to crop your image into the shape of a star – then you will need to use Canva.

Duplicate and Crop for Multiple Platforms
It’s much easier to crop one and the same image for different online platforms in Visual Watermark. Just click on the Add Crop button at the top and your selected image will be duplicated. Then you will be able to pick a different preset for this copied version.
Free Access to High-Quality Exports and Transparent Backgrounds
Visual Watermark and Canva can be used for free, but there’s also a paid version. Canva Pro offers quite a lot of amazing features – you will be able to choose the quality of your exported images as well as make the background transparent.
Fortunately, both of these things are available in Visual Watermark for free. That’s right! If you choose to crop images into a circle, you will simply need to select PNG in the File Format menu. The background will be transparent by default. And you will also be able to choose the necessary quality for your images. No matter whether you’re using a free or paid version. The only limitation is the number of images that you will be able to process – the free version allows you to crop up to 10 images per day.
Of course, Visual Watermark isn’t a stand-in for Canva. You can actually use Canva to create stunning designs from scratch as well as edit images themselves. It’s kind of like Adobe Photoshop, but slightly easier.
Visual Watermark, on the other hand, is a website that offers simple tools that can make basic image editing quicker and more convenient; especially if you need to process lots of files in one go.
Therefore, if you want to get incredible results as well as optimize your workflow and save some of your precious time, you should consider using both Visual Watermark and Canva.
Final Words
If you need a full-blown image editor that works online, Canva should definitely be your choice. You will have everything you need to create some show-stopping designs for social media, your work or personal purposes. You can easily use Canva to crop an image to a certain aspect ratio or crop an image into a shape. Hopefully, now you know how to do all that thanks to the detailed instructions in this guide.
No matter how incredible Canva is, though, it might pose some challenges when cropping multiple images. Visual Watermark’s image cropper has some advantages in this regard. But you don’t really need to choose between these two. The best solution would be to use both! With the help of Visual Watermark, you will be able to crop your images quickly, then use the time saved for creating something new and amazing in Canva!
 Visual Watermark
 by
by 