Lightroom Classic is a popular, powerful, yet rather simple software for editing photos. If you’re wondering whether you can watermark your images there, without jumping into Photoshop, you’ll be glad to know that the answer is yes. It is possible. In fact, it doesn’t take much time or effort, and you can add a watermark in Lightroom to as many photos as you want.
Let’s see how you can watermark photos in Lightroom Classic.
Add Watermark in Lightroom Step-by-Step
Once the software is open, you need to create your watermark. No matter what module you are in – Library, Develop or any other – go to “Edit” > “Edit Watermarks” (Windows) or Lightroom Classic > Edit Watermarks (macOS).
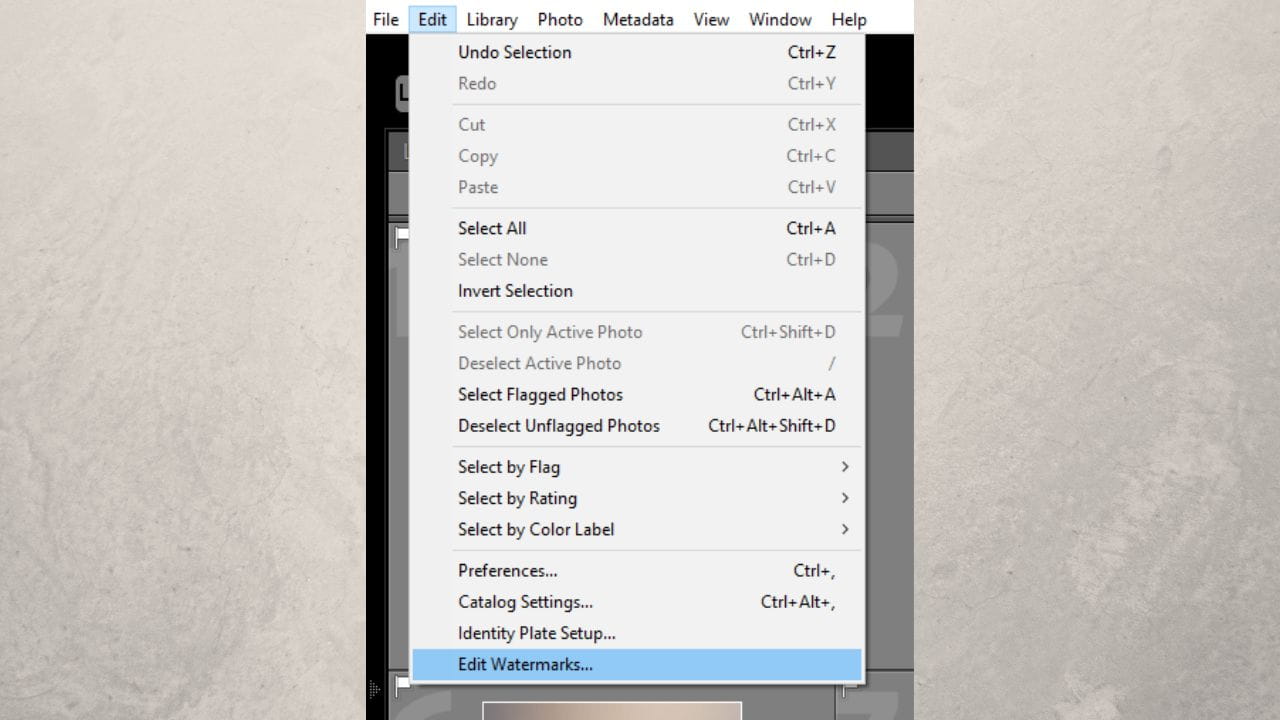
This will open the Watermark Editor window.
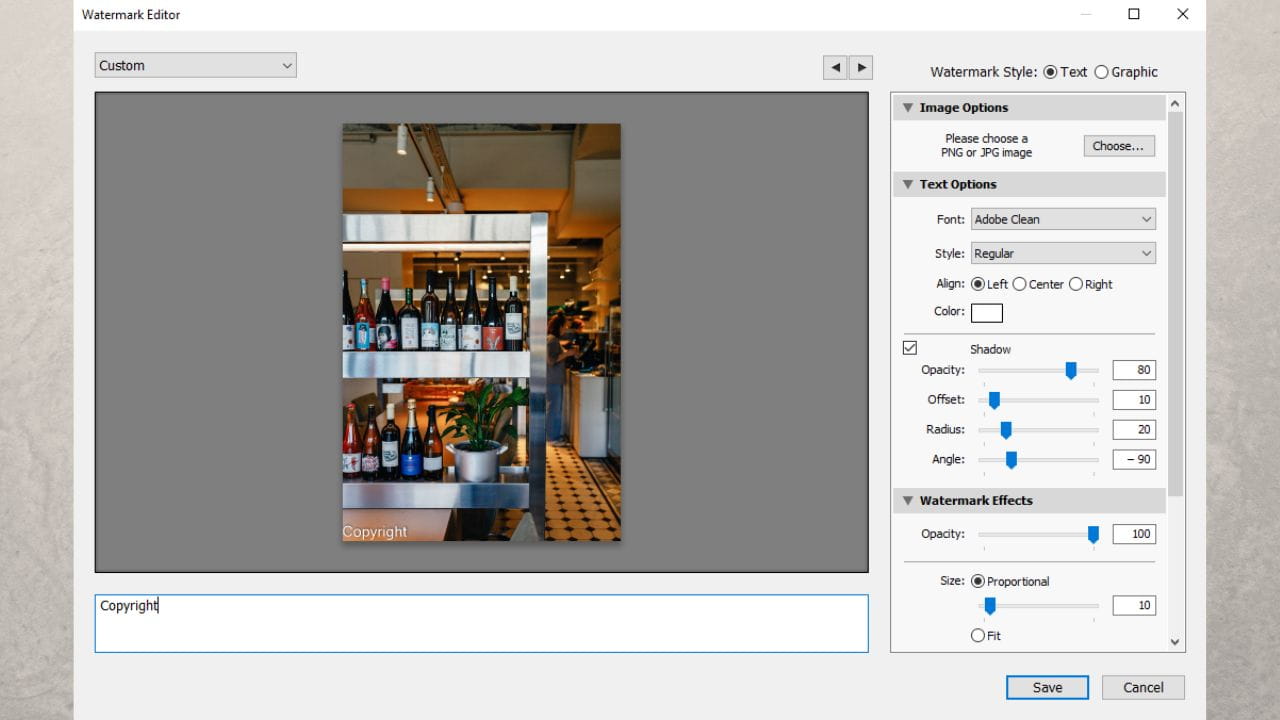
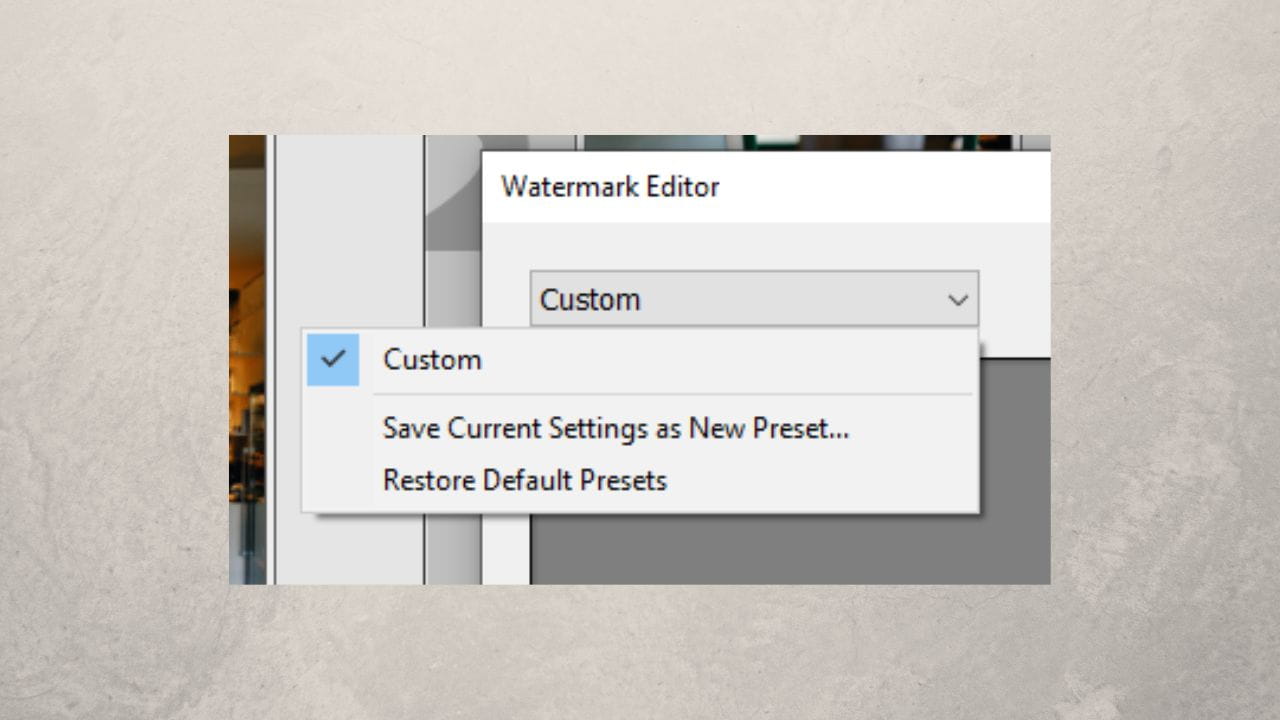
In the upper left corner, there’s a drop down menu that consists of three options – “Custom” , “Save Current Settings as a new preset” and “Restore Default Presets”. Keep it on “Custom”.
Now, you need to choose the Watermark Style. Select “Text” if you want a textual watermark. Select “Graphic” if you have a logo that you’ve created or that has been designed for you. You can also click on “Choose” in the Image Options section to upload your logo file – Lightroom will automatically switch to “Graphic”.
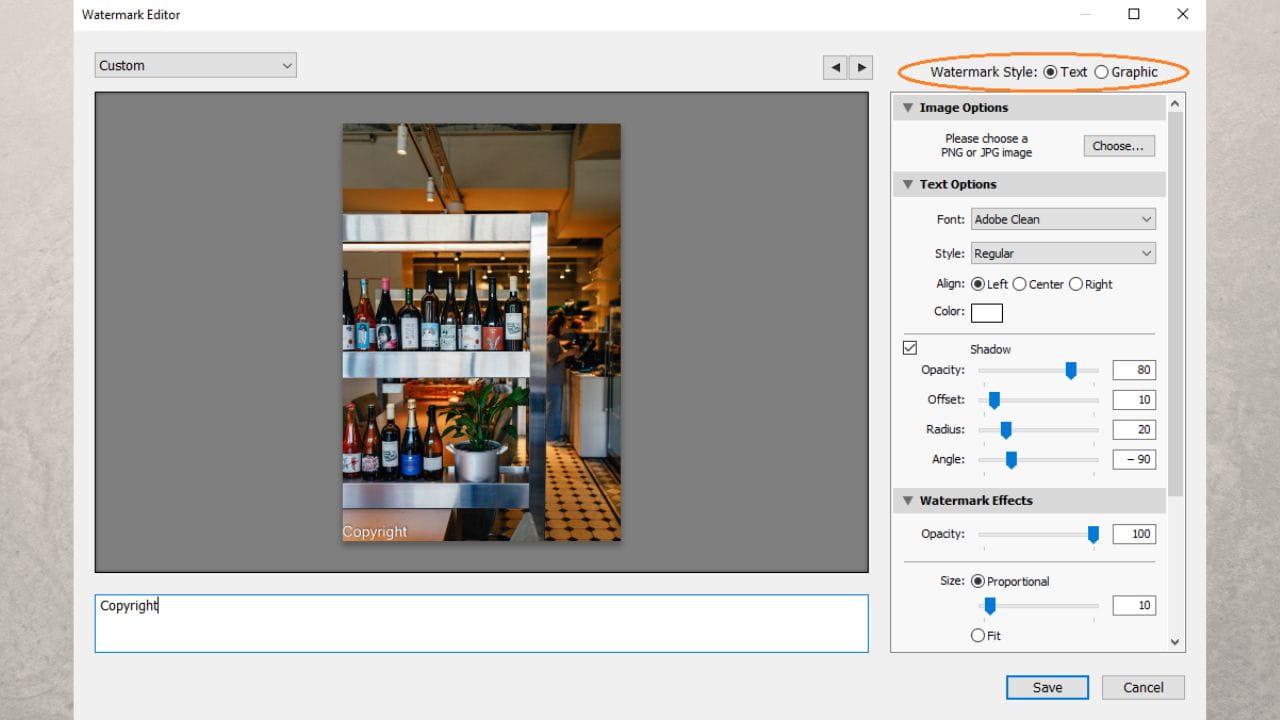
An important thing to note is that in Lightroom, you have to choose between a textual watermark and a logo to add to photo. It’s impossible to add both. It means that if you upload a logo file, the textual watermark will be automatically disabled.
If you selected several photos before opening the Watermark Editor, you can use the arrows above the preview to see how your watermark looks on other images. But if only one photo is currently selected, then clicking on the arrows won’t do anything. You can learn how to select several photos in Lightroom further down in this post.
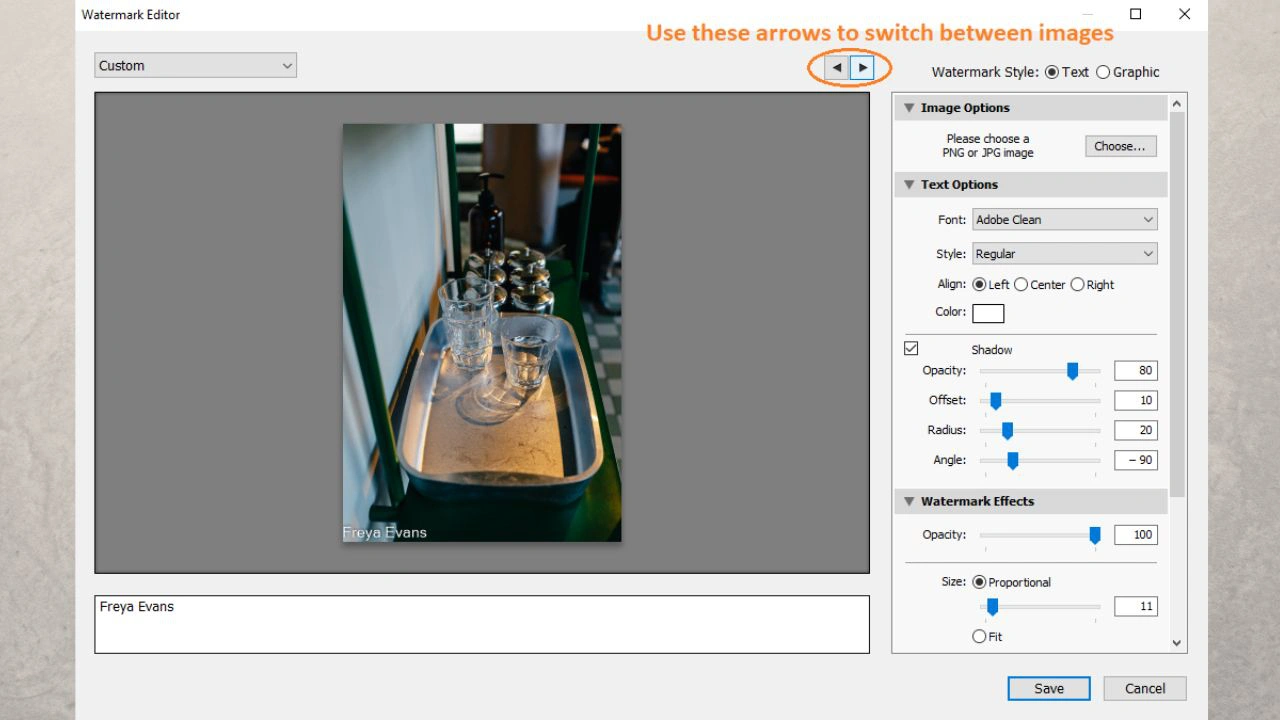
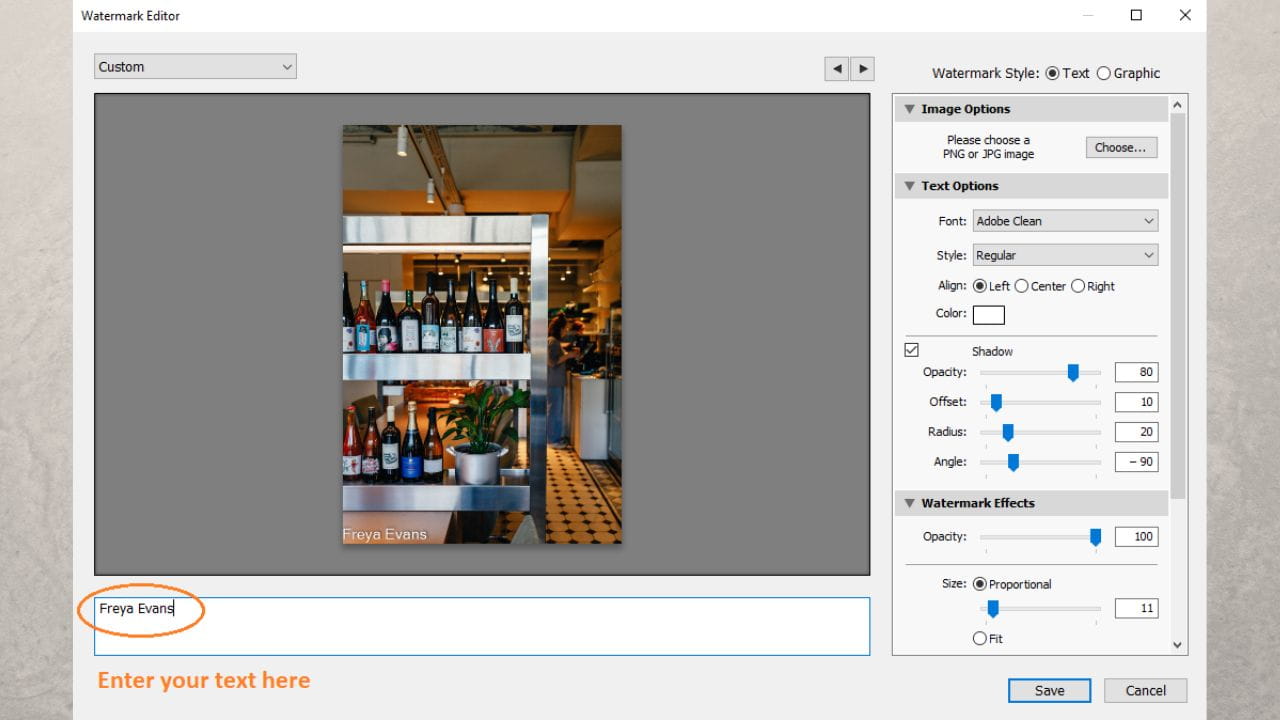
If you choose “Text”, you need to enter whatever text you want in the input area under the preview. You can type in the name of your brand, social media handle or your website address, for instance.
The right side of the Watermark Editor is occupied by the editing toolkit. The “Text Options” section allows you to edit the text itself.
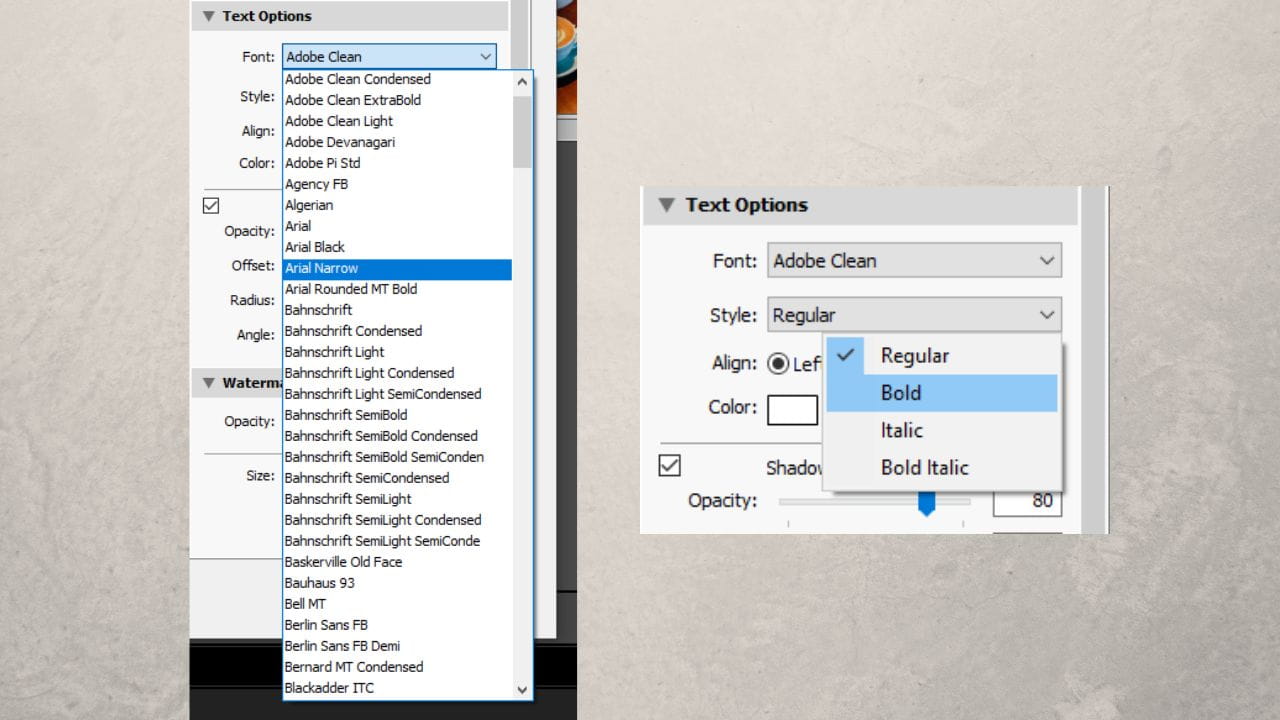
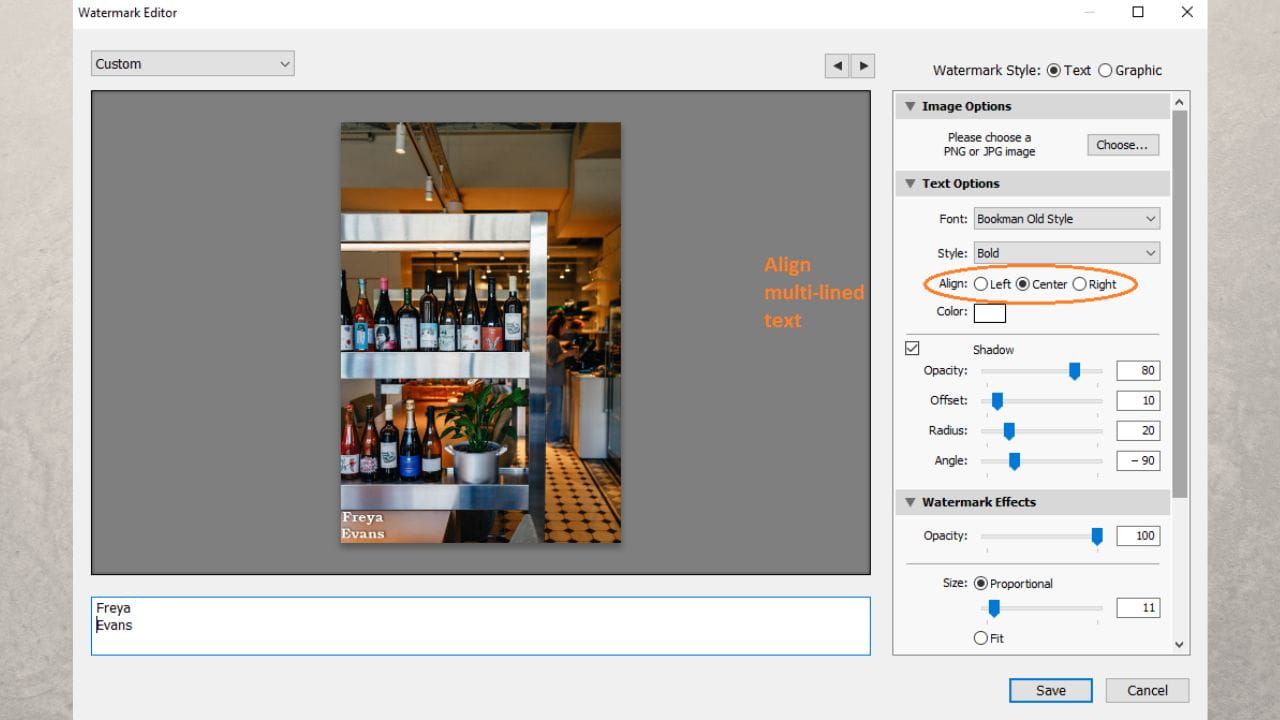
You can choose a font, style, color as well as the alignment of your text - left, right or center.
You can select any shade and hue of any color you want in the color picker.
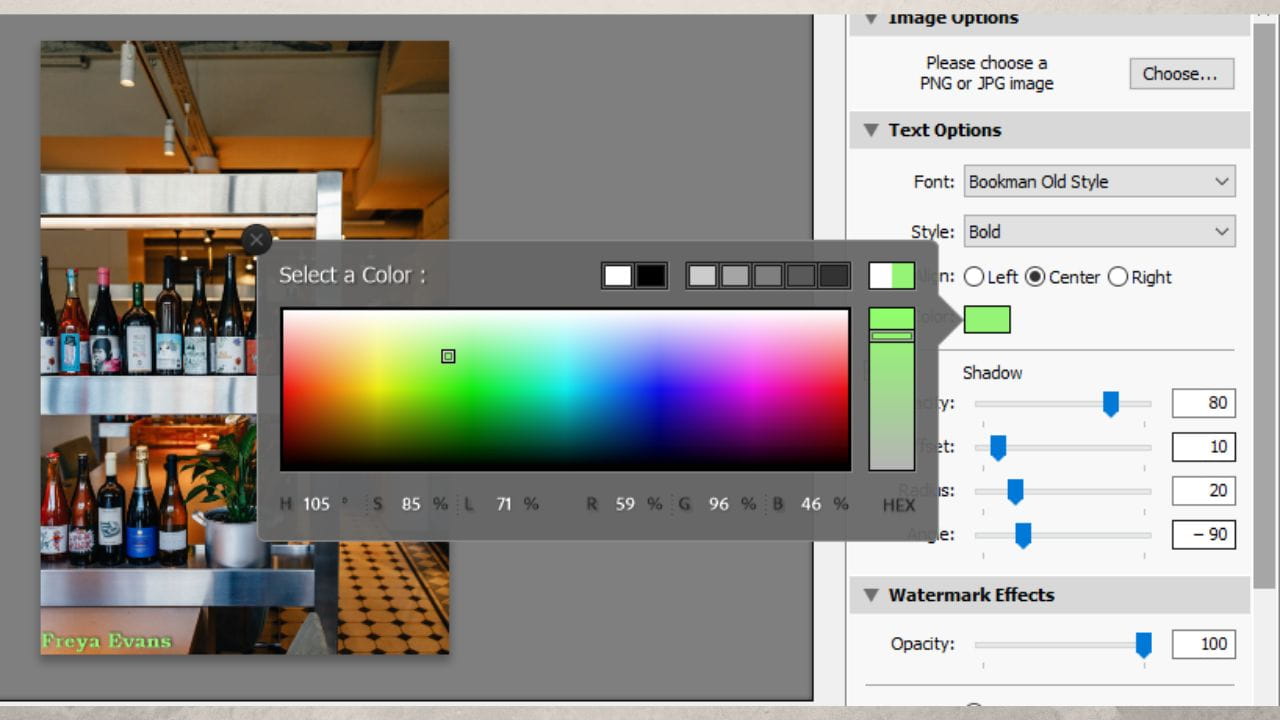
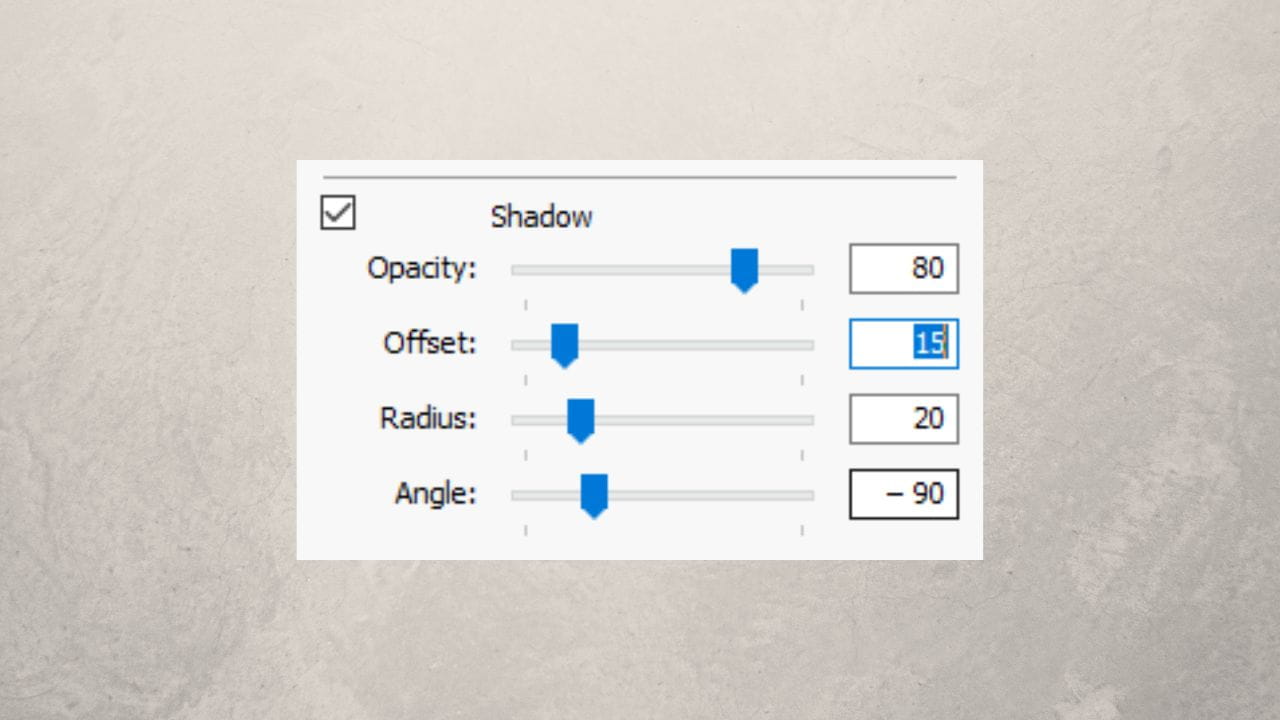
It is possible to add a shadow to your text. Just set a tick next to “Shadow”, then adjust its opacity, offset, radius and angle. You can make adjustments with the help of scroll bars or simply type in the necessary values.
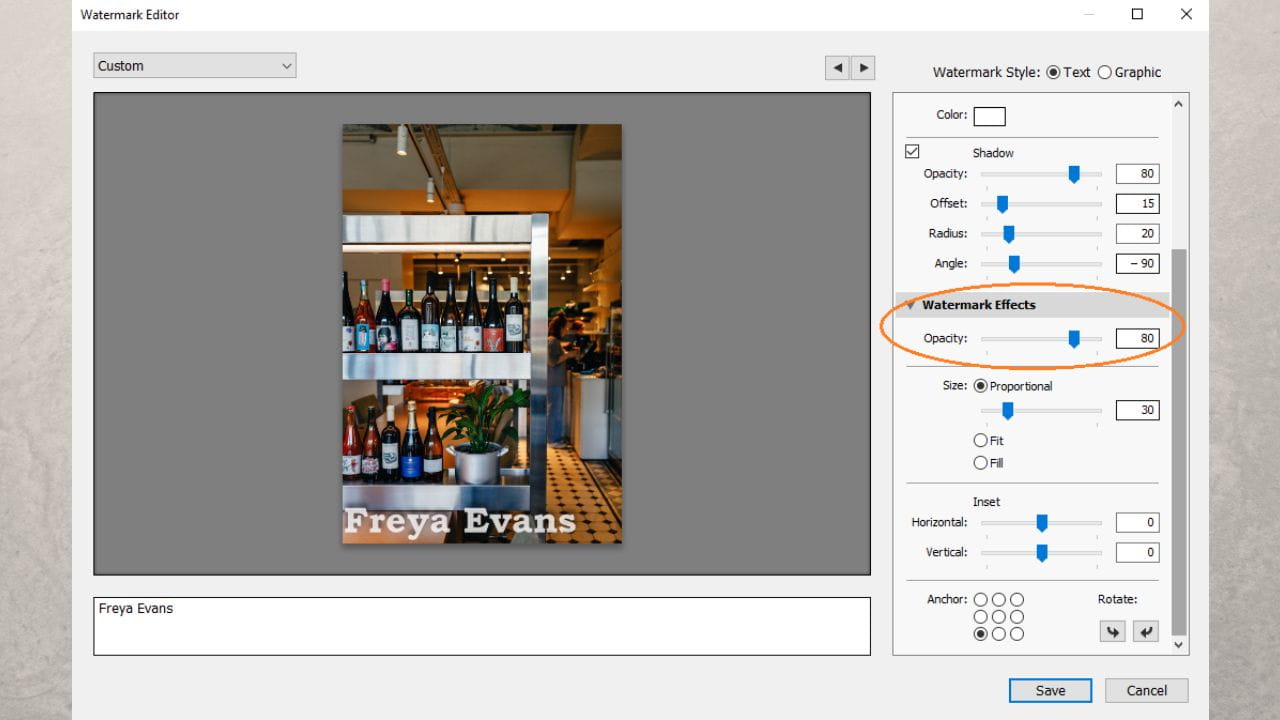
Let’s move on to the last section which is called “Watermark Effects”. Here you can change the opacity of your watermark – make it as transparent as you’d like.
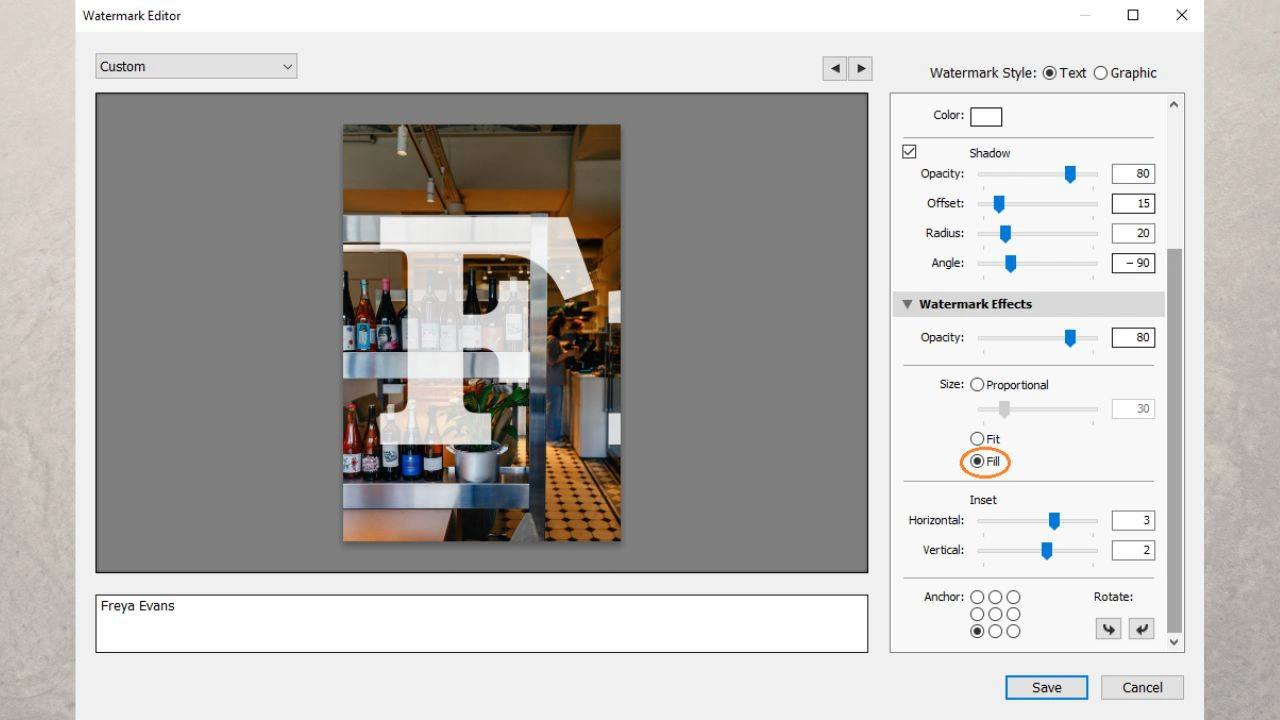
You can select your watermark in the preview and drag the corner with the cursor to make your watermark bigger or smaller. You can also use the scroll bar or type in the necessary value. However, please note that the size is adjustable only when the “Proportional” option is selected. If you select “Fit” or “Fill”, then you won’t be able to change the size anymore.
If you select “Fill”, your watermark will become so large that it’ll fill up the entire image.
On the other hand, “Fit” might actually be a good option; especially if you want to watermark several photos of different sizes that are horizontally and vertically oriented. If you select this option, Lightroom will automatically scale your watermark up or down and keep it in the same place during export.
In the same section, you can also adjust the “Inset” by adjusting the scroll bars or entering the necessary values. This option allows you to slightly reposition your watermark horizontally or vertically.
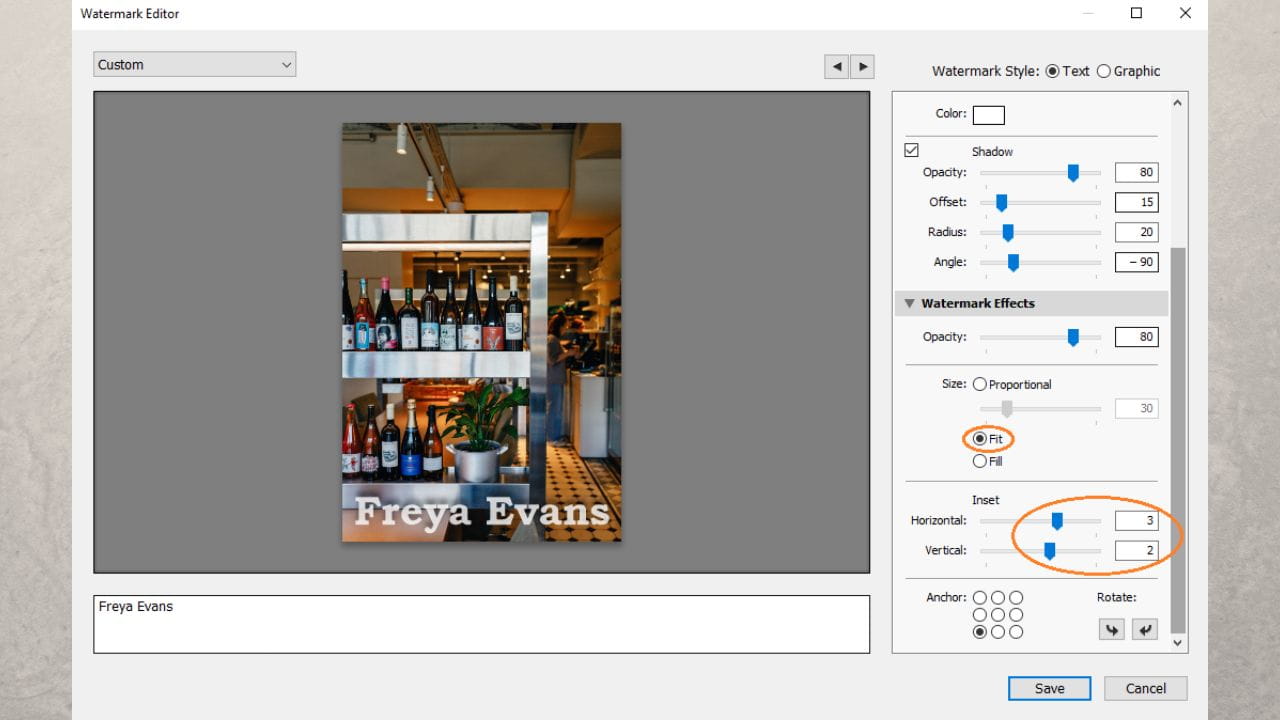
There are two more options left. You can rotate your watermark left or right with the help of the “Rotate” arrows. However, it’s not possible to select or enter a specific angle.
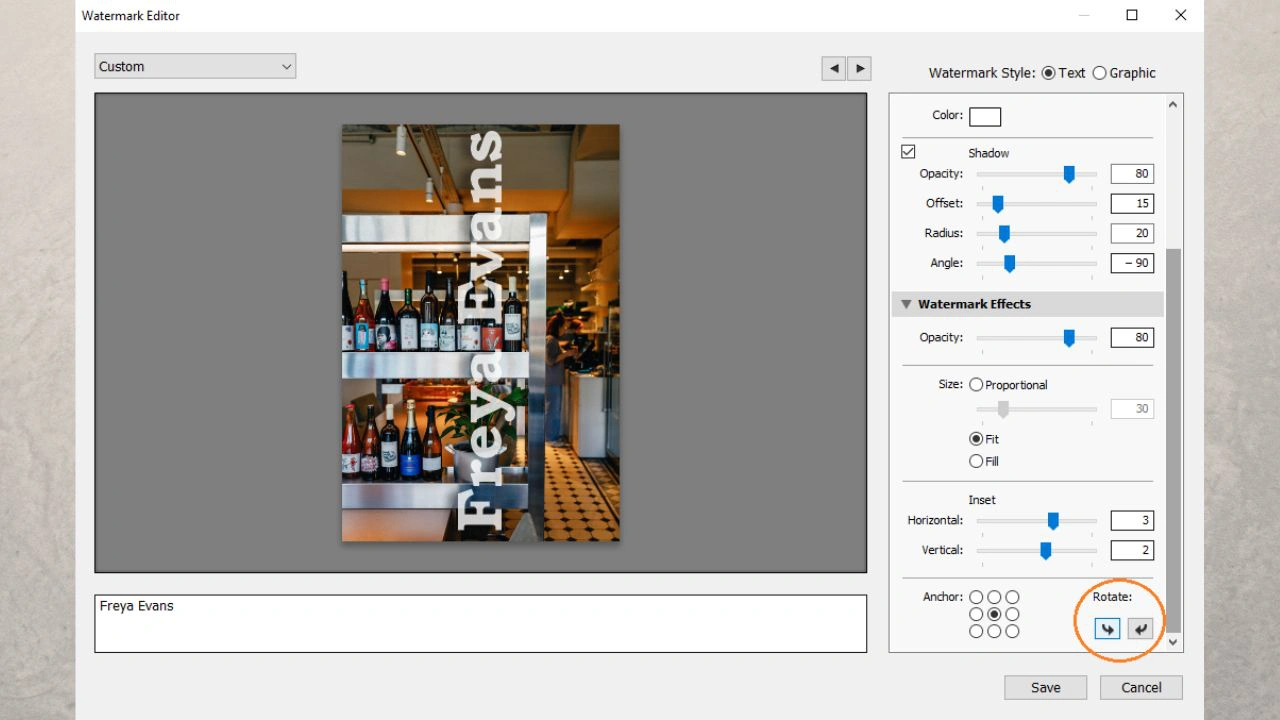
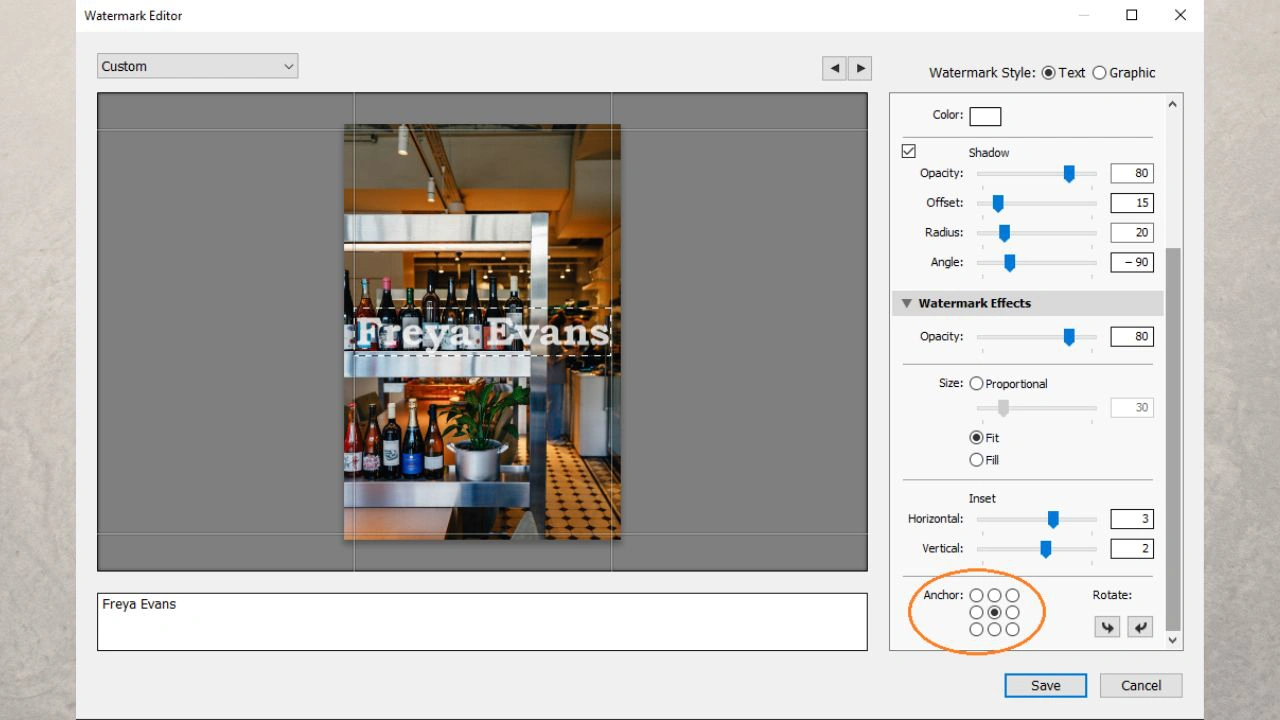
“Anchor” allows you to position and anchor your watermark to a certain anchor point; there are 9 options. You can place your watermark right in the center or in either of the four corners, for example.
If you choose the “Graphic” option and upload your logo file, the “Text Options” section will be disabled automatically. Your logo should be either in PNG or JPG. Also, it might be better to have your logo on a transparent background, but this is entirely up to you. This goes without saying, but you need to have a logo file for this. In other words, you should either design your logo in Photoshop, have a designer create it for you or make use of an online logo maker. You cannot create a logo watermark from scratch in Lightroom.
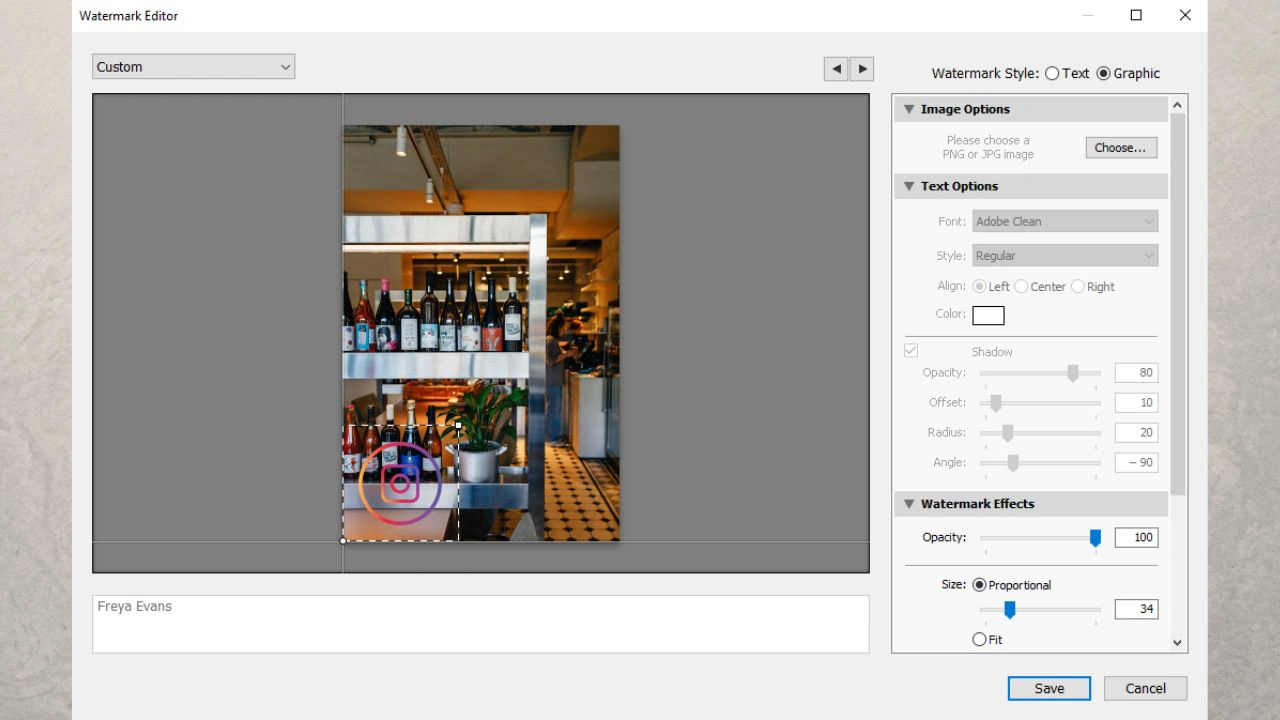
The “Watermark Effects” section is the same for both Text and Graphic.
Unfortunately, it’s impossible to pick a different color for your logo or add a shadow to it. Basically, you can make it larger or smaller, reposition it and change its opacity. That’s it.
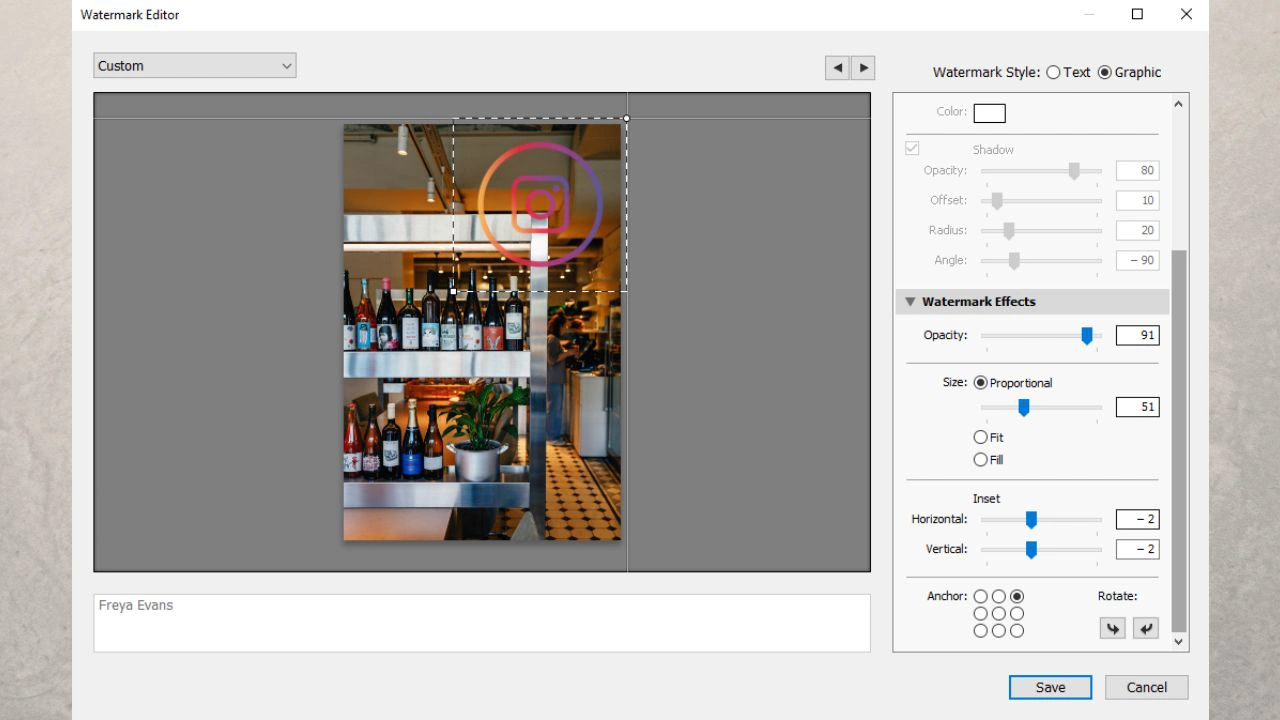
Once you are done, hit “Save”, then enter the name for your watermark preset and click on “Create”. You can create as many different presets as you want.
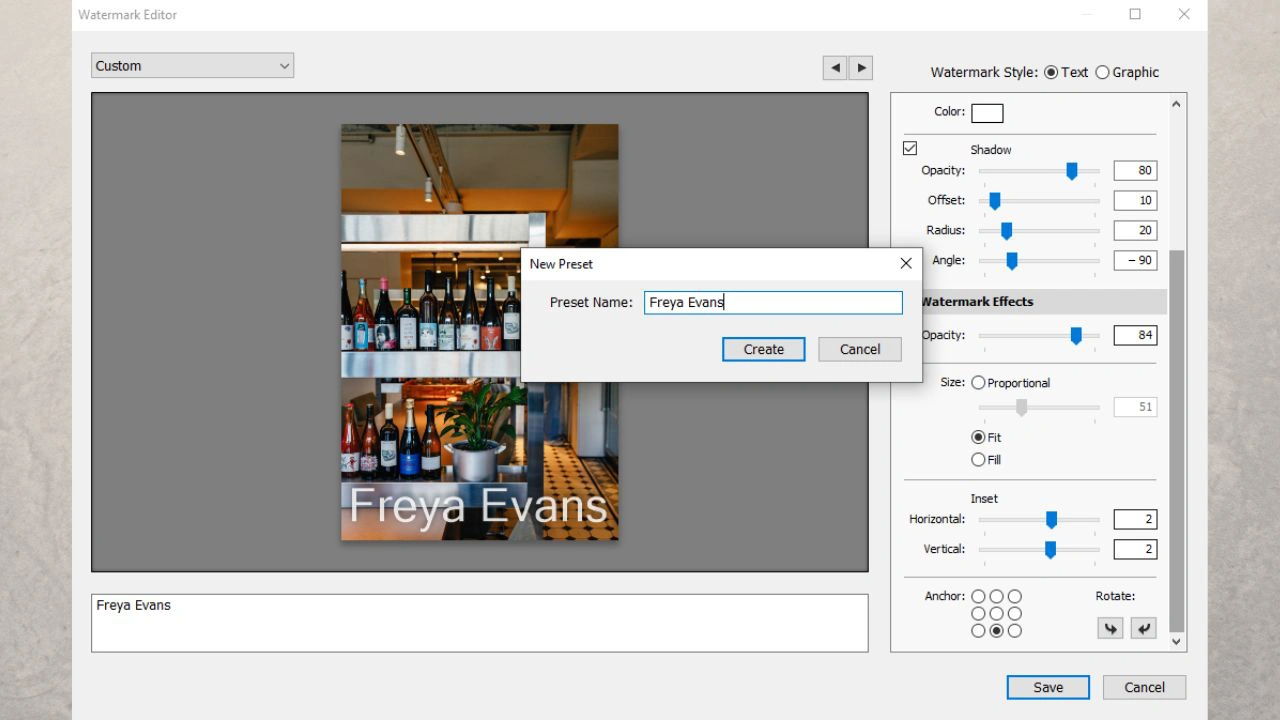
Your watermark preset is ready. Let’s see how you can apply it to your photos.
First, select images that you want to export.
If you want to select several consecutive images, select the first image, hold Shift, then click on the last image. This way the first, the last and all the photos in between will be selected.

If you want to select several images individually, hold Ctrl (Windows) or Command (macOS) and click on each image that you want to select.
Use the shortcut Ctrl + A (Windows) or Command + A (macOS) to select all the photos in the folder.
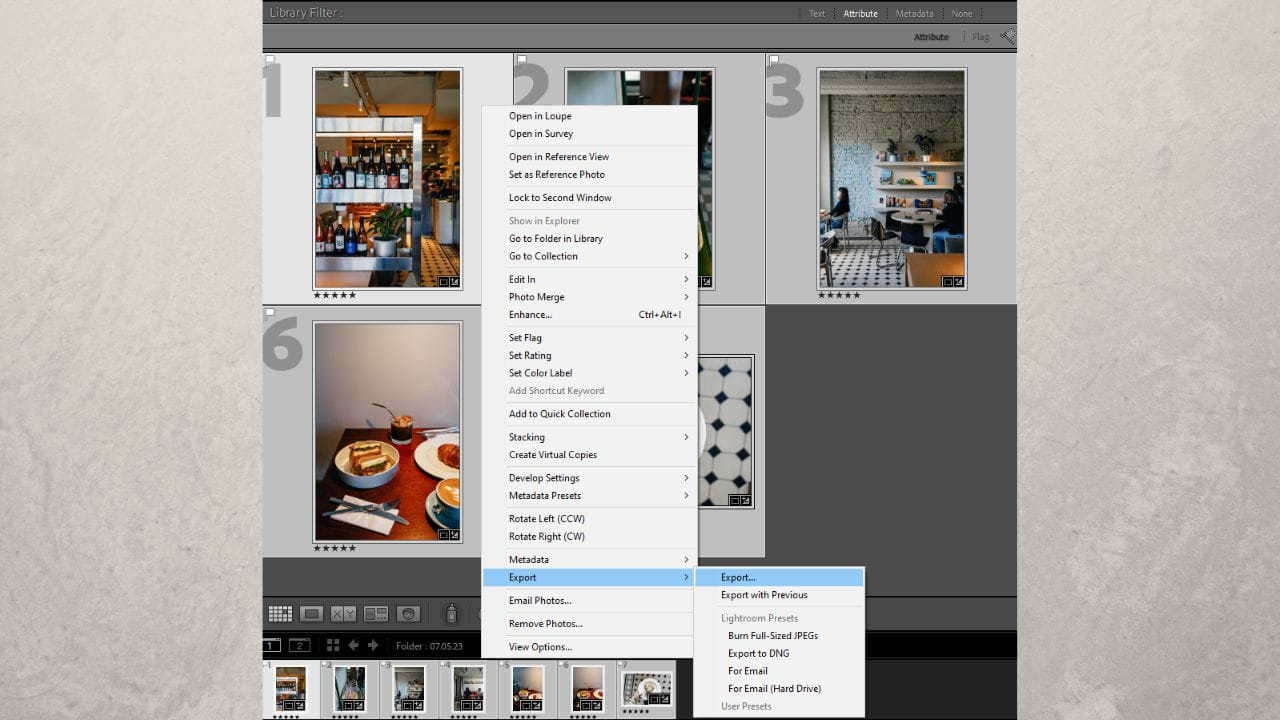
Right-click on one of the photos and select “Export” > “Export…”.
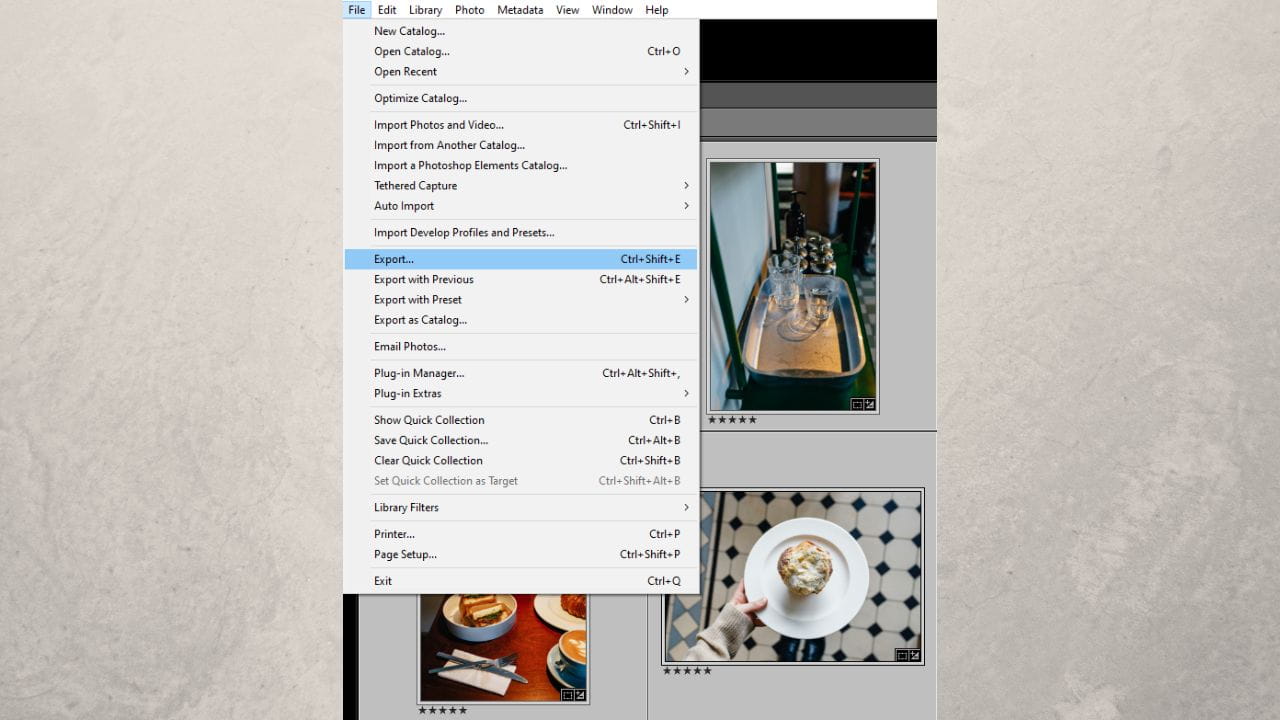
You can also go to “File” > “Export…”.
The Export window will open.
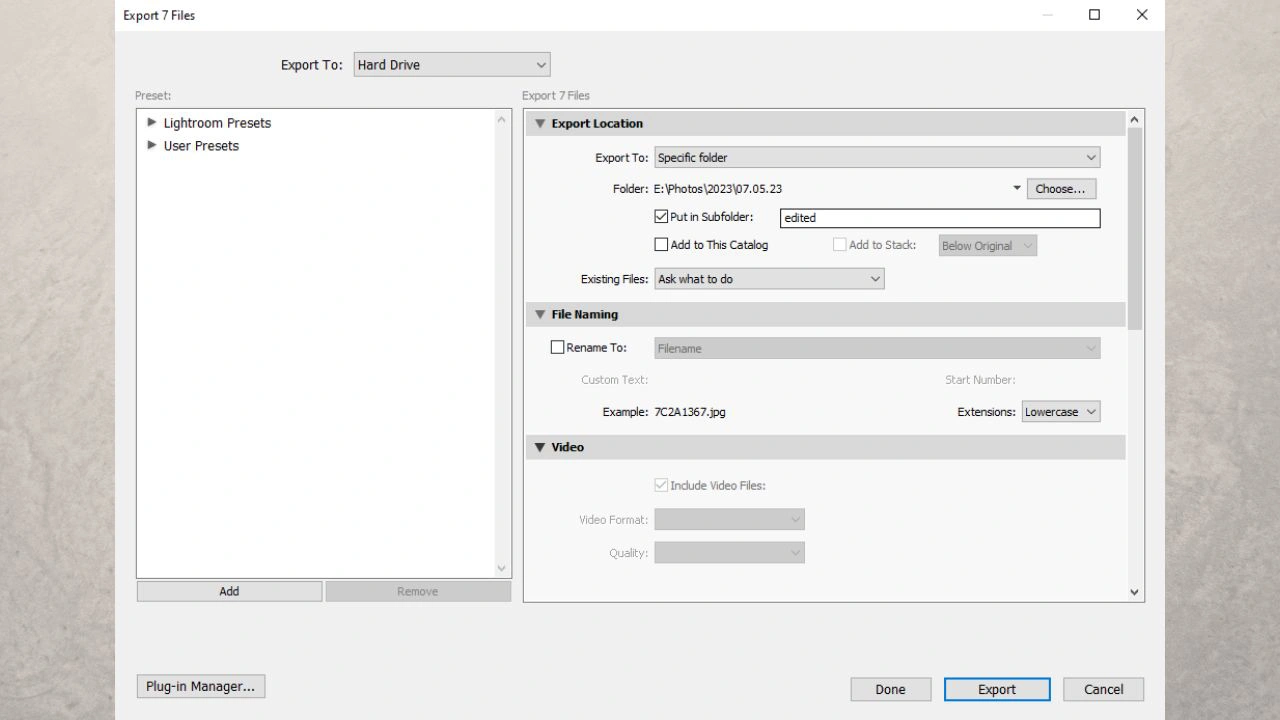
Scroll down until you find the “Watermarking” section. Set a tick next to “Watermark”.
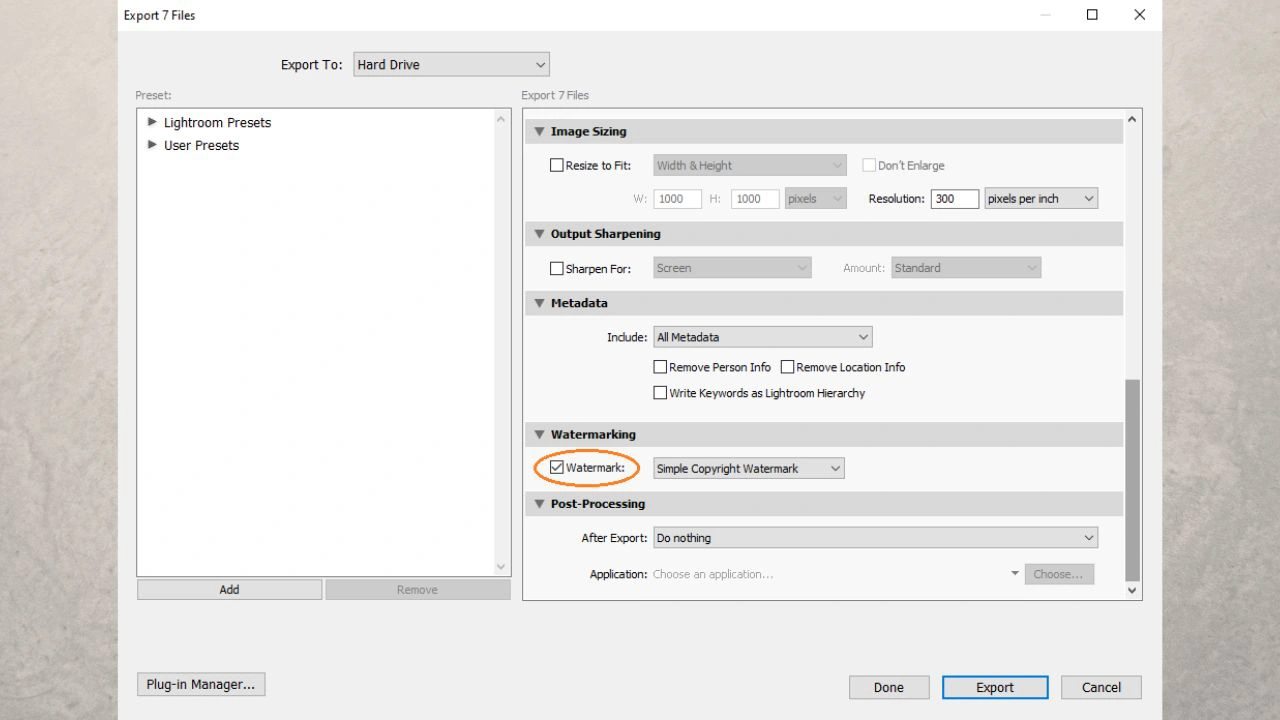
Choose the preset that you’ve just created in the drop-down menu. You can access the Watermark Editor from here as well.
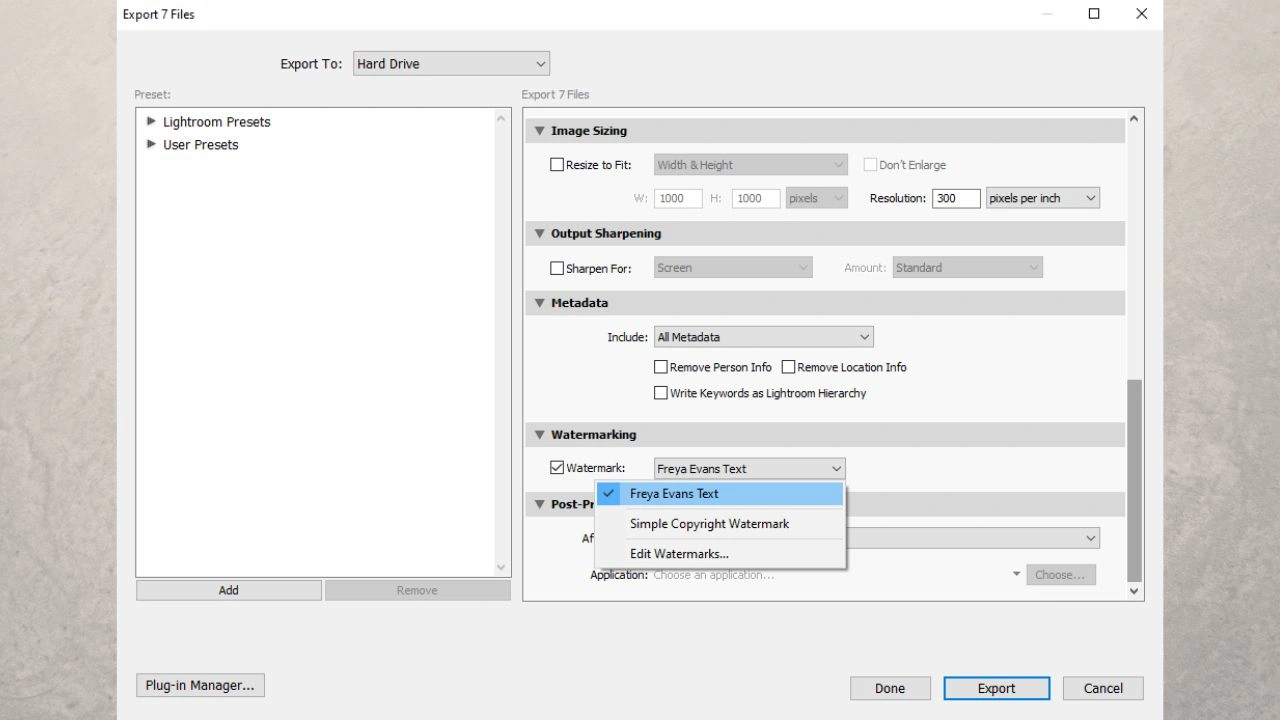
Specify other export settings, then click on “Export”.
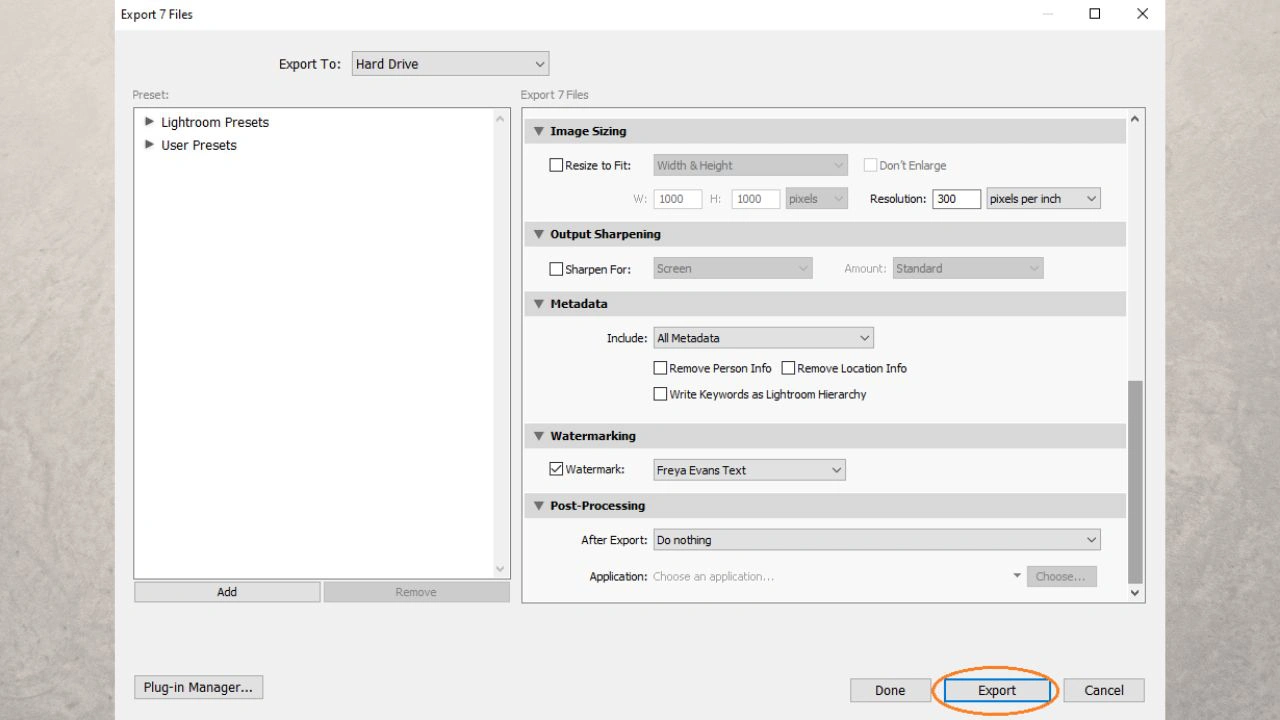
Once the export is over, go to your export folder and take a look at your watermarked images.

All done! Easy and quick, right?
Adding a Watermark in Lightroom Classic vs Visual Watermark
Editing and applying a watermark in Lightroom isn’t a challenge. It’s far more effortless and uncomplicated than using Photoshop for the same purpose. However, in this case, simplicity comes with limitations – the selection of editing tools is, admittedly, quite small.
Visual Watermark, on the other hand, is just as simple as Lightroom, but at the same time offers more tools and options for editing a watermark – be it text or logo. The obvious downside is that you will need to export your images from Lightroom first, then upload them into Visual Watermark and do a little bit of work there. But you’ll quickly forget about this little inconvenience as the advantages clearly outweigh the drawbacks.
This watermark software offers a few things that Lightroom Classic doesn’t have. In Visual Watermark you can enable the Tile feature, which will fill your entire image with repeated watermarks. On top of that, you’ll be able to choose Straight or Diagonal tile as well as the amount of space between your watermarks. In Lightroom you have to choose whether you want a textual watermark or a logo. But in Visual Watermark there’s no need for that – you can add your text to photo AND a logo. They can be added as combined items in a group or as two separate watermarks.
In Visual Watermark you’ll be able to choose an icon from the built-in library or upload your own logo file in PNG or JPG format. Also, you’ll be able to edit the logo itself – change its color and add an effect. A shadow, for example. In addition to that, you can position your watermark – text, logo or both – anywhere within the frame. Your watermark can simply be dragged with the help of the cursor – you can center it, place in either of the four corners, or place it slightly off center. Whatever looks good to you. You will also have the ability to rotate your watermark to any angle you want, and it can be done either by adjusting the scroll bar or typing in the desired angle.
Essentially, adding a watermark in Visual Watermark is as effortless and fast as in Lightroom, but you’ll have access to more tools (like crop images, resize photos, photo compressor and more) and features, get better results in nearly the same amount of time and, overall, have more fun.
More Watermarking Tutorials
How to Add a Watermark in Word
How to Make a Watermark in Photoshop
 Visual Watermark

 by
by 