Watermarks can give your spreadsheets a more professional look. You might need to add a watermark to indicate that your document is not final or, on the contrary, that its contents are confidential and shouldn’t be shared anyone.
Watermarks can even help with brand promotion and establishing the integrity of files. Of course, you don’t want your watermark to obscure the contents of your document, making them barely readable. Which is why it is important for your watermark to strike the balance between being discreet yet noticeable.
But how exactly can you watermark your Excel spreadsheets? Well, there’s no “ Add Watermark” button, but it is still possible to add a watermark in Excel. In fact, you can do it in several different ways. This guide contains detailed instructions for each method. All of them are quite easy, though they might take a little bit of your time. Here you will also find a tip on how to add watermarks that will be rather challenging to remove.
Keep reading, if you’re interested.
How to Add a Watermark in Excel using Header & Footer
This is probably the most effective method to add a watermark in Excel – no wonder why it’s so common. It’s not particularly complicated or time-consuming, and each page of your spreadsheet will be watermarked.
Once you open the necessary spreadsheet in Excel, you’ll need to do the following:
- In the ribbon go to the Insert Tab, then click on Header & Footer.
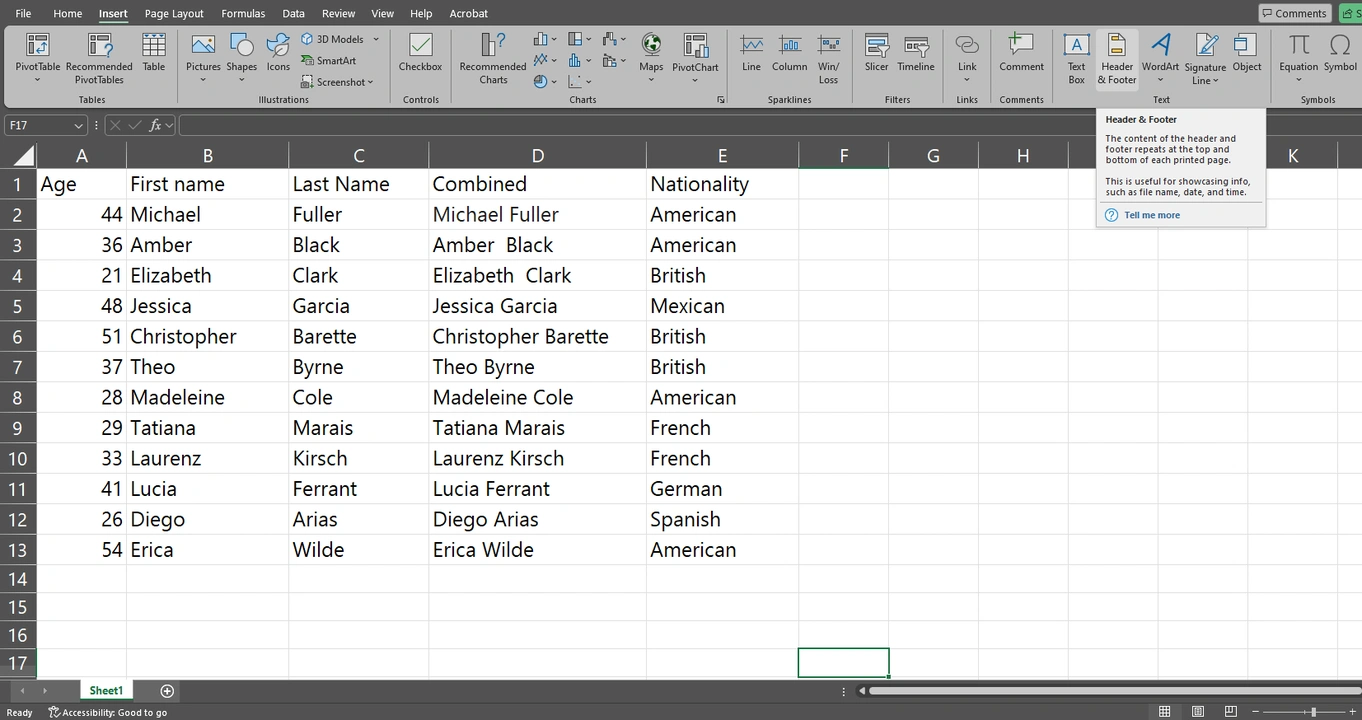
- Once you do that, 3 boxes will appear at the top of your worksheet. Excel will also switch to the Page Layout mode.
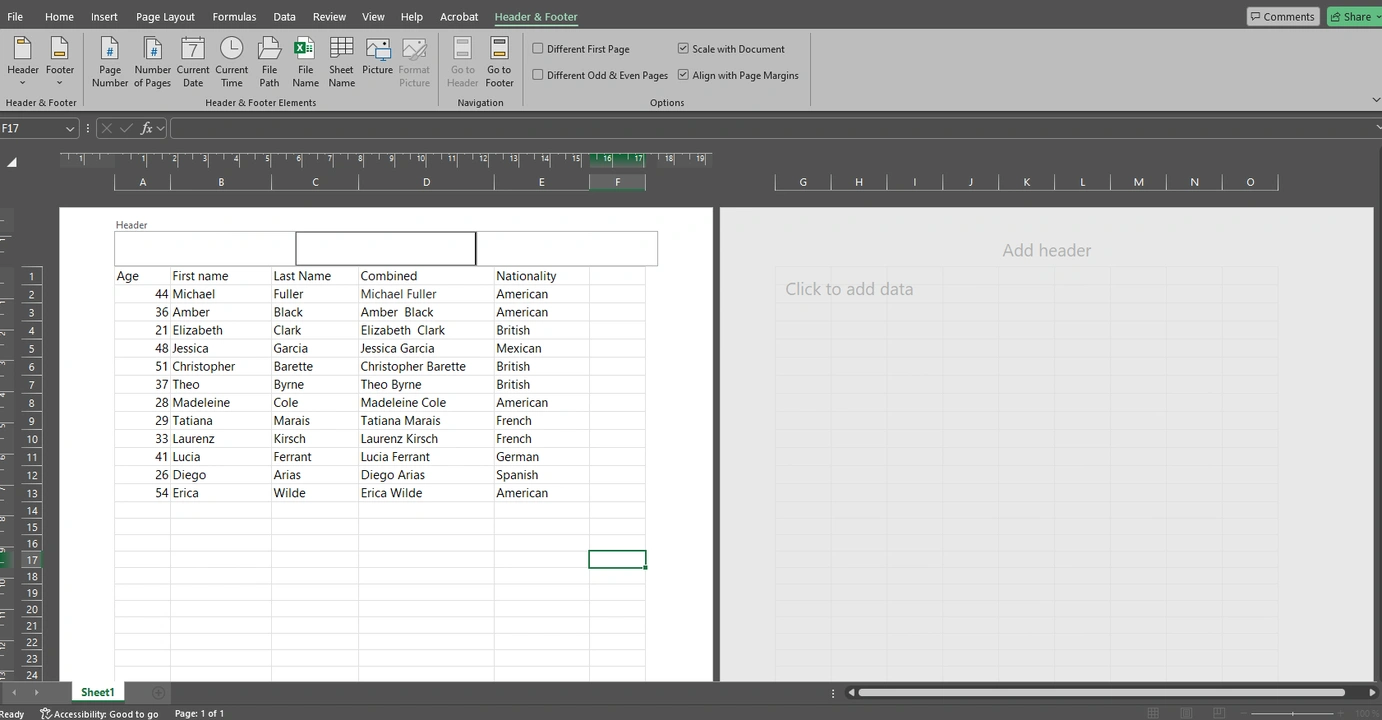
- Now, you need to decide where you want your watermark to be. For instance, if you want it to be in the center, click inside the box in the middle. If you want to add your watermark to the bottom of your Excel worksheet, you’ll need to switch from the Header to the Footer.
- Next, go to the Header & Footer tab in the ribbon and select the Picture option.
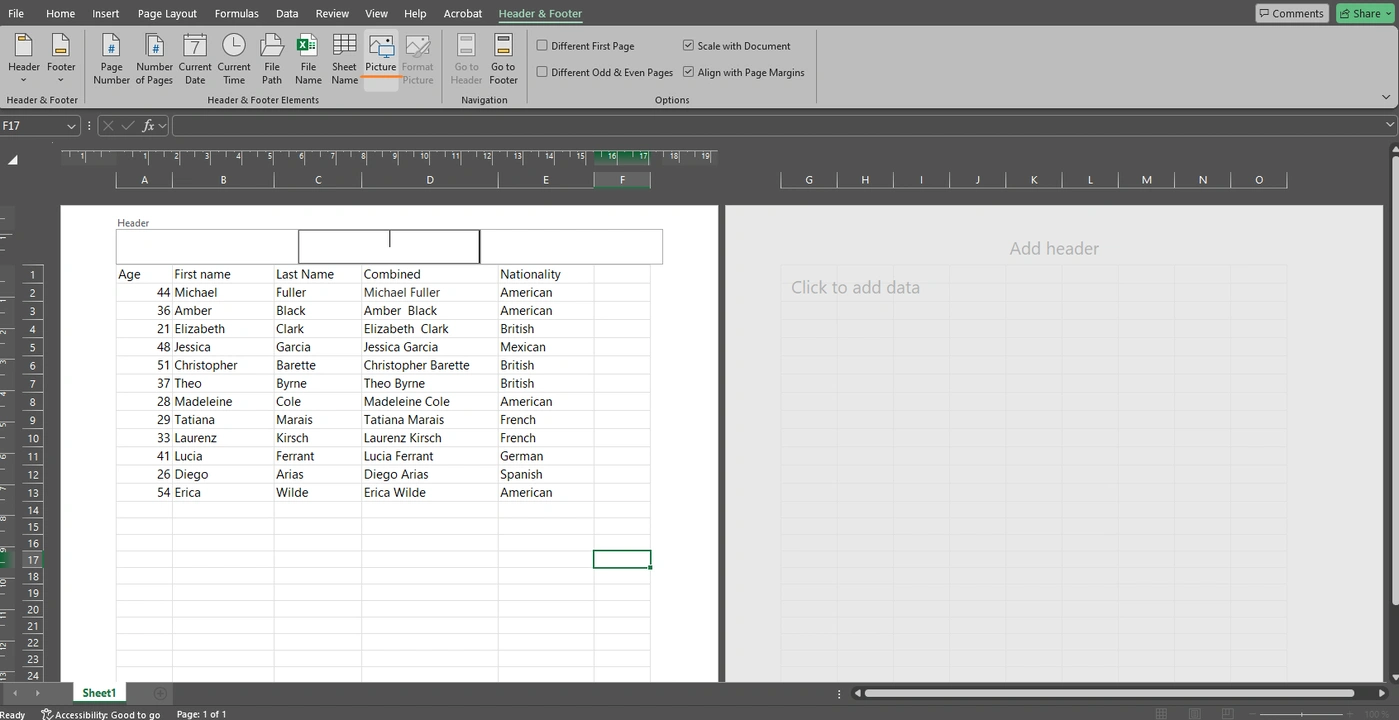
- You will see the Insert Picture dialog. Select where you want to import your image from, then choose the necessary image and insert it. Your image should be in PNG or JPEG format.
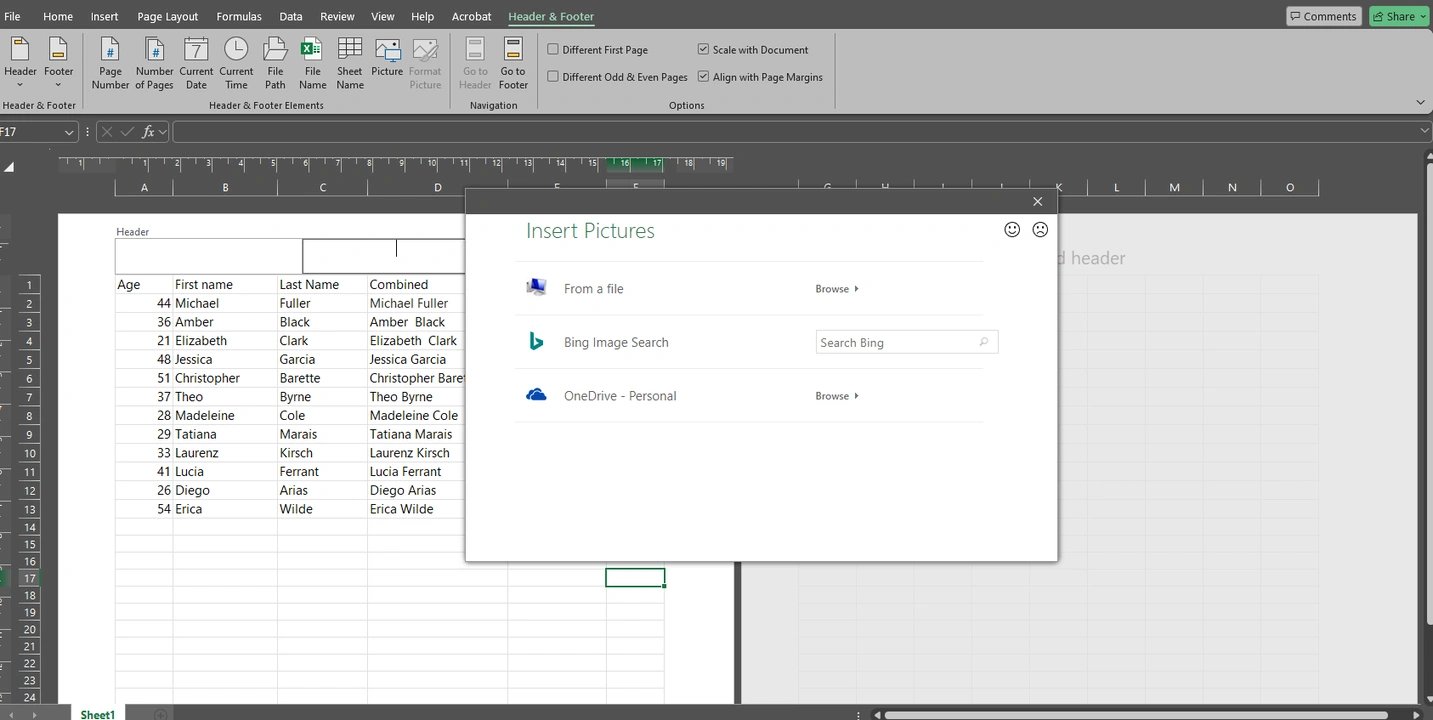 Please note that you can insert one watermark into each of the three boxes. But if you try to add two or more pictures into a single box, you’ll get an error message asking you whether you want to replace your image.
 - The &[Picture] code will appear inside the middle box. This is how it should be.
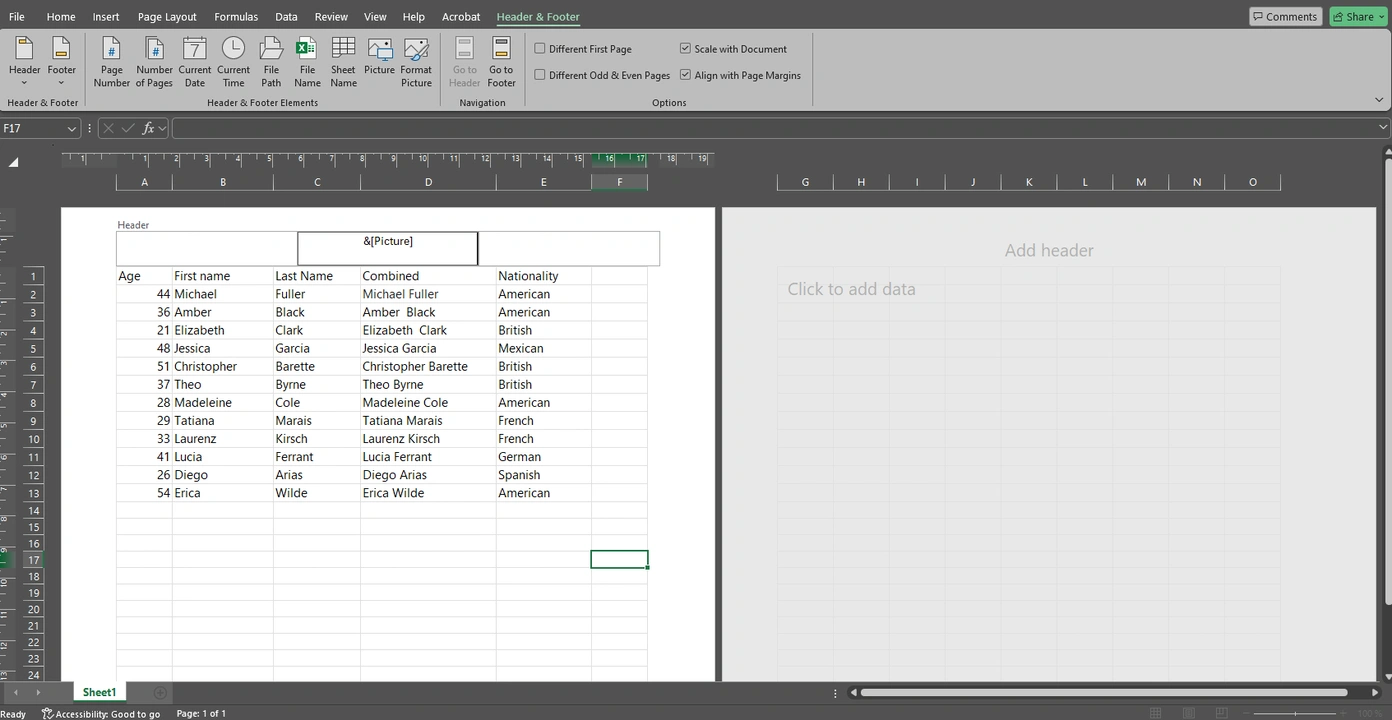
- To see your watermark in Excel, just click on any cell outside of the header. Now, it’s visible!

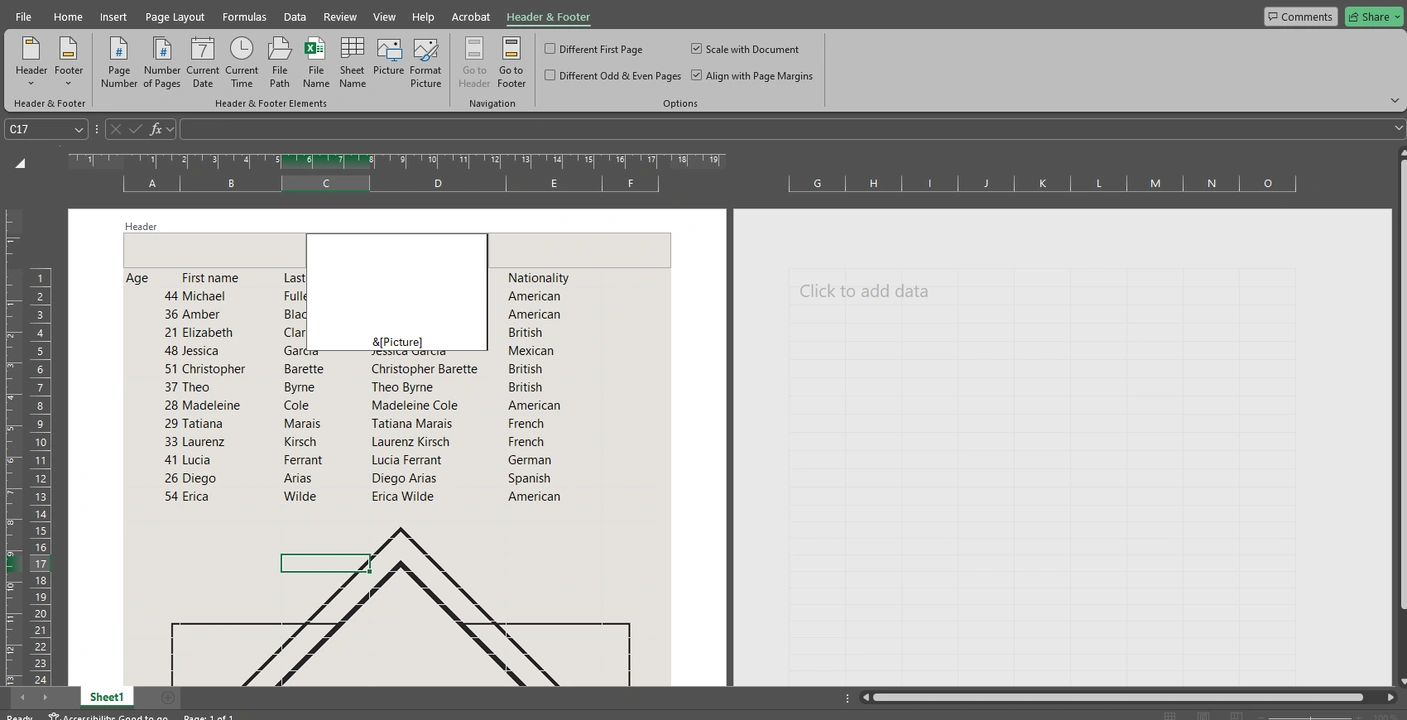
- Right now, your watermark sits at the very top of the Excel page. What if you want to move it down a bit? Click on the Page Layout tab, then click on the necessary header box.
- Place the cursor in front of the &[Picture] code, then press the Enter button. The code will move down. Press the Enter button as many times as you need. You can also use the spacebar to make some minor corrections to the position of your watermark.
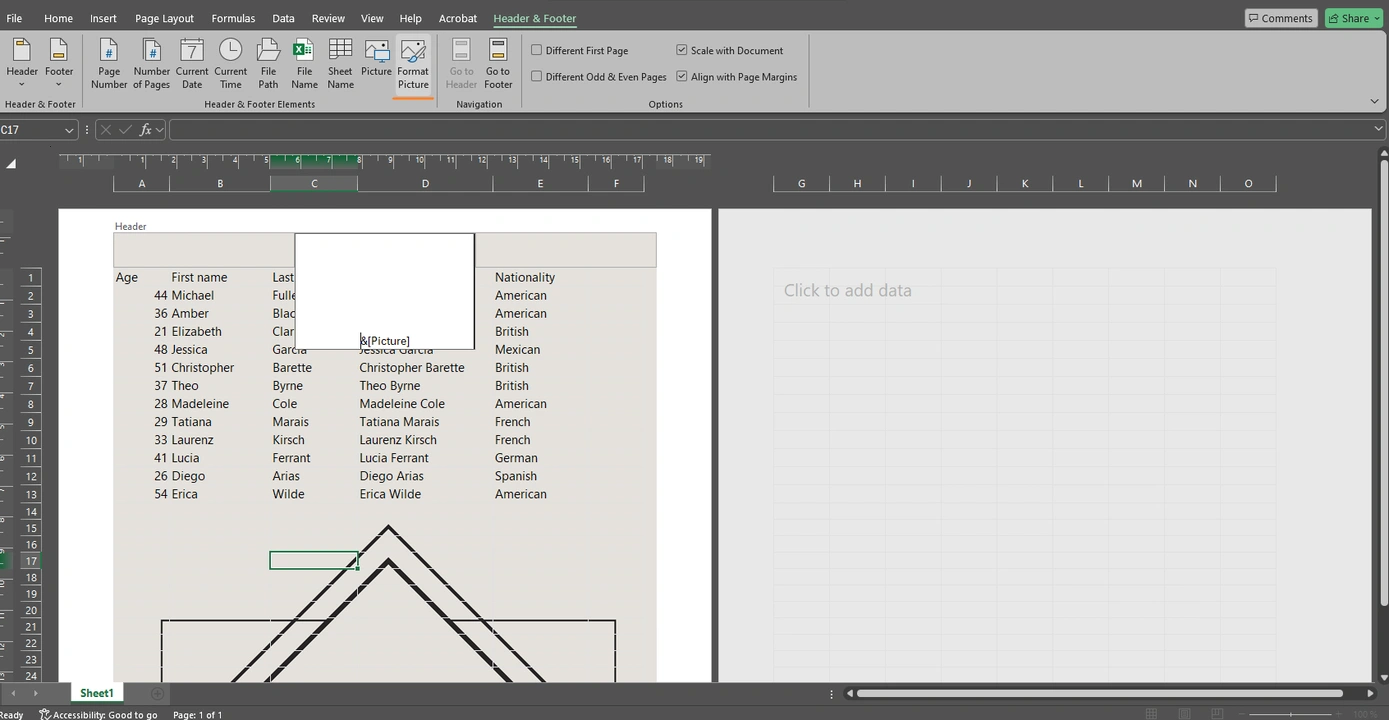
- Let’s say that you also want to resize the image that you’re using as a watermark in Excel. In the Header & Footer tab click on the Format Picture.
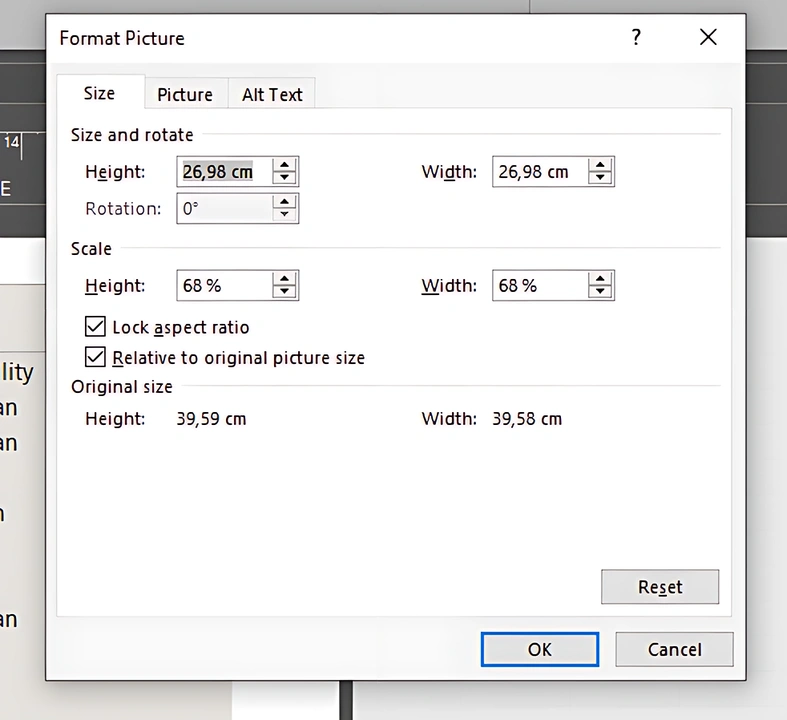
- This will open the Format Picture window. In the Size tab you can change the Width and the Height of your image. The scale will be adjusted automatically. Make sure that the Lock Aspect Ratio option is ticked, otherwise your image might get distorted.
- In this window you can also change the transparency of your watermark. To do this, switch to the Picture tab, then open the drop-down menu next to the Color in the Image Control section. Select the Washout option. The Washout option is pretty useful since it will make your watermark in Excel semi-transparent. Thus, the contents of your spreadsheet will be clearly visible and perfectly readable.
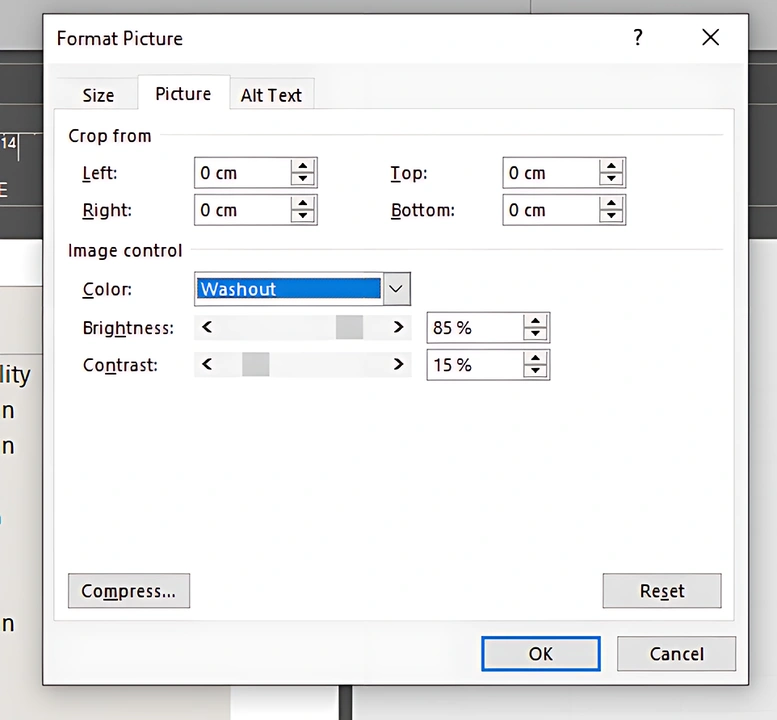
- In the Picture tab you can experiment with the brightness and contrast of your image as well as crop it if necessary. Please note that there are no previews here. You will be able to see all the changes only after you apply them. As a result, there might be some going back and forth to achieve the desired result.
- All done! You successfully watermarked your Excel worksheets!
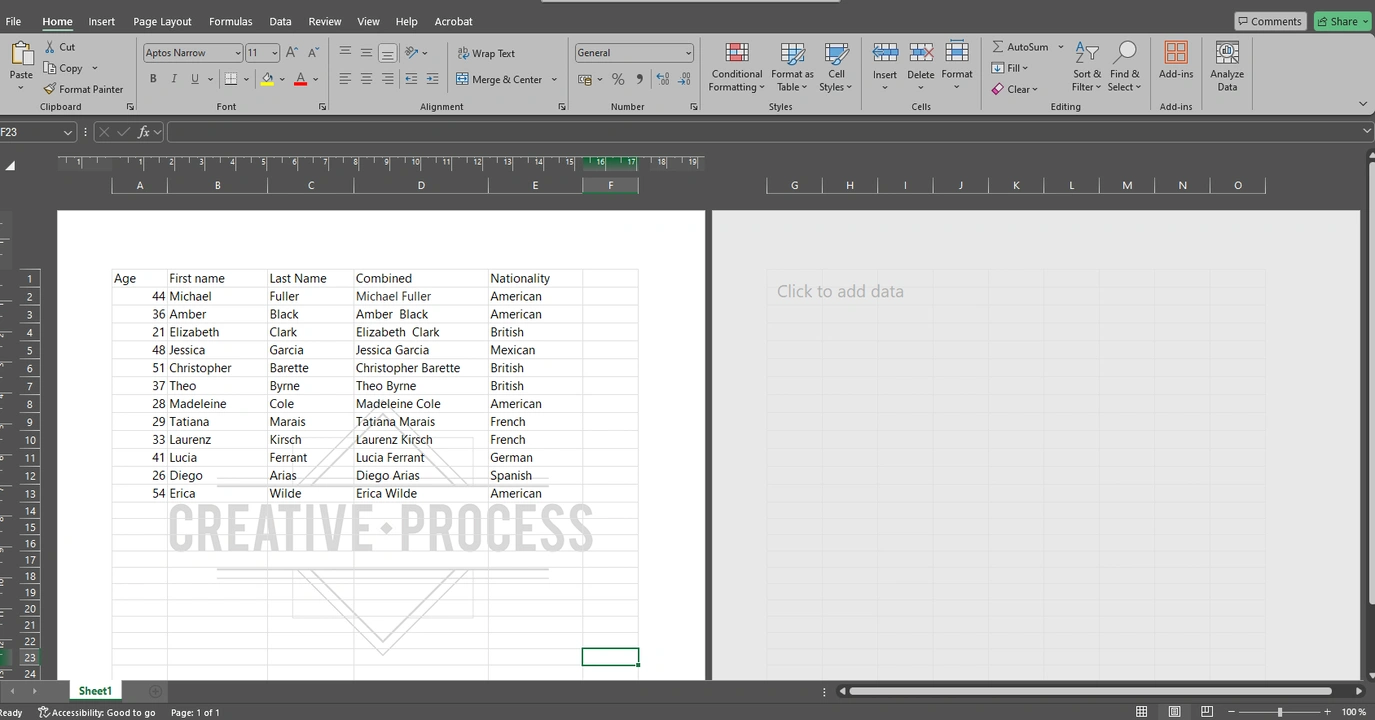
Now, there’s something that you need to know.
Excel operates somewhat differently than, say, Microsoft Word. To put it simply, when you add a watermark to a Word document, you will always be able to see it. It’s different in Excel. As soon as you switch to the Normal view mode, you won’t be able to see your watermark in the header anymore. That’s okay! If you switch back to the Page Layout mode or open the Print Preview window, you’ll see that your watermark is still there. And if you decide to print out your Excel spreadsheet, your watermark will be on every page of the printed version.
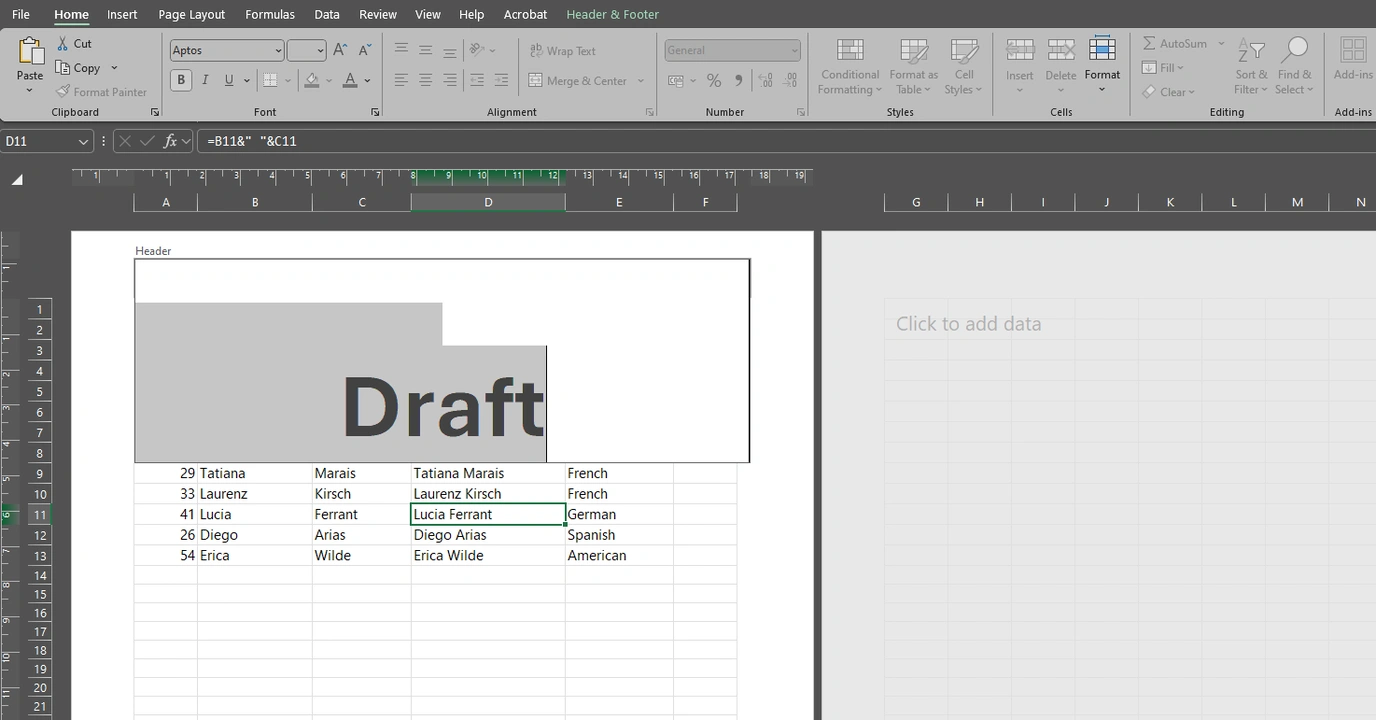
Here’s a tip! Instead of a picture you can enter any text you want in the header or footer – for example, it can be the Draft word or your website address. It’s easier and quicker than inserting an image. And you will be able to make all the necessary changes to your text: pick the right size, font and color. Keep in mind that you’ll need to select the text with the cursor before making any changes to it:
How to Rotate Your Watermark in Excel
What if you want to change the angle of your watermark in Excel? You’ve probably noticed that there’s no rotation handle and the rotation section in the Format Picture window is disabled. Well, this is due to the fact that you cannot rotate an image in the header or footer in Excel. So, you need to add an image that’s already rotated. It’s not as complicated as it may sound.
Here’s how you can do it:
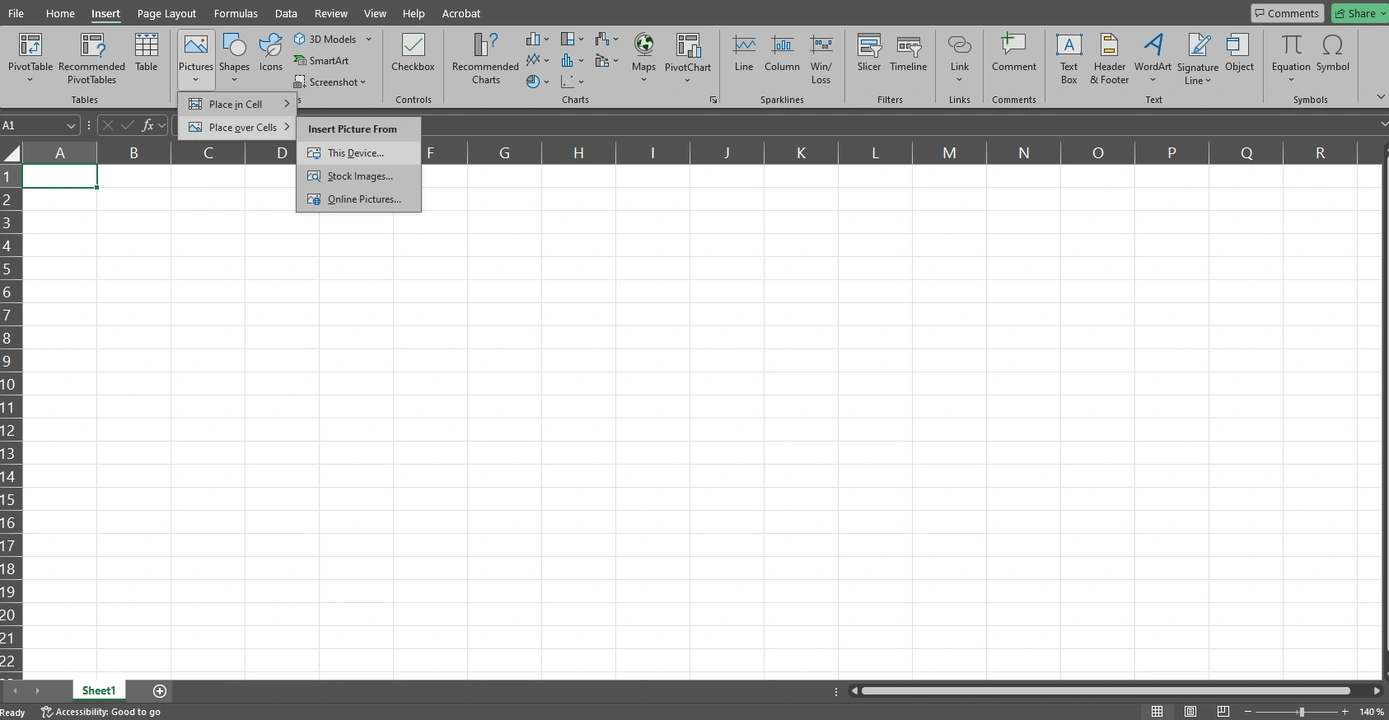
- Open a blank worksheet in Excel, then go to Insert > Pictures > Place over Cells. Select the necessary image and insert it into the worksheet.
- Click on the rotation handle above your image, then move your cursor to the left or to the right. The angle of your image will change.

- Once your image looks exactly like you want it to, right-click on it and pick the “Save as Picture” option.

- Now that your rotated image is saved as a file, you can close this blank document and open the Excel spreadsheet that you want to watermark. Then simply add your rotated image to the header or the footer.
How to Create a Repeated Watermark in Excel
Repeated watermarks are hard to miss so they will definitely get your message across to the recipient. It’s a bit tedious and time-consuming to create them in Excel. Well, you will actually need Microsoft Paint for this task, as well. But it is possible.
Just follow these steps:
- Open Excel and create a blank worksheet, then click on the Page Layout view icon in the bottom left corner of the Excel window. Your goal is to switch to the Page Layout view mode.

- Next, go to the Insert tab and find the WordArt icon in the Text section. Click on this icon, then pick the desired style.
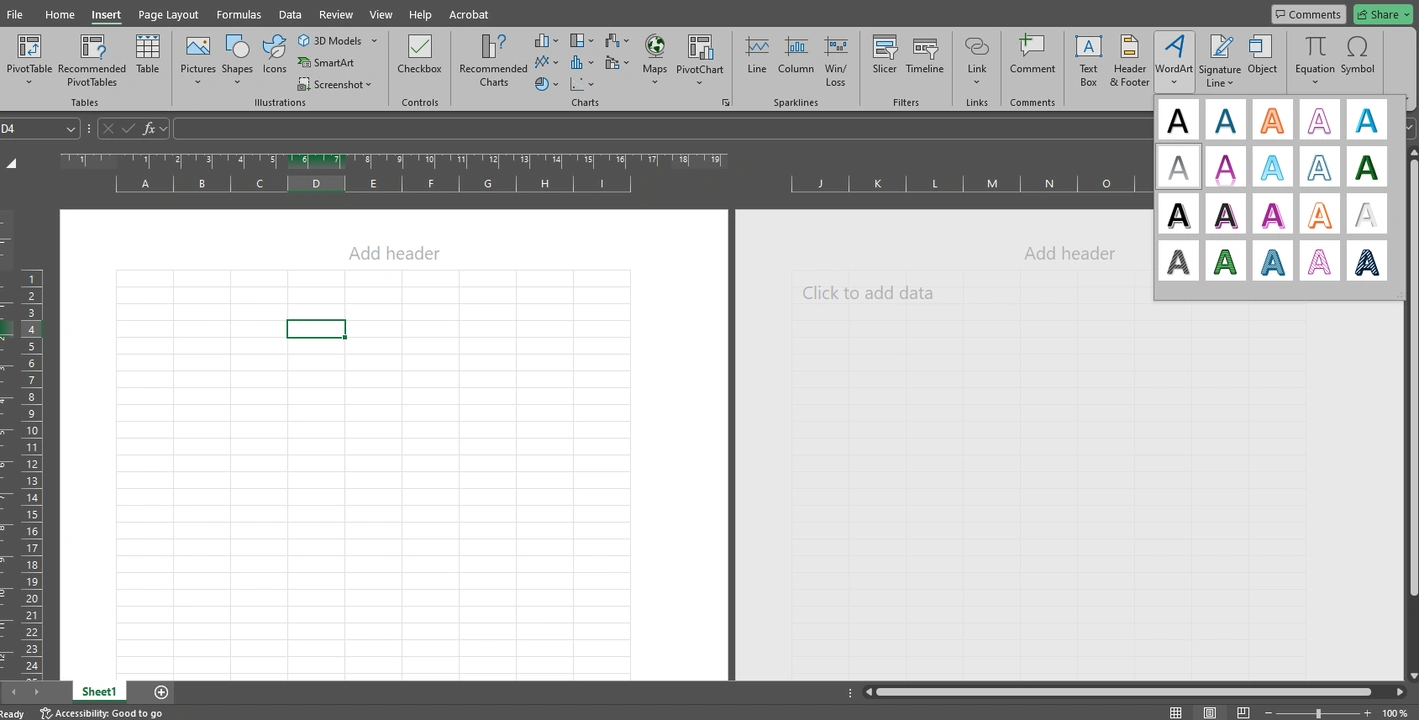
- Once a new text box appears, delete the text inside it and enter your text. For instance, it can be Confidential. Make the necessary adjustments to your text. Change its size or color, rotate it, if needed.
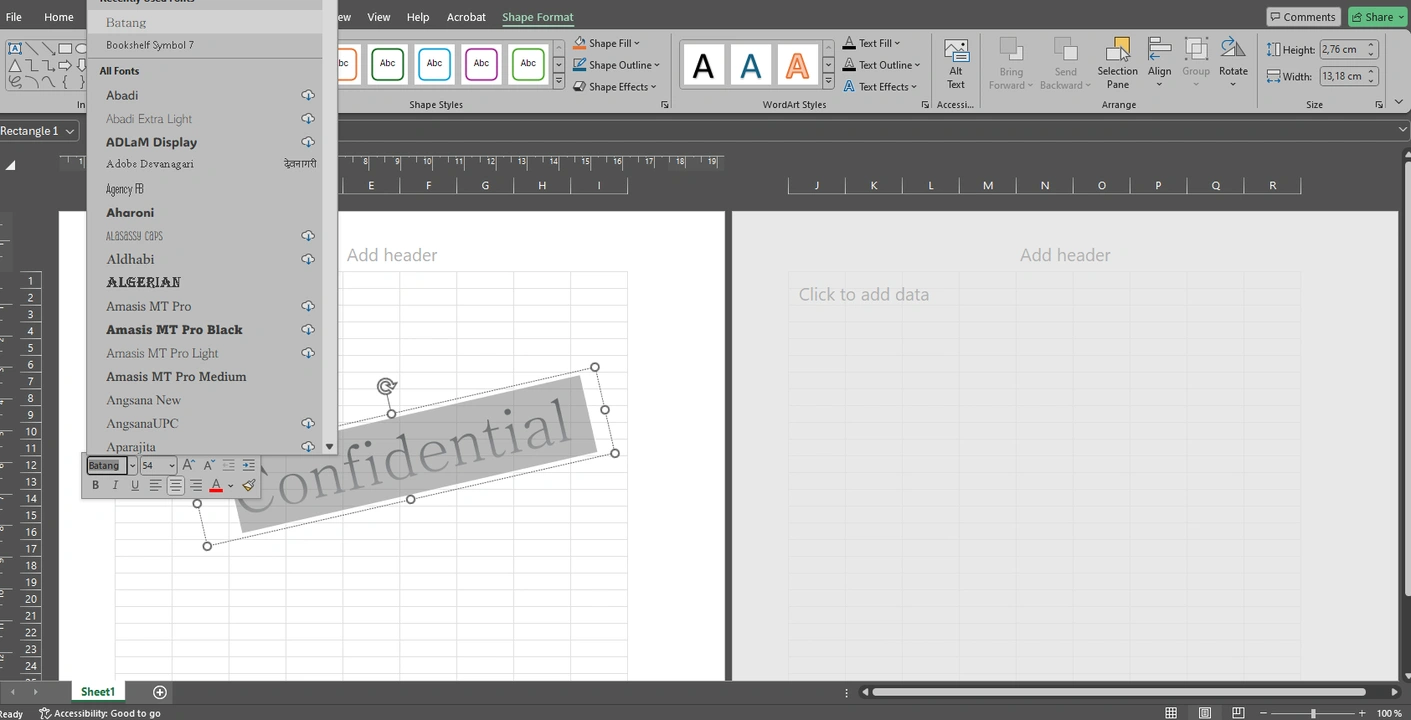
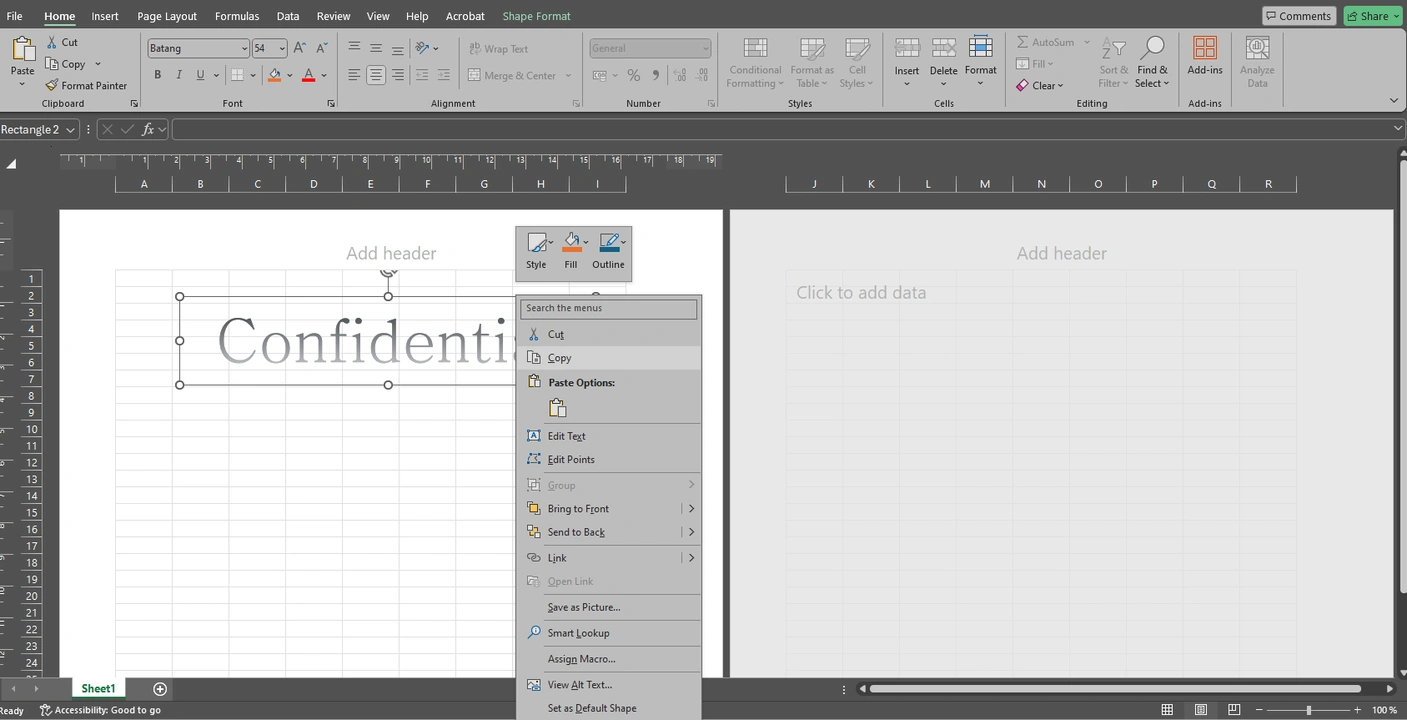
- When you are happy with the design, right-click on your text and choose Copy.
- Open Microsoft Paint, Paint 3D or any other drawing program that you like.
- Use the Ctrl + V shortcut or right-click on the empty canvas and select Paste to paste your copied text into the Paint’s canvas. Then create another copy and align it with the first one. Create as many copies as you need. Use the cropping tool to get rid of all the extra space.
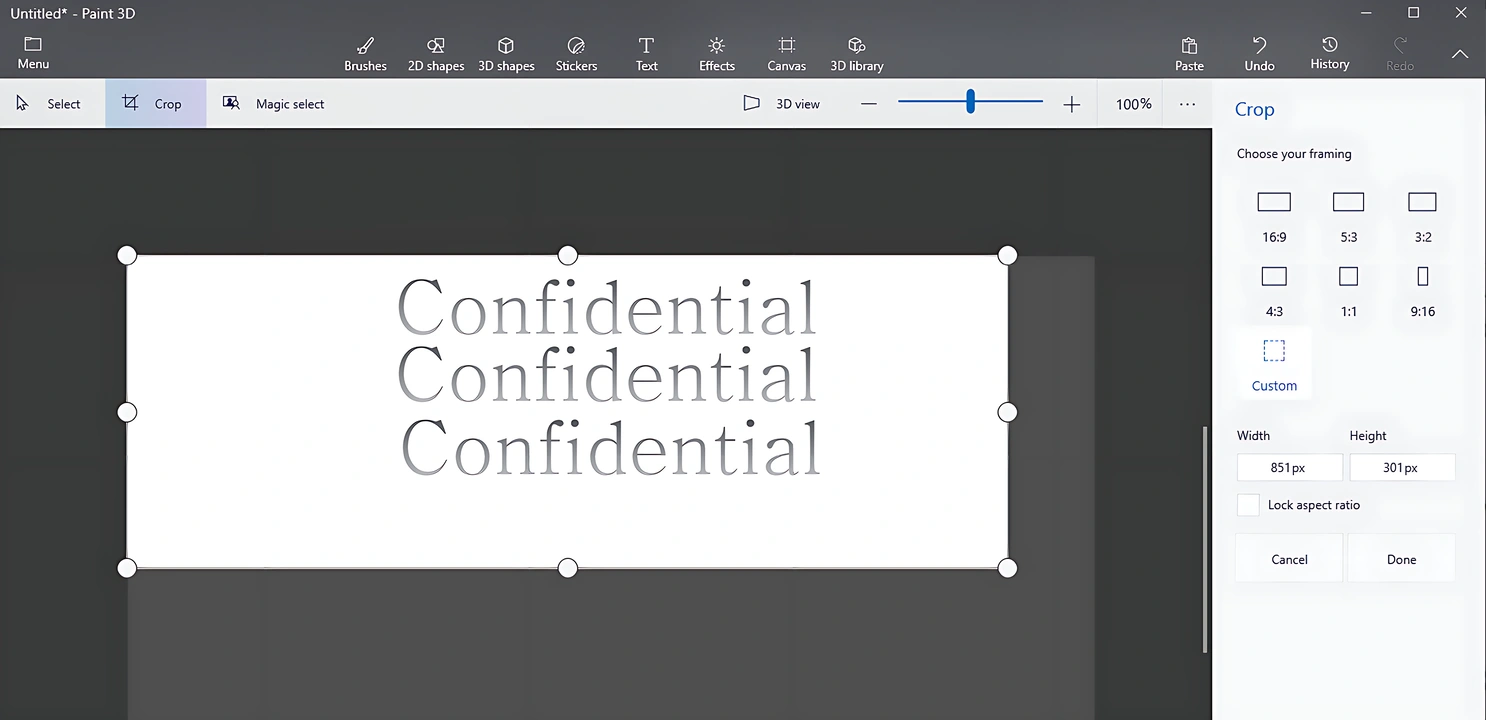 Please note that there are no automatic guideline, so it might take you a bit to align all the copies properly and even then the aligning might not be extremely precise.
 - Save your image by going to File > Save As or Menu > Save As. Keep in mind that your image should be either in PNG or JPEG.
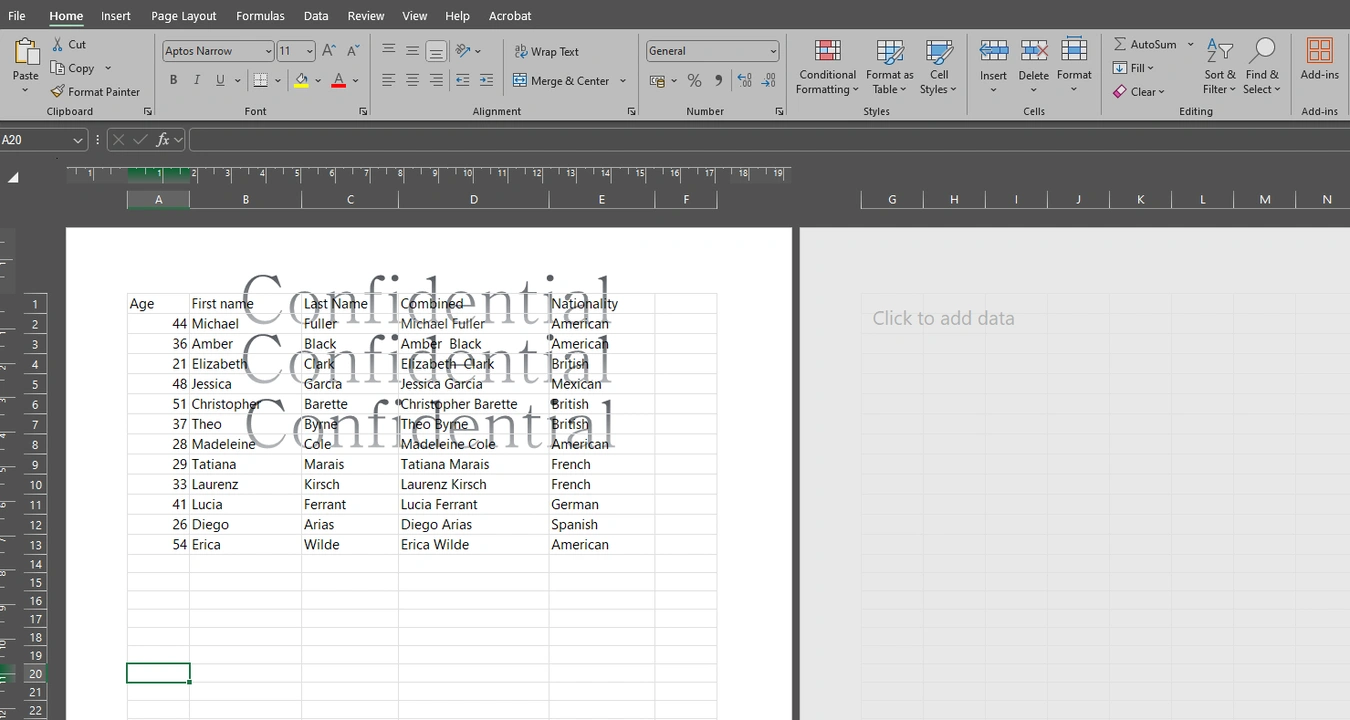
Now that you have the necessary image, you can insert your newly created watermark into your Excel worksheets using the Header & Footer method.
How to Add a Watermark in Excel using WordArt
There’s another way to create a textual watermark in Excel without going to the Header & Footer. It’s pretty similar to the previous method but you won’t have to switch to MS Paint.
Here’s what you need to do once you open your spreadsheet in Excel:
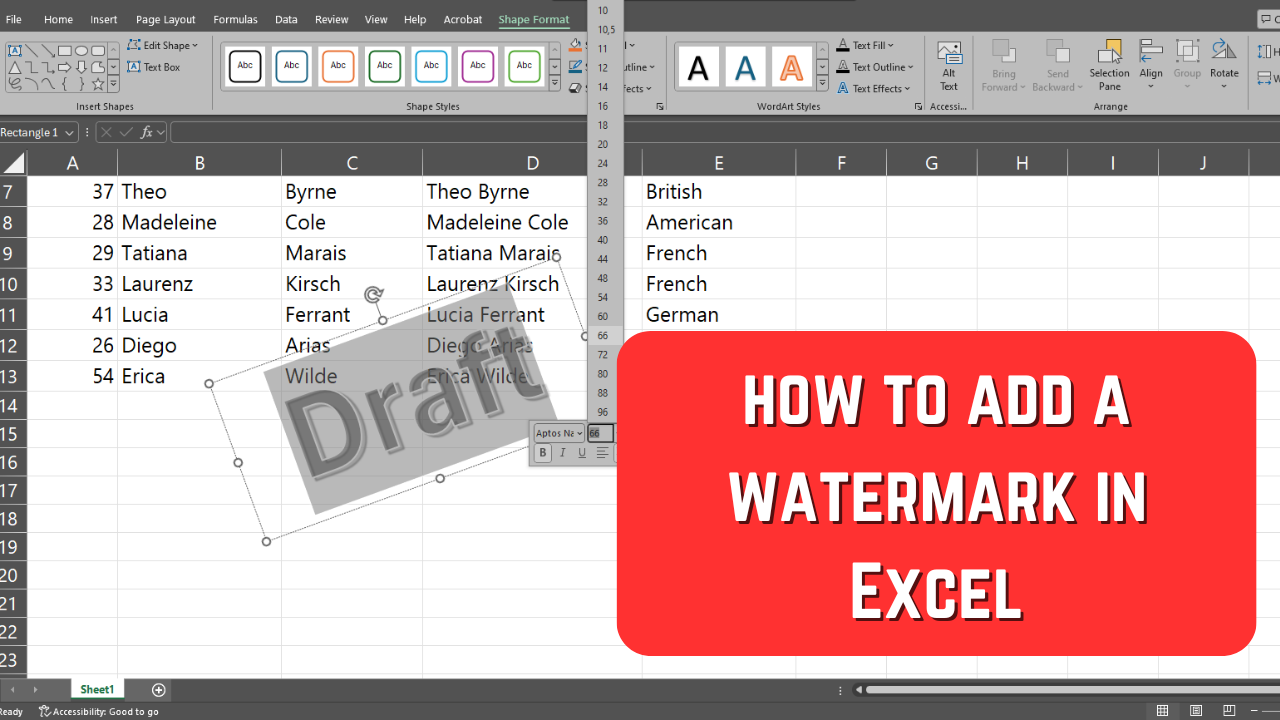
- In the ribbon go to Insert > WordArt, then select the style that you like. It might be better to go for something neutral and unobtrusive.
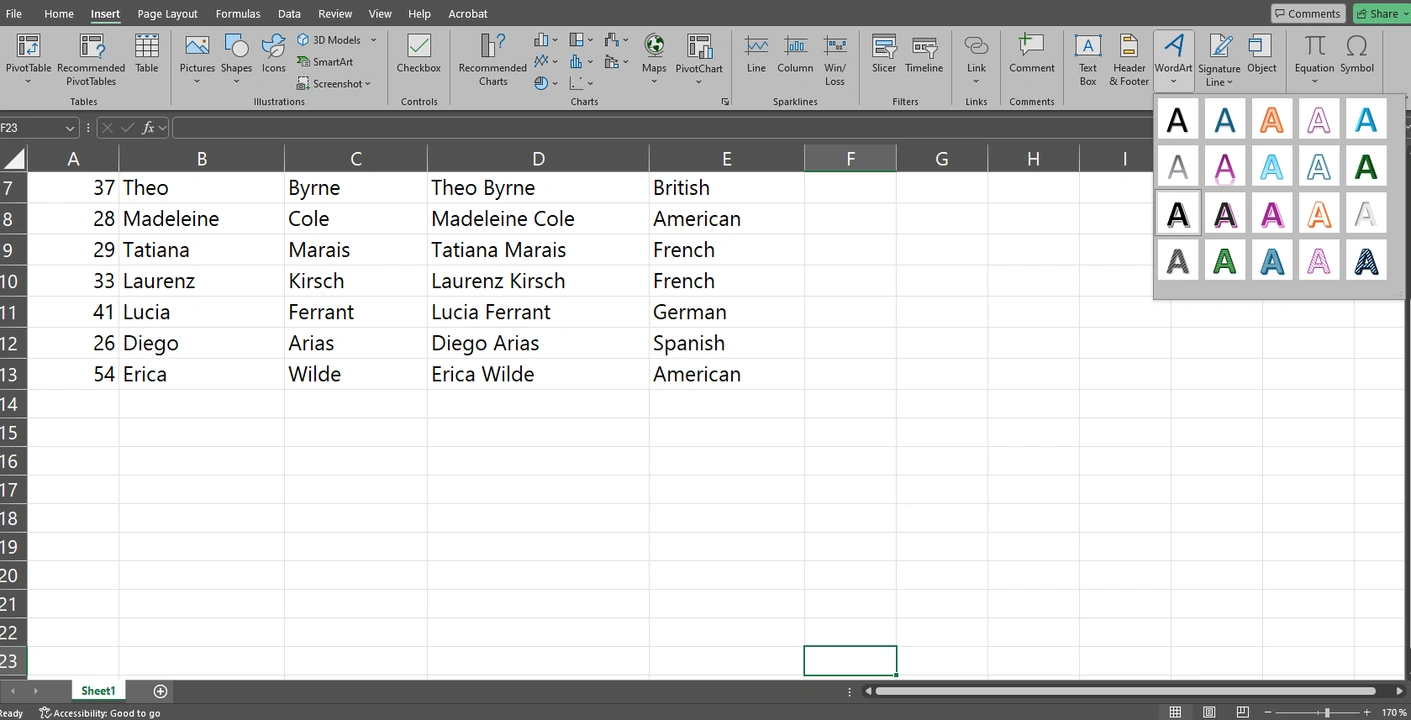
- You will see a new text box appear.

- Select and delete “Your Text here”, then enter your text. It can be your brand name, “Draft”, “Confidential” or whatever else you want.

- Right now, your text doesn’t really look like a watermark. Let’s change that. Right-click on your text and select Format Shape.

- You will see the Format Shape panel on the right. Go to the Text Options section, then adjust the Transparency slider under the Text Fill. The opacity of your text will change.
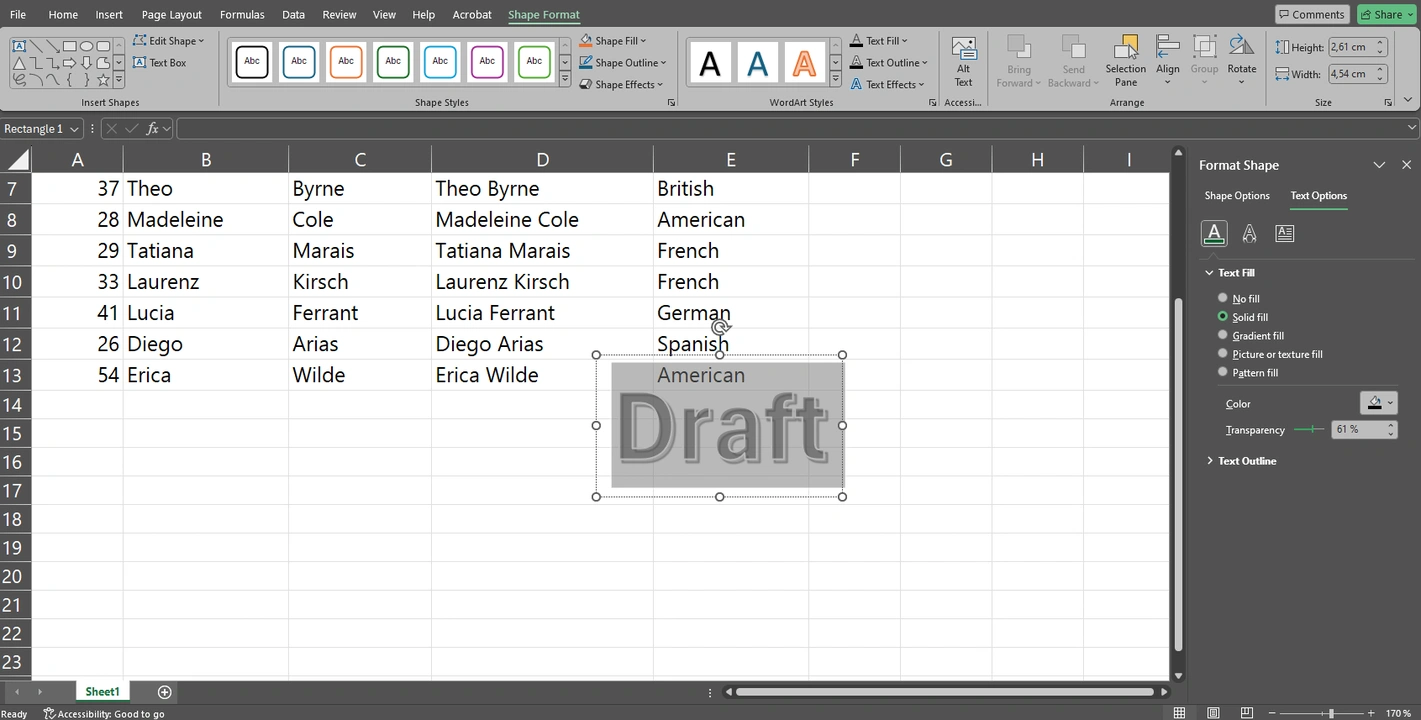
- If you want to edit your text a bit, select it with the cursor first. Then you can resize your text, pick a different color or font, etc. Click on the text box and drag it with the cursor if you want to reposition your watermark. Use the rotation handle at the top of the text box to change the angle of your text.
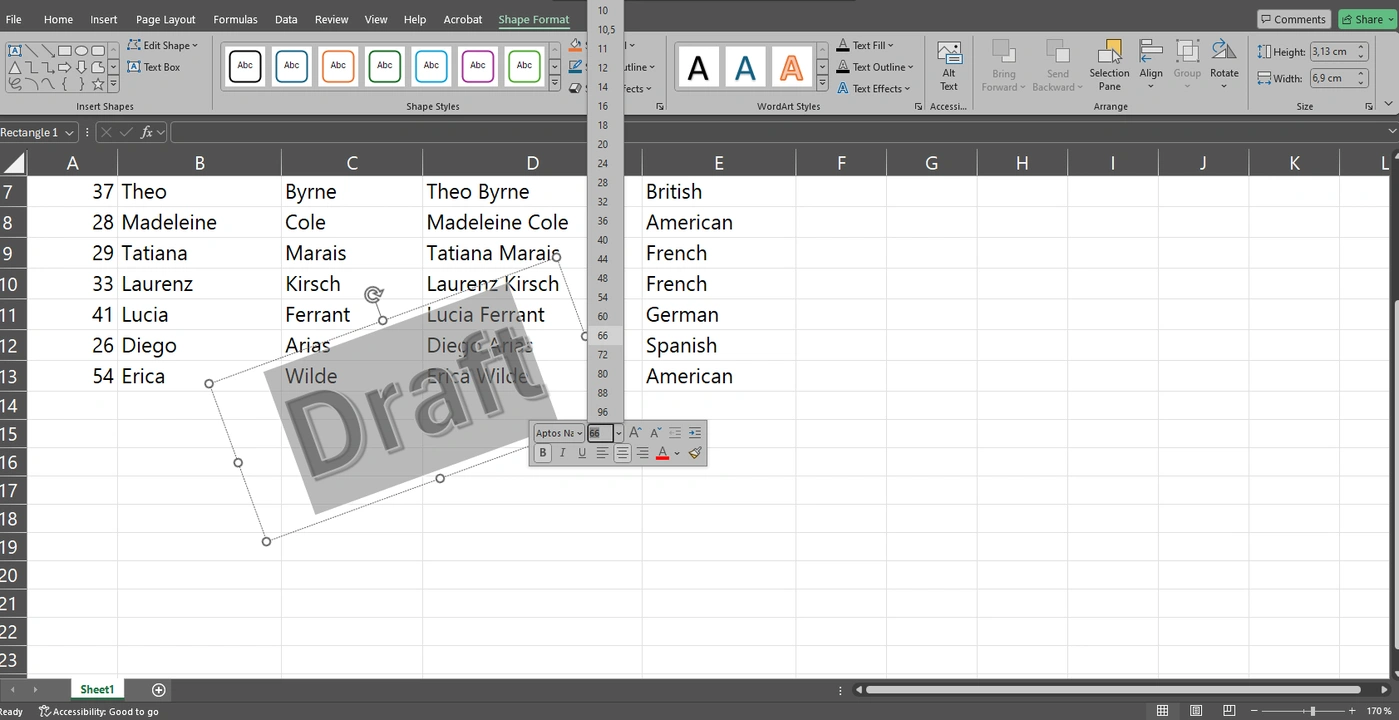
If you create a watermark in Excel using this method, it will be visible no matter what view mode you’re in. That’s because technically you simply added some text and placed it on top of your worksheet. As you might have guessed, this may lead to some of your content being obscured by your text unless you set a higher level of transparency.
Nevertheless, it’s a pretty quick and straightforward way to watermark your Excel spreadsheet.
How to Add Permanent Watermarks to Excel Spreadsheets
Similarly to Microsoft Word, there’s a downside to watermarks created in Excel. They are very easy to remove. All you need to do is go to the Header & Footer tab, then delete the &[Picture]code or text. And your image or textual watermark will be gone.
If you create a watermark using WordArt, then you will need to click on the text, then delete it. Since Excel spreadsheets are editable in most cases, whoever will get their hands on your file will be able to remove your watermark within just a couple of clicks.
Is it even possible for you to create permanent watermarks for your Excel spreadsheets?
Well, sort of.
To achieve this, you will need to convert your spreadsheets to PDF first. Yep, they won’t be in the editable Excel format anymore. You can convert your file by opening it in Excel, then going to File > Save as Adobe PDF.
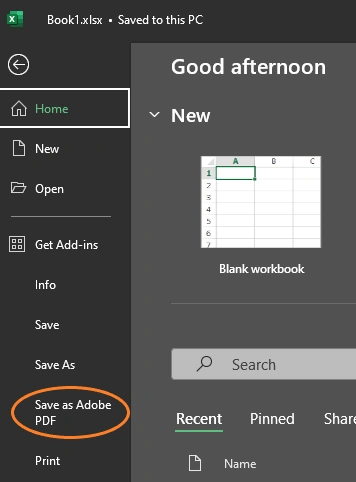
Don’t worry, your file will be automatically copied, then saved as a PDF. The original spreadsheet will still be in the Excel format.
Here’s what you’ll need to do next. Go to Visual Watermark’s website and select Watermark PDF in the Tools menu, then import your newly created PDF file into the app. Unfortunately, Visual Watermark’s online app doesn’t support the Excel Format. This is another reason why you need to convert your file to PDF.
When you get to the editing stage, pick whether you want to add a logo or text. You can also add both if you want to. Using the extensive toolkit, make the necessary adjustments to your watermark. Reposition it with the help of your cursor; you can position your watermark anywhere you want. Toggle the rotation slider to change the angle of your watermark. Additionally, you can utilize the Tile feature to fill your entire document with repeated watermarks. You don’t need to press Enter several times or save the rotated version of your image first. No need to align several copies of your text in MS Paint.
That’s not all! You will be able to see all the changes right away. No need to go back and forth.

By default, your watermark will be applied to every page of your PDF. But in the Preview & Adjust button, you can unselect some of the pages, and they won’t be watermarked.
What’s more, Visual Watermark has a batch-processing feature, which means that you can convert several Excel files to PDF, then import them into the app and add one and the same watermark to them. It will surely require less time than adding a watermark to each Excel file manually.
Finally, start the watermarking process and download a watermarked copy of your document.
As you can see, the whole process is much quicker and easier than watermarking in Excel. Plus, you will have a broader selection of editing options. Naturally, you might think that switching from the Excel format to PDF is a disadvantage. But this way, it will be much harder to remove your watermark.
Final Thoughts
It might be a bit tedious to add a watermark in Excel, but it’s not a super complicated or difficult task. Now you know how to do it in not just one but several different ways. Hopefully, the detailed instructions in this guide have helped you achieve the desired results.
And if you want your watermark to be difficult to remove, you can convert your Excel files to PDF and watermark them with Visual Watermark, an online app that works in a browser.
More Watermarking Tutorials
How to Add a Watermark in Word
How to Add a Watermark in Lightroom
 Visual Watermark
 by
by 