 by
by You see product photography everywhere and every day – on social media, popular marketplaces or various websites. It’s extremely popular. Nowadays, great product photos should be memorable and evocative. They need to catch customers’ eyes and make them stop scrolling. But that’s not all. If good food photography is supposed to make people hungry, good product photography has to evoke the desire to click the “Buy” button.
The competition in this genre of photography is quite high. If you want to be a successful product photographer with a lot of clients, you need to stand out and offer something special. One of the ways to achieve this is to develop your own style. This way, potential clients will know exactly what kind of product images they will get from you. If you’re still looking for your style, though, don’t worry.
Right now you simply need to get a little creative and think outside the box. In this article you will find several product photography ideas that will undoubtedly spark your inspiration and nudge you in the right direction. They are quite simple and not that hard to turn into a reality, yet they can surely make your portfolio more outstanding and a true magnet for clients.
Let’s dive in!
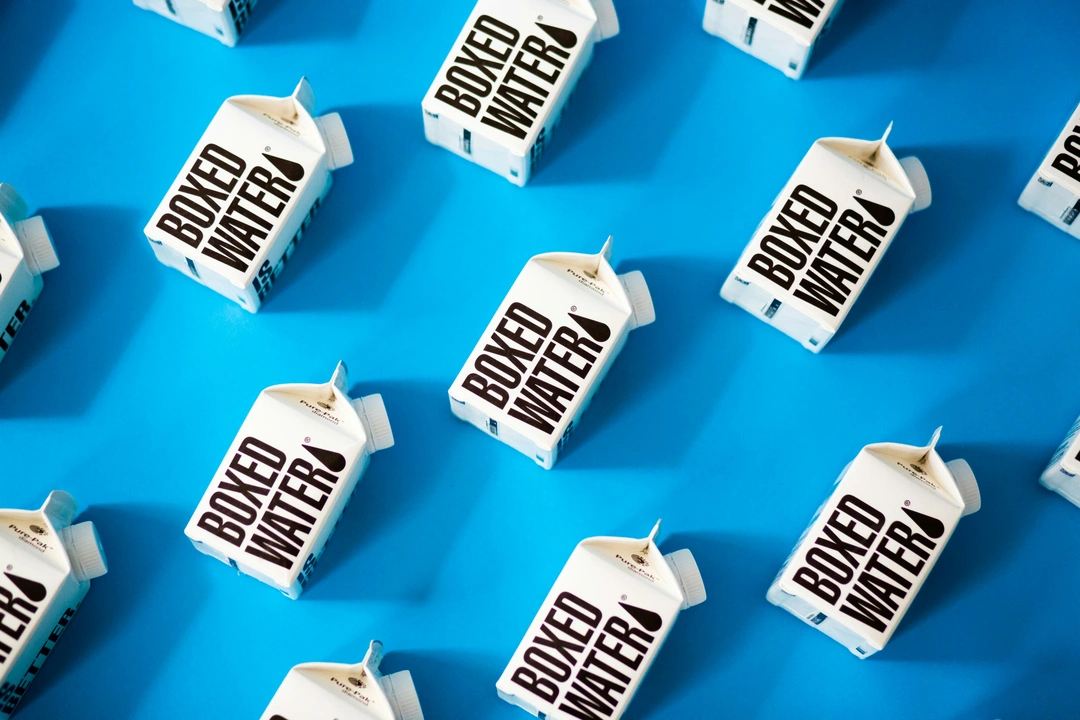
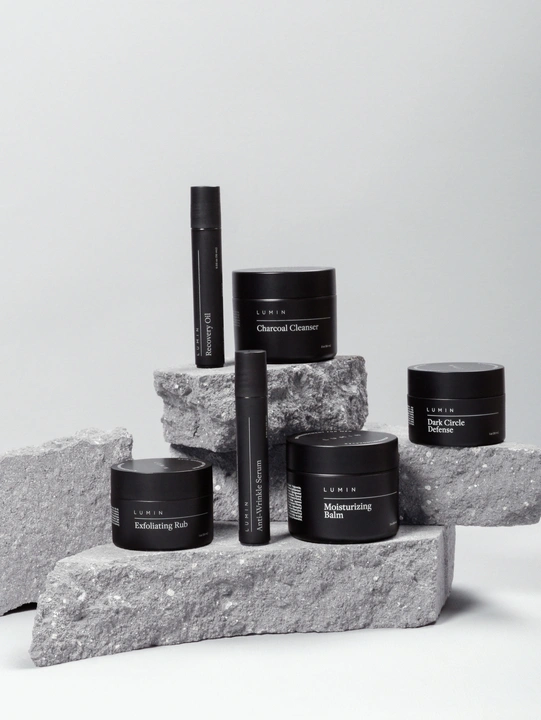
1. Turn Products into a Pattern
This is how you can produce some fun and punchy product images that will surely get people’s attention. The idea here is pretty simple. You need to create a repeated pattern with one or several products. It’s very pleasing to the eye because it creates a harmonious rhythm in your image.
And another benefit of this product photography idea is that it’s quite easy to set up and you won’t have to use lots of props, if any. This works best with a flatlay or a photo taken at a 45-degree angle.
If you have some image editing skills, you can easily take a picture of a single product or maybe two products, then make as many copies of them as you want in Photoshop. It might actually be a good idea to do so, since you will be able to place copies of your products equidistantly with greater accuracy and precision.
2. Add Text
Let’s say that you don’t have a big selection of props yet or, maybe, you want to add something extra to your images. Here’s what you can do. You can add text to your photos. This is how you can draw attention, inspire people or convey some key information about the product.
This idea will be amazing for minimalistic photos that have little to no props. Adding text to photos is pretty quick and there’s plenty of room for creativity – you can experiment with fonts, shapes, placement, overall style of the text. Talk to your client to make sure that the text will say exactly what they want and that they are okay with this idea in general.

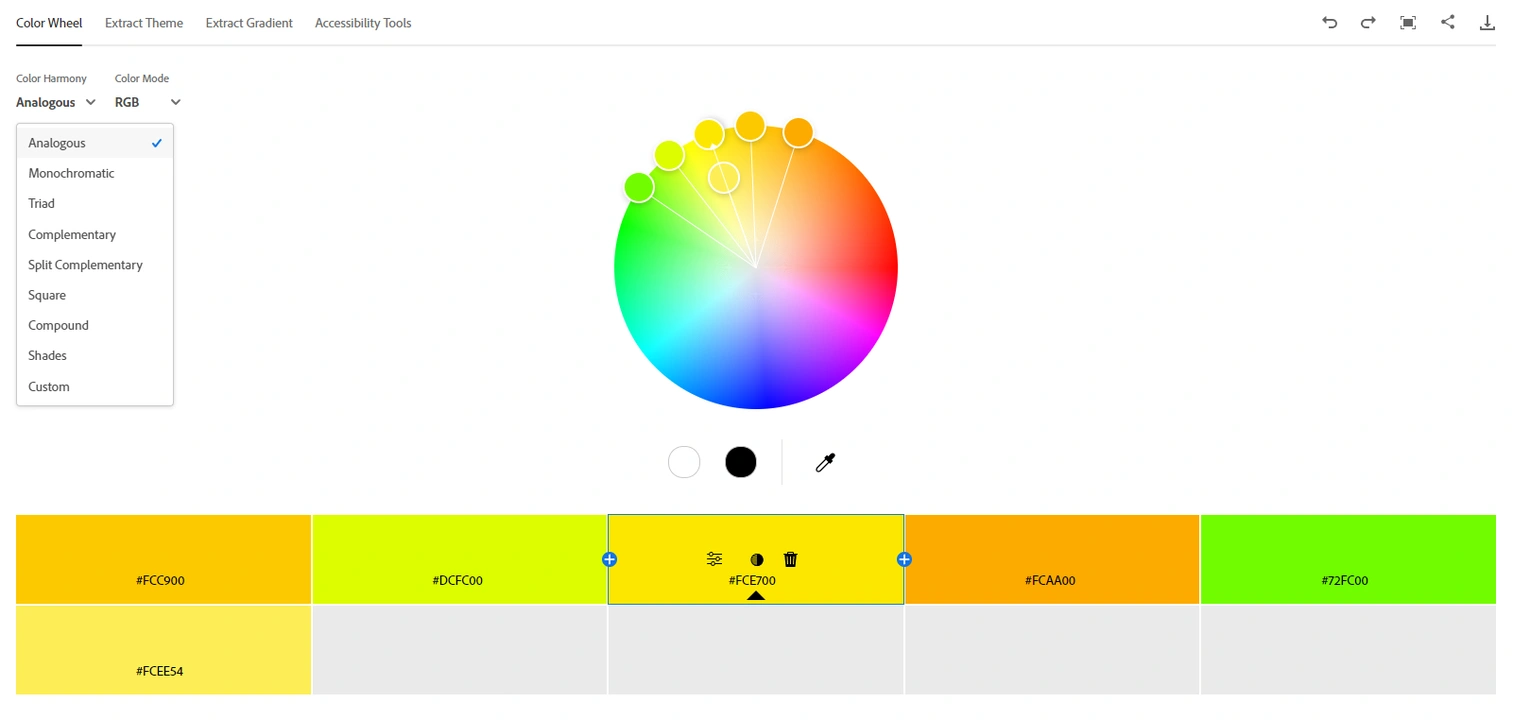
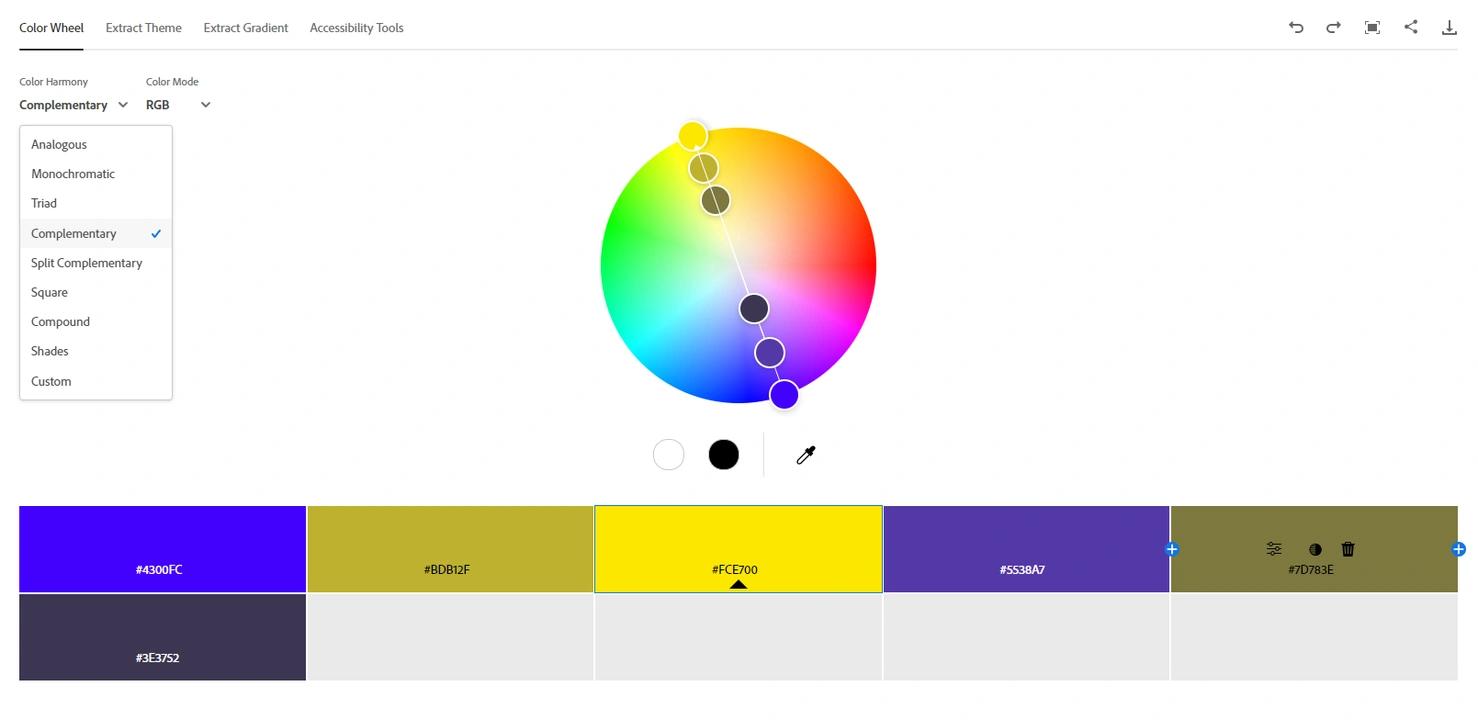
3. Utilize the Magic of Color
Color is an incredibly effective way of getting people’s attention. But you need to be careful with it and use it wisely. In most cases, people tend to use analogous, monochromatic or complimentary color schemes. What can help you out here greatly is Adobe’s Color Wheel. Here are two examples of color schemes:
Analogous
Complimentary
Please note that if the product that you’re shooting has a neutral-colored packaging, say, dark brown or grey, adding a bright-colored element into your scene might be distracting.
Remember all the colors in the frame should lead the attention to the product. For instance, if the packaging is black and white with a tiny splash of yellow, what you can do is to use yellow for the background or throw in some yellow props. Also, keep in mind that you can change the hue and the saturation of the colors in your photos in Lightroom. For instance, make them cooler or warmer, darker or lighter.
Here’s a tip
If you are working with lighting equipment, you might consider making use of colored gels. You can attach them to your continuous or strobe light. Keep in mind that this won’t be suitable for all products, though. For instance, if you’re shooting earrings, it might be better to illuminate them with a neutral white light, then add a splash of colored light in the background.
4. Try Different Angles
Don’t be afraid to try as many angles as you can. The Dutch angle can make your photos more eye-catchy by adding a sense of movement. Also, you can get closer to the product if you have a macro lens. You can put a soda can on a small pedestal and shoot it from below. Get into the creative flow and experiment! Whatever ideas come to your mind, try them. Even if you think a photo from a certain angle might look weird, it’s still better to take it. Afterall, you’re only limited by the amount of free space on your SD card.
Please note that you probably will need to take your camera off the tripod for this. And in some cases, it might be a bit tricky. Product photos usually need to be shot at f/8 – this way, the entire product will be in focus. But there shouldn’t be any shakiness, either. So, when shooting handheld, make sure that your shutter speed is around 1/200 or 1/250 and fill your scene with as much light as you can.

5. Play Around with Different Layers
Your goal is to layer elements of various sizes, textures and shapes in your scene to create a visually-appealing and dynamic photo. You can use geometric foam shapes and put one product on the top of the shape and the other one at the bottom. If you are shooting a flatlay, use a smooth background, then throw in a prop with rough texture.
Introduce a diagonal line. When people scroll through social media, they scroll down along the vertical, while the text they skim through is horizontal. By introducing a diagonal line that runs across the screen, you will break the pattern. This will make people stop and look for a second or two.
If you are a beginner, though, please, be careful with this product photography idea. When layering props and textures, it’s really easy to go overboard and make the scene too busy. It will be unclear what the main subject is. And that’s not what you want.
Try to stick to simpler compositions until you train your eye and gain more experience in styling. Alternatively, you can collaborate with a stylist, who has some experience in creating harmonious scenes that have lots of props and layers without looking too busy.
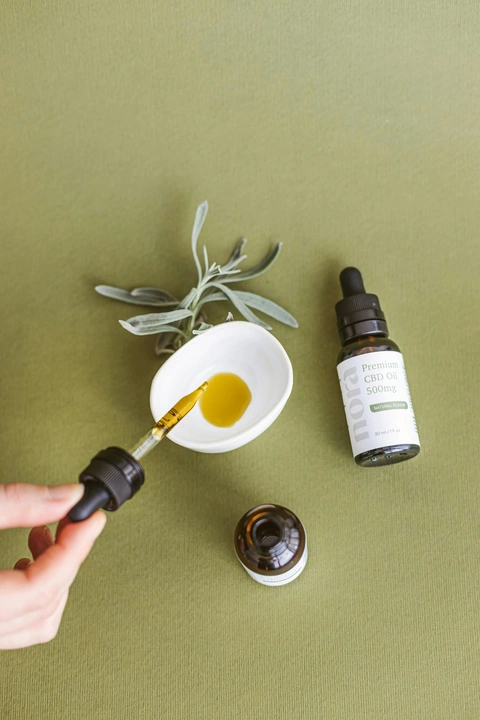
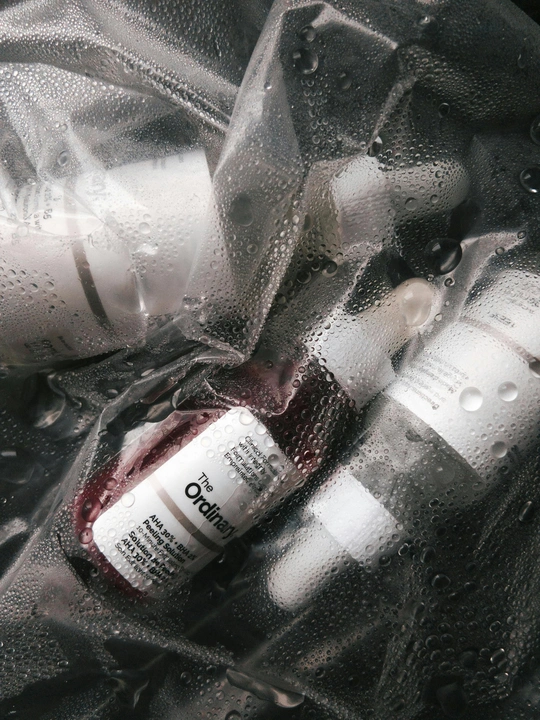
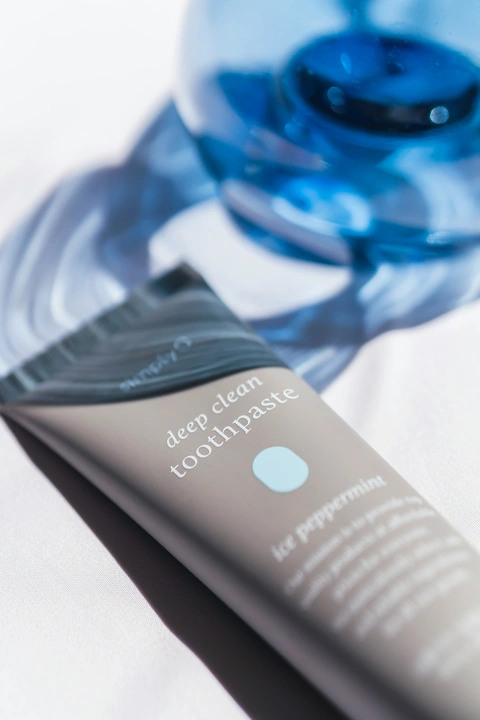
6. Add Some Water
Water can be quite versatile. You can grab a giant transparent bin and fill it with some water. Since it’s a transparent bin you might want to place it on a white surface so that the background is monochrome and unobtrusive. Put the product into the water. For instance, a tube of foam cleanser.
You can tint the water with some color or add some foam and leaves. It’s good to take inspiration from the product. For instance, if the packaging is pink and the cleanser contains some rose extract, you can add some pink rose petals or even small pink roses. When working with water, you might want to get an assistant to help you. While you’re shooting, the assistant can slightly move the bin around to create some waves and splashes.
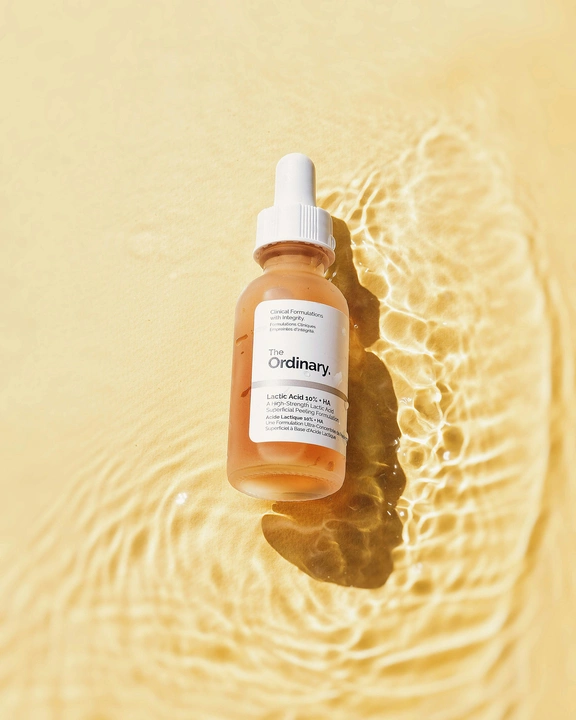
Adding water drops can really convey that the product is refreshing and cool. Think of taking a soda can out of a fridge on a hot summer day – you will see condensation form on it pretty quickly. This is exactly what you want to emulate in your product photography.
Water drops look great on skincare products, too.
Here’s a tip
Mix water with some glycerin in a spray bottle. This way water drops will stick to the product much better, and you won’t have to keep reapplying water all the time.
Another great way to use water is to create some shadows. Say, you’re shooting a product outside on a sunny day. You can fill a small transparent bin with some water, then ask your assistant to hold this bin over your scene. This will create shadows and make it look like your product is underwater.
7. Make Use of Moody Shadows
Speaking of shadows! This next product photography idea is pretty simple yet can make a world of a difference. Shadows add not only some visual appeal to your images, but also create a certain vibe and atmosphere.
For instance, when taking photos of a sunscreen tube, it might be a good idea to create shadows using a palm tree leaf. Combined with a sandy color scheme, this will make customers think of spending time at the beach.
What’s great about shadows is that you can create them with lots of different objects and props – plants, glassware, gobo masks, etc. You can even make great use of some colored glass as it will not only add a shadow but also a splash of color.
8. Throw in Some Action
You can pour some water on a soda can or pour soda into a glass, drop the product into the water. You can ask your model to put on the lipstick that you need to take photos of. You can add action into your photos in a variety of different ways.
What’s great about action product photography is that it can be very dynamic and emotion-evoking. For instance, when a person sees a photo of beer being poured into a glass, they immediately think of the fizzing sound and the bitter taste of beer in their mouth.
To capture action properly and without any shakiness, you’ll need a rather fast shutter speed, lots of light and a tripod to keep your camera stable. Also, the key to getting good action shoots is to use the burst mode which means taking multiple shots in a row. This way, you will get at least a couple images that are usable. The classic lighting set up for action product photos is 45 degrees up and 45 degrees to the side of the product. It will provide enough light, but at the same time create some depth in the photo thanks to the shadows.

9. Lifestyle Product Photos
Do you want potential customers to visualize using a product? There’s no better way to do this than lifestyle photos! Think of how a product tends to be used in life and create your scene, which can be indoors or outdoors.
For instance, you should photograph workout clothes on a model while he or she is doing yoga or some other sport. What’s great about lifestyle photos is that they can not only tell a story but also invite customers into this story. They can make them want to be a part of it.
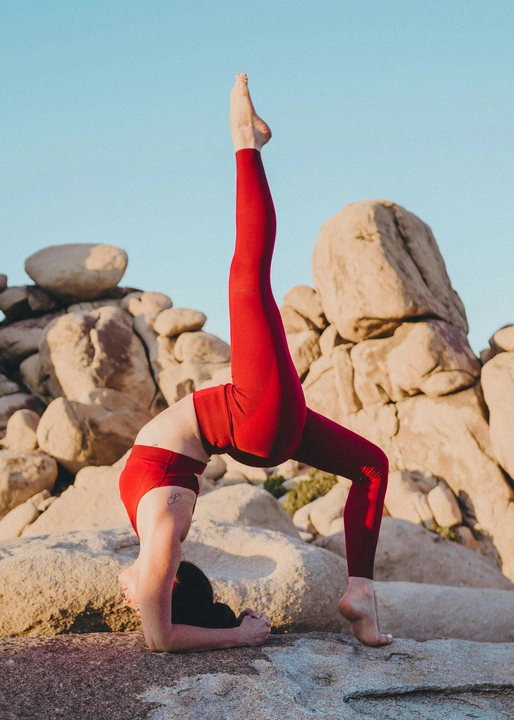
Don’t worry, not all products will require hiring a model; if you have a tripod, that is. Say, you need to take photos of someone holding a can of cold coffee. Well, you can actually be your own model! Now, incorporating self-portrait photography into your product photos might be a bit complicated and intimidating for beginners…but it’s not as challenging as you may think.
You’ll need to put your camera on a tripod and set a timer. A more convenient way to do this would be to use a remote control or a special app if your camera has wi-fi. That’s it!
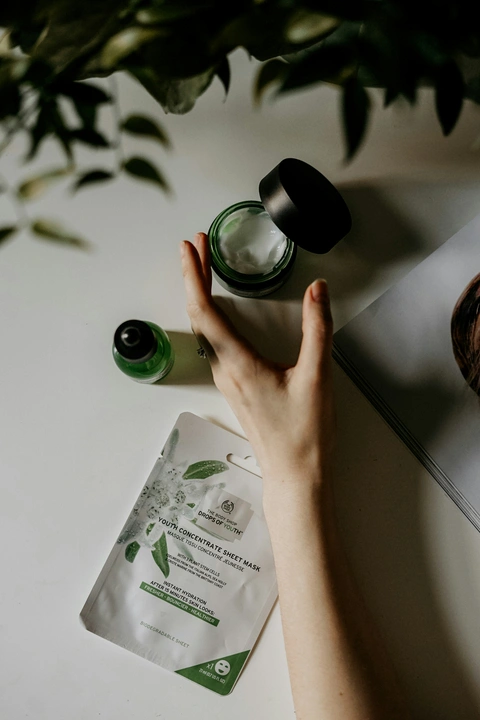
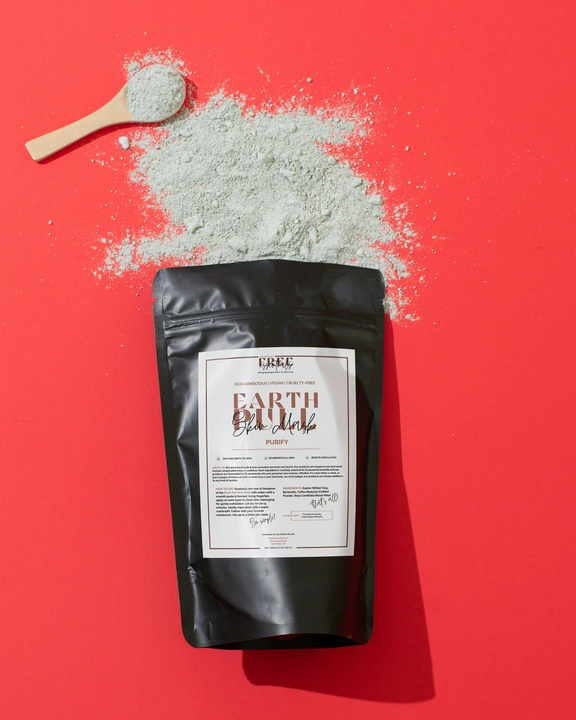
10. Show What’s Inside
It’s always a good idea to show the product itself, not just its package. You can unwrap the product half-way or take a part of a product from its package.
For instance, if it’s a box of cornflakes, pour them onto the surface. If it’s a skin cleanser, squeeze it out of the tube and show its texture. Also, keep in mind that people usually want to see some swatches especially if you’re photographing lipstick, eyeshadows or some other beauty product. Your photos need to give a sense of a product’s texture, show what it will feel and look on human skin.
Pro Tip : Keep Experimenting
There’s one thing that’s vital to getting stunning product photos – and that’s experimenting! Experiment with different color combinations, different camera angles, positioning of a product and props. Experiment with soft and harsh light as well as the positioning of the light. Try adding different props or removing them from your scene completely.
If you don’t like the way a scene you’ve set looks, don’t give up on it right away – instead, try to change up the props or the background, rearrange them. Alternatively, you can try to shoot the product in a completely different setting.
By experimenting you can actually discover something unique and beautiful.

Optimize Your Product Photos for Web
Now that you’ve got some product photography ideas, let’s talk about something important. First of all, you need to protect your portfolio that you’ve been working so hard for. You probably have a website and promote your photography on social media, right? Unfortunately, some small businesses cut costs by stealing product photos from others. To put it simply, it’s possible for you to come across some Chinese online store using your product photos without your permission or paying you a cent. To avoid this and make sure that people pay you for your work, you should use add a watermark to the product photos that you publish online.
On top of that, watermarks can be great for promoting your brand and achieving top-of-mind awareness. So, the next time potential clients need a product photographer, they will be more likely to turn to you since your brand will be the first one they will think of. Please note that to increase brand awareness, it’s better to add a brand logo to your photos.
Fortunately, with our batch watermarking app this whole process will be super quick and effortless. And our detailed instructions will make the whole process even easier. You can add a logo or a text, then apply it to dozens and even hundreds of photos at a time.
You will also need to optimize your product photos for web. High-resolution images usually have a large file size. Thus, they will take an eternity to load when someone visits your website. You want to avoid this at all costs and compress your images before publishing them online. This will decrease their file size dramatically without a significant loss of quality.
Social media platforms and popular marketplaces have size requirements for images, and most of your clients won’t be aware of them. So, when you send them high-resolution images, they might publish them online just like that without optimizing them first.
As a result, it might have a negative effect on the load speed of their websites and the images will look blurry and unclear on their social media accounts. To help your clients out, you might want to do this work for them. Naturally, you can charge some extra for this! You can send them a batch of original images as well as a batch of web-optimized images.
You can find an array of online tools on Visual Watermark’s website that you can use for some basic image editing. Your photos can have the necessary aspect ratio and pixel dimensions to meet the size requirements of popular social media platforms – you just need to crop them in our online image cropper. You can also use our Image Resizer to change the image size without cropping.
Finally, it’s possible to bring product photography ideas to life with the help of a smartphone camera. If that’s what you’re using, what you also need to make sure is that your photos are in the correct format. For instance, your product photos might be in the HEIC format if you took them with your iPhone. Instagram and other popular social media platforms don’t support this format. JPEG is commonly used on the Internet. Thus, you’ll need to convert their format to JPEG before publishing your photos online.
Conclusion
What’s great about product photography is that you can build an amazing portfolio in the comfort of your own home. You can spend lots of time experimenting with different backgrounds and props, rearranging the products, trying out different compositions and angles.
Hopefully, this article has given you some creative product photography ideas and got you inspired. Do some brainstorming, think what your photos should communicate to people and get to work! And when you’re done, remember to optimize your product images for the web.
Photo Editing Tutorials
How To Watermark Instagram Photos
How To Watermark Photos on Android